
Tree Care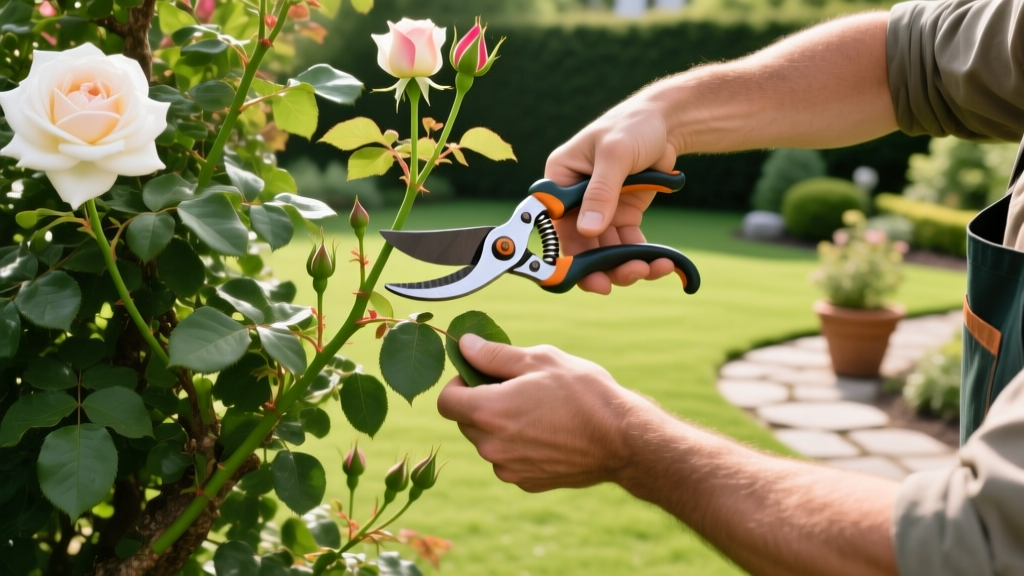
How to Trim a Rose Bush: Diagnosing and Fixing Overgrowth
The Hidden Costs of an Unpruned Rose Bush
An unpruned rose bush rapidly devolves into a tangled thicket that chokes its own blooms and invites devastating fungal pathogens. When you neglect seasonal trimming, the interior canopy drops below 40% relative humidity thresholds, creating a microclimate where Diplocarpon rosae (black spot) and Podosphaera pannosa (powdery mildew) thrive. Furthermore, the plant wastes critical carbohydrates on “blind shoots”—stems that produce foliage but lack the apical meristem tissue required to form a flower bud.
Learning how to trim a rose bush is not merely about aesthetics; it is a triage process. By diagnosing specific structural and biological failures in your shrub, you can apply targeted pruning solutions that restore vigor, maximize bloom production, and extend the lifespan of the rootstock. Below is a comprehensive diagnostic framework for identifying rose bush problems and executing the precise cuts required to fix them.
Rose Bush Diagnostic Matrix: Symptom to Solution
Before making a single cut, evaluate your shrub against this diagnostic matrix. Identifying the primary stressor dictates your pruning strategy.
| Visual Symptom | Underlying Diagnosis | Biological Cause | Targeted Trimming Solution |
|---|---|---|---|
| Yellowing leaves with black spots dropping early | Black Spot Fungus | Poor airflow trapping moisture in the inner canopy | Remove all inward-growing canes; thin center density by 30% |
| Hollowed-out canes with fine sawdust at the base | Rose Stem Borers | Wasps or beetles laying eggs in exposed pith tissue | Cut below the hollow section; seal the fresh cut immediately |
| Lush, dark green foliage but zero flower buds | Blind Shoots / Nutrient Imbalance | Loss of apical dominance or excessive nitrogen application | Prune blind shoots back to the first 5-leaflet leaf node |
| Vigorous, thorny canes emerging from the soil base | Rootstock Suckers | Dormant buds on the Rosa multiflora rootstock activating | Tear (do not snip) the sucker off flush with the root crown |
Essential Tools for Precision Rose Triage
Using the wrong tool crushes the vascular cambium layer, leading to dieback that can extend 3 to 4 inches down the cane. Equip yourself with professional-grade gear to ensure clean, surgical cuts.
- Bypass Pruners (The Workhorse): Invest in the Felco F-2 Classic ($65–$75) or the ARS HP-VS8Z ($70). These feature high-carbon steel blades that hold an edge through hundreds of thorny cuts. Avoid anvil pruners entirely; they crush rose canes.
- Long-Handled Loppers: For canes exceeding 3/4-inch in diameter, use the Corona ComfortGEL Bypass Lopper ($45) to reach deep into the shrub’s center without tearing your forearms on thorns.
- Pruning Sealer: While modern arboriculture largely discourages sealers for standard tree wounds, roses are highly susceptible to cane borers. Keep a tube of Sterling International Tree Trunk Sealer ($12) or standard Elmer’s Carpenter’s Wood Glue on hand to seal cuts larger than a pencil’s diameter.
- Heavy-Duty Gloves: Goatskin leather gloves with gauntlets (e.g., Ironclad General Utility, $25) provide the dexterity needed to grip thin canes while protecting against needle-sharp stipules.
Step-by-Step Triage: How to Trim a Rose Bush
Timing is critical. According to Penn State Extension, the optimal window for major structural pruning is late winter or early spring, precisely when the leaf buds begin to swell but before they unfurl. A reliable phenological indicator is the blooming of forsythia bushes in your region.
Step 1: Execute the "3 Ds" and the Pencil Rule
Begin by removing all Dead, Damaged, and Diseased wood. Cut diseased canes back to healthy, white pith tissue—if the center of the cane is brown or black, keep cutting lower until the pith is creamy white. Next, apply the “pencil rule.” Any cane thinner than a standard #2 pencil (approximately 6mm in diameter) lacks the structural integrity to support a heavy bloom and will only drain the plant’s energy reserves. Snip these weak canes flush with the main branch.
Step 2: Open the Vase (Center Clearance)
Rose bushes require a “vase shape” to maximize solar penetration and air circulation. Identify any canes growing inward toward the center of the shrub and remove them completely at their point of origin. If two canes are crossing and rubbing against each other, remove the weaker of the two or the one growing at the most awkward angle. Your goal is to create an open center that allows sunlight to reach the lower bud unions.
Step 3: Eradicate Rootstock Suckers
Most grafted roses feature a swollen knob at the base called the graft union. Canes emerging from below this knob are suckers from the hardy rootstock (often Rosa multiflora or Rosa fortuniana). Do not just snip these off at soil level. Snipping leaves the dormant bud intact, prompting the rootstock to send up two more suckers in its place. Instead, use your gloved hands to firmly grasp the sucker at its base and pull downward with a tearing motion to strip the bud eye completely from the root crown.
Warning: The Graft Union Vulnerability
When clearing soil to locate suckers, be careful not to damage the graft union. In USDA Hardiness Zones 5 and below, the graft union must remain buried under 2-3 inches of soil or mulch during winter to prevent freeze-kill. Expose it only temporarily for sucker removal and early spring inspection.
When clearing soil to locate suckers, be careful not to damage the graft union. In USDA Hardiness Zones 5 and below, the graft union must remain buried under 2-3 inches of soil or mulch during winter to prevent freeze-kill. Expose it only temporarily for sucker removal and early spring inspection.
Step 4: The Final Heading Cuts
For the remaining healthy canes, make your final cuts approximately 1/4-inch above an outward-facing bud eye. The angle of the cut must be exactly 45 degrees, sloping away from the bud. This geometry ensures that rainwater and irrigation runoff flow away from the vulnerable bud tissue, preventing rot. According to Texas A&M AgriLife Extension, cutting too high leaves a dead stub that invites disease, while cutting too close damages the bud itself.
Post-Pruning Recovery and Disease Prevention
Once the structural trimming is complete, your rose bush is in a state of recovery. Immediate post-pruning care dictates the vigor of the spring flush.
- Sanitation Protocol: Rake up every clipped cane, leaf, and thorn from the mulch bed. Fungal spores overwinter in this debris. Dispose of it in municipal green waste bins; never compost diseased rose material, as home compost piles rarely reach the 140°F required to kill Diplocarpon rosae spores.
- Dormant Spray Application: If your bush suffered from severe black spot or scale insects the previous year, apply a dormant spray of lime sulfur or a copper-based fungicide (like Bonide Liquid Copper Fungicide, $14) immediately after pruning. This eradicates overwintering spores on the bare canes.
- Fertilizer Activation: Wait until the new pruned canes push 4 to 6 inches of fresh growth before applying fertilizer. Use a granular rose-specific formula with an NPK ratio of 18-24-12, applying 1/2 cup per plant in a ring 6 inches away from the main trunk. Water it in thoroughly to activate the nutrient release.
"The difference between a mediocre rose garden and an exceptional one is rarely the variety of the rose itself, but the ruthless precision of the pruner's shears. Do not be afraid to cut away 50% of the shrub's volume; roses are remarkably resilient and reward aggressive structural correction with explosive blooms."
By shifting your perspective from simple “hedge trimming” to biological problem-solving, you transform how to trim a rose bush from a chore into a strategic horticultural practice. Diagnose the specific failure modes of your shrub, use precision bypass tools, and execute angled cuts that protect the vascular system. Your roses will respond with a robust, disease-free canopy and heavy, continuous blooms throughout the growing season.

