
Tree Care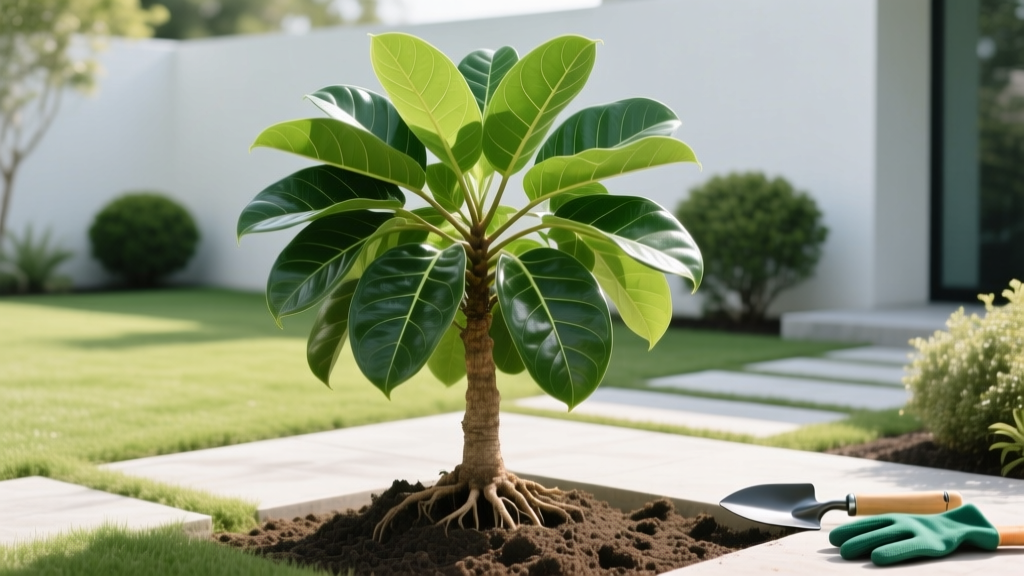
Money Tree Growing Guide: Planting, Soil & Establishment Tips
The Pachira aquatica, universally recognized as the money tree, is a resilient wetland native to Central and South America that has become a staple in modern indoor horticulture. However, the transition from a nursery environment to a permanent indoor or outdoor location triggers a critical 90-day establishment window. This money tree growing guide bypasses generic care tips to focus strictly on the botanical mechanics of planting, soil architecture, and root acclimation required to prevent transplant shock and fatal root rot.
Pre-Planting Preparation: Pot Selection and Root Inspection
Before introducing new soil, you must address the container and the existing root ball. Money trees are highly susceptible to Phytophthora root rot, a water-mold pathogen that thrives in hypoxic (low-oxygen) soil environments. The container you choose dictates the gas exchange rate at the root zone.
Warning: The Braided Trunk Vulnerability
Most commercial money trees feature braided trunks. If the braiding is bound tightly with wire or rubber bands at the soil line or canopy, remove these immediately. As the trunk expands during establishment, restricted bindings will girdle the vascular cambium, choking off nutrient transport and killing the tree above the bind point.
Most commercial money trees feature braided trunks. If the braiding is bound tightly with wire or rubber bands at the soil line or canopy, remove these immediately. As the trunk expands during establishment, restricted bindings will girdle the vascular cambium, choking off nutrient transport and killing the tree above the bind point.
Sizing and Material Specifications
- Diameter: Select a pot that is exactly 2 inches wider than the current nursery root ball. Oversizing the pot retains excess moisture in the outer soil ring, leading to anaerobic decay.
- Material: Unglazed terracotta or porous ceramic is mandatory for beginners. These materials allow lateral moisture evaporation. If using glazed ceramic or plastic, you must compensate with a highly porous soil matrix (detailed below).
- Drainage: A minimum of one 1/2-inch drainage hole is non-negotiable. Never plant directly into a cache pot without a removable nursery insert.
The Ideal Soil Matrix for Pachira aquatica
Standard commercial potting soils retain too much water for Pachira aquatica. To optimize the soil-air-water ratio, you must engineer a custom blend that mimics the well-aerated, nutrient-rich margins of its native swamp habitats. According to horticultural profiles from the Royal Horticultural Society, sharp drainage is the primary requirement for this species.
| Component | Ratio | Specific Grade/Type | Botanical Purpose |
|---|---|---|---|
| Premium Potting Base | 40% | Peat-free or standard indoor mix (e.g., FoxFarm Ocean Forest) | Provides baseline cation exchange capacity (CEC) and moisture retention. |
| Orchid Bark | 30% | Fir bark, 1/2-inch to 1-inch chunks | Creates macro-pores for rapid water throughput and root anchorage. |
| Coarse Pumice | 20% | 1/4-inch to 3/8-inch horticultural pumice | Prevents soil compaction over time and maintains permanent aeration. |
| Horticultural Charcoal | 10% | Activated or standard lump charcoal (crushed) | Buffers soil pH, absorbs impurities, and inhibits fungal pathogens. |
Step-by-Step Planting and Root Establishment Protocol
Execute the planting process during the active growing season (spring or early summer) to leverage the plant's natural metabolic surge. Avoid repainting in late fall or winter when the tree is semi-dormant.
- Root Ball Teasing: Gently remove the tree from its nursery pot. Using sterilized bypass pruners, snip away any circling roots at the bottom third of the root ball. Remove any black, mushy, or foul-smelling roots immediately.
- Base Layering: Add a 1-inch layer of your custom soil matrix to the bottom of the new pot. Do not add a layer of gravel or rocks at the bottom; this creates a perched water table that raises the saturation level closer to the roots.
- Positioning: Place the tree in the center. Ensure the root flare (where the trunk widens at the base) sits exactly 1 inch below the pot's rim. Burying the trunk flare invites basal stem rot.
- Backfilling: Add the soil mix around the sides, tapping the pot firmly against the floor every few inches to settle the soil and eliminate large air pockets. Do not compress the soil with your hands.
- The Establishment Watering: Water slowly with room-temperature water until 20% of the volume exits the drainage holes. This initial soak collapses remaining air pockets and establishes soil-to-root contact.
Acclimation: Light, Humidity, and the First 30 Days
The first month post-planting is purely about environmental stabilization. The tree will likely halt top-growth as it focuses energy on expanding its root network into the new soil matrix.
Environmental Target Metrics (Days 1-30)
- Light Intensity: 10,000 to 20,000 lux (bright, indirect light). Use a digital lux meter app to verify. Avoid direct southern exposure, which will scorch unacclimated foliage.
- Ambient Temperature: 65°F to 80°F (18°C - 26°C). Keep away from HVAC vents and drafty windows.
- Relative Humidity: 40% to 55%. If your indoor environment drops below 40%, utilize a localized humidifier rather than misting the leaves, which can promote foliar fungal issues.
During this 30-day window, do not apply any fertilizer. The custom soil mix contains sufficient baseline nutrients, and introducing synthetic salts to a compromised root system will cause osmotic stress and root burn. Wait until you see new apical growth (usually around day 45-60) before initiating a half-strength liquid fertilizer regimen, such as Dyna-Gro Foliage-Pro 9-3-6.
Troubleshooting Early Establishment Failures
Recognizing the difference between normal transplant shock and fatal establishment failure is critical for saving the specimen.
Yellowing and Dropping Lower Leaves
Diagnosis: If only the oldest, lowest leaves are yellowing and dropping while the apical meristem (top growth) remains firm and green, this is standard transplant shock. The tree is aborting older tissue to conserve energy for root generation.
Action: Maintain your watering schedule. Do not overwater to 'compensate' for the leaf drop.
Mushy Base or Wrinkled Trunk
Diagnosis: If the lower trunk feels soft, yields to gentle pressure, or the bark wrinkles, the vascular cambium is rotting due to chronic overwatering or a perched water table.
Action: This is often fatal. Immediately unpot the tree, excise all rotten tissue with a sterilized blade, treat the remaining healthy roots with a copper-based fungicide, and repot in 100% coarse pumice to attempt emergency root regeneration.
Brown, Crispy Leaf Margins
Diagnosis: Low ambient humidity combined with high soluble salt levels from nursery fertilizers.
Action: Perform a soil flush. Run distilled water through the soil profile for 3 minutes to leach accumulated salts, then allow the top 2 inches of soil to dry completely before the next watering.
Outdoor Establishment in USDA Zones 10-12
For homeowners in frost-free climates (such as South Florida, coastal Southern California, or Hawaii), Pachira aquatica can be established in-ground, eventually reaching heights of 30 feet. The USDA Plants Database notes its hardiness in these tropical zones.
When planting outdoors, select a site with dappled shade. Dig a planting hole twice the width of the root ball but no deeper than the root ball's height. If your native soil is heavy clay, abandon in-ground planting and instead construct a 12-inch raised berm using the custom soil matrix outlined above to ensure adequate drainage during heavy seasonal rains. Furthermore, the ASPCA confirms that Pachira aquatica is non-toxic to dogs and cats, making it a safe choice for outdoor landscaping in pet-friendly yards.
Successful establishment of a money tree relies entirely on the initial decisions made regarding soil porosity and moisture management. By engineering a high-drainage matrix and respecting the 90-day acclimation window, your Pachira aquatica will develop the robust root architecture necessary to thrive for decades.

