
Tree Care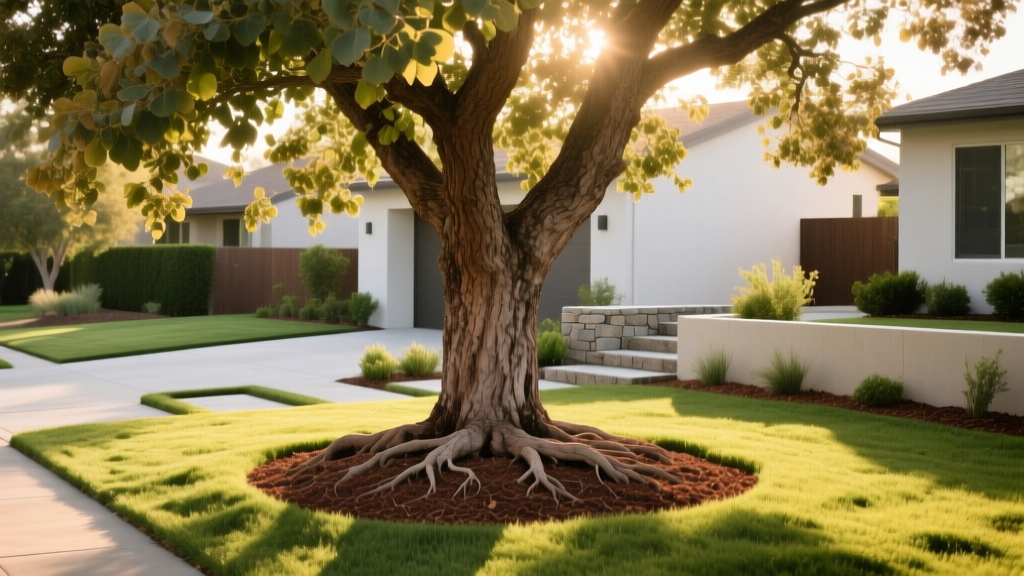
How to Select and Plant a Climate-Resilient Front Yard Tree
The Strategic Role of the Front Yard Tree
A well-placed front yard tree does more than boost curb appeal; it acts as a critical microclimate regulator. According to current urban forestry data, strategically planted shade trees can reduce localized ambient temperatures by up to 6°F and lower home cooling costs by 25% during peak summer months. However, the difference between a thriving landscape anchor and an infrastructure-destroying liability comes down to precise species selection, rigorous spacing calculations, and botanically correct planting techniques.
This guide bypasses generic landscaping advice to provide a technical, step-by-step framework for selecting and establishing a front yard tree that will thrive in modern suburban environments without damaging hardscapes or utility lines.
The Infrastructure Clearance Matrix
The most common failure in front yard tree planting is ignoring the mature root spread and canopy diameter. Roots typically extend 1.5 to 2 times the width of the canopy. Use the matrix below to determine the minimum safe planting distances based on the tree's projected mature size.
| Tree Category | Mature Height | Sidewalk Setback | Driveway Setback | Power Line Safe? |
|---|---|---|---|---|
| Small / Understory | Under 25 ft | 3 feet | 4 feet | Yes |
| Medium Canopy | 25 - 45 ft | 5 feet | 6 feet | No |
| Large Shade | Over 45 ft | 8+ feet | 10+ feet | No |
⚠️ Critical Warning: Underground Utilities
Before breaking ground, you must call 811 (the national call-before-you-dig number) at least 72 hours in advance. Utility locators will mark public lines, but you are responsible for locating private lines like irrigation systems, invisible dog fences, and private sewer laterals using a professional utility locating service.
Before breaking ground, you must call 811 (the national call-before-you-dig number) at least 72 hours in advance. Utility locators will mark public lines, but you are responsible for locating private lines like irrigation systems, invisible dog fences, and private sewer laterals using a professional utility locating service.
Top 3 Front Yard Tree Species for Modern Landscapes
When visiting a nursery in 2026, look for cultivars bred for disease resistance, drought tolerance, and non-invasive root structures. Avoid species like Bradford Pear (Pyrus calleryana) or Silver Maple (Acer saccharinum), which are prone to catastrophic limb failure and aggressive surface rooting.
1. Acer rubrum 'October Glory' (Red Maple)
Best for: Medium to large front yards with acidic to neutral soil (pH 5.5 - 6.5).
Mature Size: 40-50 ft height, 30-40 ft spread.
Why it works: This cultivar offers a dense, oval canopy that provides exceptional summer shade while delivering brilliant crimson fall foliage. It tolerates occasional wet soil but requires consistent moisture during its first three establishment years. Ensure you purchase a tree with a single, dominant central leader to prevent future co-dominant stem splitting.
2. Lagerstroemia indica x fauriei 'Natchez' (Crape Myrtle)
Best for: Compact front yards, planting strips, and areas under power lines.
Mature Size: 20-25 ft height, 15-20 ft spread.
Why it works: 'Natchez' is a mildew-resistant hybrid that produces pristine white blooms from mid-summer to early fall. Its exfoliating cinnamon-brown bark provides striking winter interest. Because it stays relatively small, it won't interfere with overhead utilities or obscure sightlines at driveway intersections.
3. Ginkgo biloba 'Autumn Gold' (Maidenhair Tree)
Best for: Urban environments, heavy clay soils, and high-pollution areas.
Mature Size: 40-50 ft height, 25-30 ft spread.
Why it works: Ginkgos are virtually immune to urban stressors, including soil compaction, road salt, and smog. 'Autumn Gold' is a male clone, meaning it will not produce the foul-smelling fruit associated with female Ginkgo trees. Its fan-shaped leaves turn a uniform, luminous yellow in autumn before dropping all at once, making cleanup a single-day event.
Step-by-Step Planting Protocol for Maximum Establishment
Nursery-grown trees are often planted too deeply in their containers or burlap wraps. Planting a tree at the exact depth it grew in the nursery is a guaranteed way to induce girdling roots and trunk rot. Follow this precise excavation and backfilling protocol.
Step 1: Excavate and Expose the Root Flare
The root flare (the point where the trunk widens and transitions into lateral roots) must be visible. Use a hand trowel or a gentle stream of water to remove the top 2 to 4 inches of soil from the root ball until you find the first primary lateral root. If the root flare is buried, the tree will slowly suffocate and die over 5 to 7 years.
Step 2: Dig a Saucer-Shaped Hole
Do not dig a deep, cylindrical hole. Tree roots grow laterally, not vertically.
- Depth: Dig the hole exactly 1 to 2 inches shallower than the height of the excavated root ball. This ensures the root flare sits slightly above the surrounding grade, preventing water from pooling against the trunk.
- Width: The hole should be 2.5 to 3 times the width of the root ball. This loosens the surrounding soil, allowing new feeder roots to expand rapidly.
Step 3: Position and Remove Packaging
Place the tree in the center of the hole. If it is a balled-and-burlapped (B&B) tree, cut away all synthetic burlap, twine, and the top third of the wire basket. Leaving wire baskets intact will eventually girdle the root mass as the tree expands. If it is a container-grown tree, shave off the outer 1 inch of the root ball with a pruning saw to sever any circling roots that could eventually strangle the trunk.
Step 4: Backfill and Mulch Using the 'Donut' Method
Backfill the hole using the native soil you just dug out. Do not amend the backfill with compost or potting mix; this creates a 'bathtub effect' where water pools in the loose amended soil and drowns the roots. Tamp the soil gently to remove large air pockets, then water deeply to settle it.
💡 Pro Tip: The Mulch Donut
Apply 2 to 3 inches of shredded hardwood mulch in a wide ring around the tree, extending to the drip line if possible. Crucially, keep the mulch at least 3 inches away from the trunk itself. Piling mulch against the bark (volcano mulching) traps moisture, invites fungal pathogens, and encourages secondary roots to grow into the mulch rather than the soil.
Apply 2 to 3 inches of shredded hardwood mulch in a wide ring around the tree, extending to the drip line if possible. Crucially, keep the mulch at least 3 inches away from the trunk itself. Piling mulch against the bark (volcano mulching) traps moisture, invites fungal pathogens, and encourages secondary roots to grow into the mulch rather than the soil.
First-Year Watering and Fertilization Schedule
Newly planted trees lack the extensive root network required to scavenge for moisture. According to the Morton Arboretum, proper hydration during the first 12 months is the single highest predictor of long-term survival.
- Volume Rule: Apply 1.5 to 2 gallons of water per inch of trunk caliper (measured 6 inches above the soil line) per week. A tree with a 2-inch caliper needs roughly 3 to 4 gallons weekly.
- Application Method: Use a slow-drip watering bag (like a Treegator) or a 5-gallon bucket with a 1/8-inch hole drilled in the bottom. Slow application allows water to penetrate deeply into the clay or loam rather than running off the surface.
- Fertilization: Do not apply synthetic nitrogen fertilizers during the first year. The tree needs to focus energy on root development, not top-growth. If a soil test indicates severe phosphorus or potassium deficiencies, apply a slow-release, organic amendment like bone meal or kelp meal at the drip line.
For more detailed guidance on species selection and regional planting windows, consult the Arbor Day Foundation's planting resources or your local university extension office, such as the University of Florida IFAS Extension guidelines on root flare excavation and soil compaction management.
Frequently Asked Questions
Should I stake my newly planted front yard tree?
Only stake the tree if it is in a high-wind area or has a top-heavy canopy that cannot support itself. If staking is necessary, use two flexible, wide nylon straps placed low on the trunk to allow for slight movement. This micro-movement stimulates the development of reaction wood, resulting in a thicker, stronger trunk. Remove all stakes after exactly one year.
How close can I plant a tree to my home's foundation?
Small ornamental trees should be planted at least 8 to 10 feet from the foundation. Large shade trees require a minimum setback of 15 to 20 feet. While tree roots rarely crack intact, poured concrete foundations, they can exploit existing cracks and damage shallow basement waterproofing membranes or underground drainage tiles.
What is the best time of year to plant?
Early autumn (after leaf drop but before the ground freezes) is optimal for most deciduous species. Soil temperatures remain warm enough to stimulate root growth, while cooler air temperatures reduce evapotranspiration stress on the canopy. Spring planting is the second-best option, provided you commit to a rigorous summer watering schedule.

