
Tree Care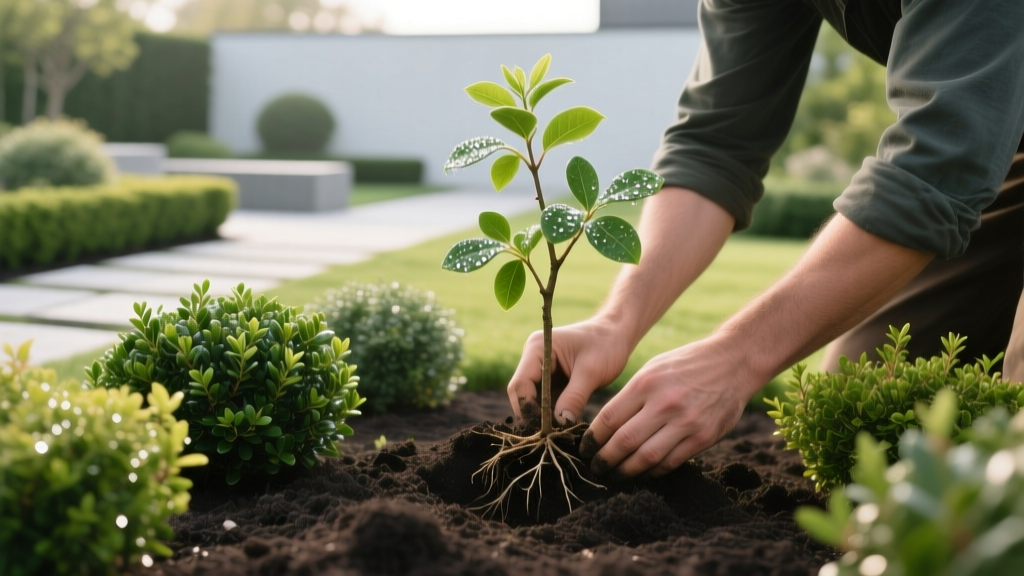
How to Plant and Grow Hedges and Shrubs: A Beginner's Guide
Why Hedges and Shrubs Transform Your Landscape
Establishing hedges and shrubs is one of the highest-ROI landscaping investments a homeowner can make. Beyond basic aesthetic appeal, a properly sited shrub border acts as a living windbreak, reducing winter heating costs by up to 15%, while dense evergreen hedges provide immediate visual privacy and noise dampening from street traffic. Unlike annual flowers or turfgrass, woody perennials compound in value and structural density year over year. However, the margin for error during the first 90 days of establishment is narrow. Improper planting depth, inadequate soil preparation, and aggressive shearing are the primary reasons new hedges fail to thrive or develop dead interior zones.
Selecting the Right Species for Your Hardiness Zone
The most common beginner mistake is selecting a plant based solely on its appearance in a nursery display, ignoring its mature dimensions and USDA Hardiness Zone requirements. A shrub that grows to 4 feet tall in a nursery pot can easily reach 15 feet at maturity, blocking windows and encroaching on utility lines. When planning a privacy screen or foundation planting, always calculate the mature width to determine proper spacing.
| Common Name | Botanical Name | USDA Zones | Mature Size (H x W) | Privacy Spacing | Avg. Cost (3-Gal Pot) |
|---|---|---|---|---|---|
| Emerald Green Arborvitae | Thuja occidentalis 'Smaragd' | 3-8 | 12-14' x 3-4' | 24-30 inches | $55 - $75 |
| Green Velvet Boxwood | Buxus 'Green Velvet' | 4-9 | 3-4' x 3-4' | 18-24 inches | $45 - $65 |
| Nellie Stevens Holly | Ilex 'Nellie R. Stevens' | 6-9 | 15-25' x 8-12' | 5-6 feet | $85 - $110 (7-Gal) |
| Knock Out Rose (Hedge) | Rosa 'Radrazz' | 4-11 | 3-4' x 3-4' | 36-48 inches | $35 - $50 |
Pro Spacing Formula: To create a solid privacy screen without overcrowding, divide the plant's mature width by two. For example, if a shrub grows 6 feet wide, plant them 3 feet apart on center. This allows the canopies to intertwine naturally while maintaining enough airflow to prevent fungal diseases like powdery mildew.
Site Preparation and Soil Testing
Before digging a single hole, you must understand your soil profile. Most hedges and shrubs require a soil pH between 6.0 and 7.0 for optimal nutrient uptake. Notable exceptions include ericaceous plants like azaleas, rhododendrons, and camellias, which demand highly acidic soil (pH 4.5 to 5.5). Purchase a basic digital soil pH meter or send a $20 soil sample to your local university cooperative extension for a comprehensive macro and micronutrient analysis.
If your soil is heavy clay, which retains water and suffocates roots, do not simply dig a hole and fill it with potting soil. This creates a 'bathtub effect' where water pools in the loose backfill and drowns the root ball. Instead, amend the entire planting bed area with 2 to 3 inches of composted pine bark or leaf mold, tilling it into the top 8 inches of native soil to improve drainage and structural integrity.
Step-by-Step Planting Instructions
Follow this precise sequence to ensure high survival rates and vigorous first-year growth. According to the University of Minnesota Extension, proper root flare positioning is the single most critical factor in long-term shrub health.
- Dig the Trench or Hole: Dig a hole that is exactly as deep as the root ball, but 2 to 3 times as wide. This loose lateral soil encourages roots to spread outward rather than circling the pot.
- Locate the Root Flare: Brush away the top layer of soil from the nursery pot to find the root flare—the exact point where the trunk widens and transitions into roots. This flare must sit 1 to 2 inches above the final grade line.
- Tease the Roots: If the shrub is root-bound, use a sterilized hori-hori knife to make three vertical slices (1 inch deep) down the sides of the root ball, and gently tease the bottom roots outward.
- Backfill with Native Soil: Refill the hole with the native soil you just dug out. Do not add synthetic fertilizers to the backfill, as this can burn tender new root hairs.
- Eliminate Air Pockets: Water the backfill heavily as you go, using a blunt stick to poke the mud and collapse hidden air pockets that could dry out the roots.
The First-Year Watering and Mulching Matrix
Newly planted hedges and shrubs lack the extensive root networks required to scavenge for deep soil moisture. Relying on rainfall or brief sprinkler cycles during the first year is a guaranteed path to transplant shock. Apply a 2.5-inch layer of hardwood mulch over the root zone, keeping it strictly 3 inches away from the main trunk to prevent vole damage and stem rot.
| Timeframe | Frequency | Volume per Shrub | Application Method |
|---|---|---|---|
| Weeks 1-2 | Daily | 1 - 2 gallons | Slow trickle hose at base |
| Weeks 3-8 | Every 2-3 days | 2 - 3 gallons | Treegator slow-release bag |
| Months 3-12 | Weekly (if no rain) | 3 - 5 gallons | Drip irrigation line |
Warning: Avoid using overhead oscillating sprinklers for newly planted evergreen hedges like Arborvitae or Leyland Cypress. Wet foliage that remains damp overnight creates the perfect breeding ground for Seiridium canker and Cercospora needle blight. Always water at the soil level.
Pruning Framework for Dense Growth
Beginners often reach for electric hedge trimmers the moment a shrub looks slightly unruly. This results in 'shell growth'—a dense outer layer of leaves that blocks sunlight from reaching the interior, eventually causing the inside of the shrub to die and turn brown. For the first two years, put away the power shears and use high-quality hand bypass pruners, such as the Felco Model 2, to make precise, angled cuts.
'When pruning hedges and shrubs for density, always cut back to a lateral bud or a branching node. This forces the plant to push out two new shoots from the cut point, naturally thickening the canopy from the inside out without sacrificing interior airflow.'
The 'A-Frame' Shaping Technique
If you are maintaining a formal hedge (like Boxwood or Yew), the base of the plant must always be wider than the top. Trim the hedge into a subtle 'A' shape or trapezoid. This geometry ensures that the lower branches receive direct sunlight, preventing the dreaded 'bare legs' syndrome where the bottom of the hedge thins out and dies due to top-heavy shading.
Common Beginner Mistakes to Avoid
- Volcano Mulching: Piling mulch high against the trunk traps moisture against the bark, inviting fungal pathogens and encouraging girdling roots to grow upward into the mulch instead of outward into the soil.
- Planting Too Deep: Burying the root flare even half an inch below grade restricts oxygen to the root crown. According to the Arbor Day Foundation, deep planting is the leading cause of premature decline in woody landscape plants.
- Ignoring Winter Desiccation: Broadleaf evergreens (like Holly and Southern Magnolia) continue to lose water through their leaves during winter winds. If the ground is frozen, roots cannot replace this moisture. Apply an anti-desiccant spray like Wilt-Pruf in late November when temperatures are above 40°F to seal the leaf cuticle.
- Fertilizing in Late Fall: Applying high-nitrogen synthetic fertilizers after August stimulates tender new growth that will not have time to harden off before the first frost, leading to severe winter dieback.
By prioritizing soil preparation, respecting the root flare, and utilizing strategic hand-pruning over aggressive shearing, your hedges and shrubs will establish a robust root system capable of sustaining dense, vibrant growth for decades.

