Tree Care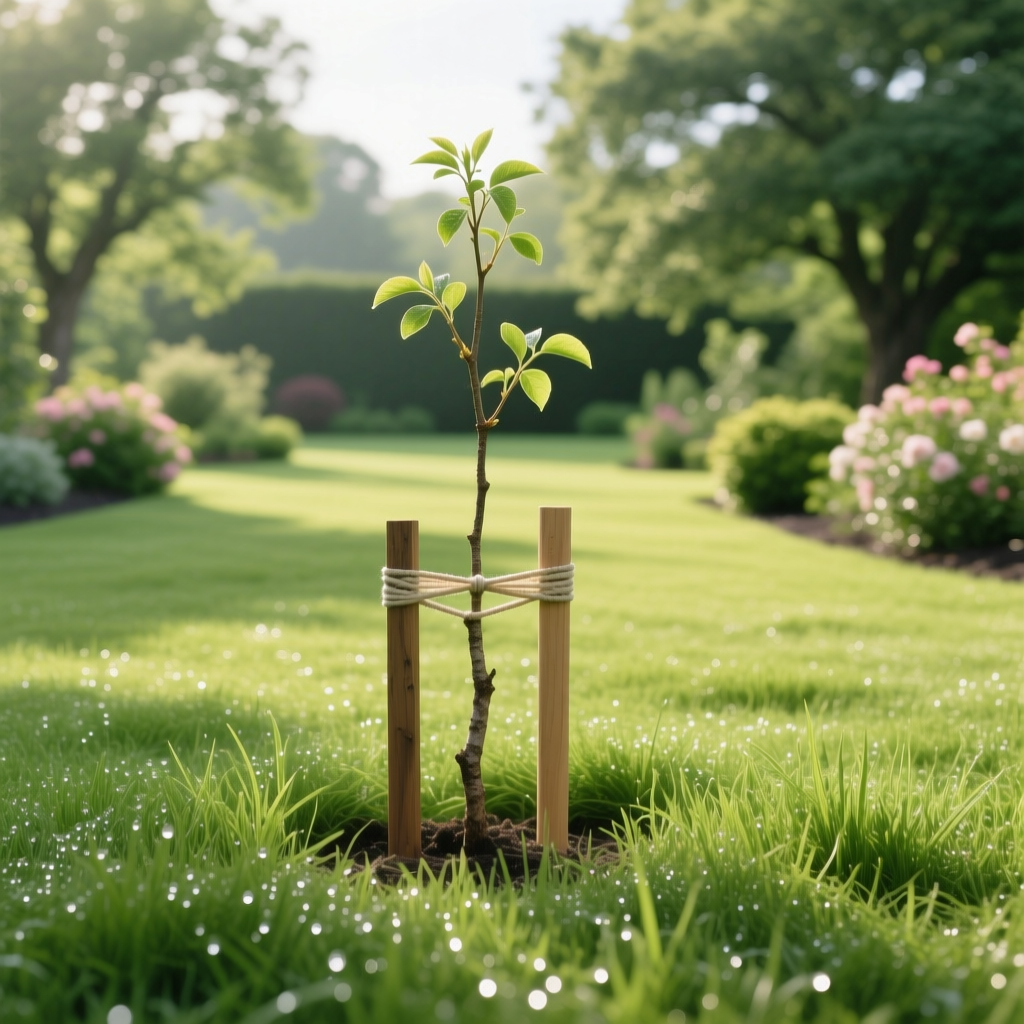
Proper Tree Staking Techniques for Young Trees: A Complete Guide
David ParkPublished
Proper Tree Staking Techniques for Young Trees: A Complete Guide
Planting a young tree is one of the most rewarding investments you can make in your landscape. However, a newly planted tree often faces significant challenges during its first few seasons, including strong winds, unstable soil, and its own underdeveloped root system. This is where proper tree staking comes in. When done correctly, staking provides the temporary support a young tree needs to establish strong roots and grow into a healthy, resilient specimen. When done incorrectly, it can actually weaken the tree, cause girdling injuries, and even lead to premature death.
Many homeowners and even professional landscapers make critical mistakes when staking young trees. Over-staking, using the wrong materials, and leaving stakes in place too long are among the most common errors that compromise tree health. The truth is, not every newly planted tree requires staking at all. Understanding when staking is necessary, which techniques work best, and how to transition a tree away from artificial support is essential knowledge for anyone serious about tree care and long-term landscape success.
In this comprehensive guide, we will walk you through everything you need to know about proper tree staking techniques for young trees. From selecting the right materials to knowing exactly when to remove stakes, you will gain the practical knowledge needed to give your young trees the best possible start. Whether you are planting shade trees, fruit trees, or ornamental specimens, these proven techniques will help you cultivate stronger, healthier trees that thrive for decades.
When and Why Young Trees Need Staking
Before driving a single stake into the ground, it is important to understand that staking is not always necessary. In fact, research from horticultural institutions consistently shows that trees allowed to sway naturally in the wind develop stronger trunks and more robust root systems than those that are rigidly staked. The gentle movement stimulates the production of reaction wood, which increases trunk caliper and overall structural integrity.
Situations That Warrant Staking
There are specific circumstances where staking becomes essential for the survival and proper development of a young tree:
- Top-heavy trees: If the canopy is disproportionately large relative to the root ball, the tree may be unable to support itself upright, especially during wind events.
- Bareroot trees: Trees planted without a soil ball around their roots have minimal anchorage and often benefit from temporary staking until new roots develop.
- High-wind areas: Properties in exposed locations, coastal regions, or areas with frequent strong winds may require staking to prevent uprooting.
- Shallow or sandy soils: Loose, sandy, or compacted soils may not provide adequate anchorage for newly planted trees during their establishment period.
- Large-caliper transplants: Trees with trunk diameters exceeding two inches at planting time often have large canopies that catch significant wind, making temporary support advisable.
- High-traffic areas: Trees planted near walkways, driveways, or play areas may need staking simply to protect them from accidental damage.
When Staking Is Unnecessary
Small, container-grown trees with well-developed root balls planted in sheltered locations with average soil conditions often do not require staking at all. If you can gently push on the trunk and the root ball does not shift in the soil, the tree likely has sufficient stability on its own. Avoid the temptation to stake trees "just in case" — unnecessary staking can do more harm than good by creating dependency and preventing the natural trunk development that comes from wind-induced movement.
For more information on preparing your landscape for new plantings, check out our soil preparation guide, which covers the foundational steps for healthy tree and lawn establishment.
Essential Materials and Tools for Tree Staking
Using the correct materials is one of the most important factors in successful tree staking. Improper materials can cut into bark, restrict growth, and introduce disease. Here is a detailed look at what you need and what to avoid.
Stakes
The stakes themselves serve as the primary anchor points for your support system. Choose from the following options:
- Wooden stakes: Treated wooden stakes (at least 1 inch by 1 inch and 5 to 6 feet long) are the most common and affordable choice. Use pressure-treated lumber or naturally rot-resistant species like cedar or locust. Drive them at least 18 to 24 inches into the ground for adequate anchorage.
- Metal stakes: Steel T-posts or rebar stakes are extremely durable and reusable, making them a good choice for long-term or commercial applications. Be sure to use protective caps on top to prevent injury.
- Fiberglass stakes: Lightweight and weather-resistant, fiberglass stakes are increasingly popular among professional arborists. They flex slightly in wind, which allows some beneficial movement to reach the tree.
Ties and Fasteners
The material that connects the tree to the stake is arguably the most critical component. This is where most staking mistakes occur.
- Wide, flat straps: Commercially available tree ties made from nylon, polypropylene, or rubber are the best option. Look for straps that are at least 1 to 2 inches wide to distribute pressure across a larger area of bark.
- Canvas or cloth strips: Soft, wide strips of canvas or old cotton fabric work well as an economical alternative. They are gentle on bark and allow some flexibility.
- Rubber tubing: Sections of garden hose or specialized rubber tree ties can be effective, but ensure they are not so tight that they constrict the trunk as it grows.
Materials to Avoid
Never use the following materials as tree ties, as they can cause serious damage:
- Wire (bare or even wrapped in hose) — it cuts through bark and girdles the trunk
- Thin rope or twine — concentrates pressure on a narrow band of tissue
- Duct tape or electrical tape — adheres to bark and tears it upon removal
- Zip ties — too rigid and will slice into expanding trunks within weeks
Additional Tools
You will also need a heavy mallet or post driver for installing stakes, a measuring tape to ensure proper placement, pruning shears for trimming any damaged branches before staking, and a level to verify that the tree is positioned vertically. For guidance on selecting and maintaining quality landscaping tools, visit our essential lawn care tools page.
Step-by-Step Tree Staking Techniques
Now that you have the right materials, follow these proven techniques to stake your young tree properly. The method you choose will depend on the size of the tree and the conditions at your site.
The Single-Stake Method
This is the simplest and most common technique, ideal for small to medium-sized trees (up to about 8 feet tall) in areas with moderate wind exposure.
- Position the stake: Drive a single stake into the ground on the windward side of the tree (the side from which prevailing winds blow). Place the stake approximately 12 to 18 inches from the trunk, being careful not to damage the root ball.
- Drive the stake deep: The stake should penetrate at least 18 to 24 inches below the soil surface. The portion above ground should extend to roughly two-thirds the height of the tree canopy.
- Attach the tie: Secure a wide, flexible strap around the trunk at the point where the tree needs support — typically at about two-thirds of the tree height. Leave enough slack so you can fit two fingers between the strap and the bark. The tree should be able to move slightly in all directions.
- Create a figure-eight pattern: Loop the tie around the stake in a figure-eight configuration so that the strap crosses between the tree and the stake. This prevents the trunk from rubbing directly against the stake and provides cushioning.
- Check alignment: Use a level to ensure the tree is standing straight. Adjust the tie tension as needed.
The Double-Stake Method
For larger trees or those in exposed, windy locations, two stakes provide more balanced support and prevent leaning in multiple directions.
- Place two stakes: Drive two stakes into the ground on opposite sides of the tree, perpendicular to the prevailing wind direction. Each stake should be 18 to 24 inches from the trunk.
- Ensure equal height: Both stakes should extend above ground to the same height — approximately two-thirds of the canopy height.
- Attach ties to both stakes: Use separate wide straps on each side, attaching them at the same height on the trunk. Each tie should form a figure-eight between the tree and its respective stake.
- Balance tension: Ensure both ties have equal slack so the tree is centered between the stakes and can sway gently in all directions.
The Three-Stake (Guy Wire) Method
This technique is best reserved for large-caliper trees, trees planted on slopes, or specimens in extremely windy sites.
- Install three stakes: Drive three stakes into the ground at equal intervals (120 degrees apart) around the tree, each approximately 24 to 36 inches from the trunk.
- Attach guy wires: Run flexible cables or straps from a single attachment point on the trunk (at roughly one-third to one-half the tree height) down to each stake at a 45-degree angle.
- Protect contact points: Use rubber tubing or commercial protectors wherever cables or straps contact the trunk to prevent bark abrasion.
- Equalize tension: Adjust all three lines so the tree stands plumb and has uniform, slight flexibility in every direction.
The Anchor-Stake (Below-Ground) Method
For situations where visible stakes are undesirable, an underground anchoring system can provide invisible support.
- Install a deadman anchor: Bury a treated timber or concrete block approximately 18 to 24 inches deep near the root ball.
- Run a strap underground: Connect a strap from the anchor up through the soil and attach it to the lower trunk just above the root flare.
- Cover and monitor: Backfill the soil over the strap and mark the location so you remember to remove the system after the establishment period.
No matter which method you use, the key principle is to allow some movement. Rigid staking that completely immobilizes the trunk prevents the development of trunk taper and reaction wood, resulting in a weaker tree once the stakes are eventually removed. For more on creating a healthy landscape environment around your trees, see our mulching techniques guide.
Common Staking Mistakes and How to Avoid Them
Even well-intentioned gardeners can inadvertently harm young trees through improper staking. Understanding these common pitfalls will help you avoid them.
Mistake 1: Staking Too Tightly
One of the most damaging errors is pulling the ties so tight that the trunk cannot move at all. A tree that cannot sway will not develop the trunk taper and root strength it needs to stand independently. Always leave enough slack for gentle movement — you should be able to move the trunk a few inches in any direction without resistance.
Mistake 2: Staking Too High
Placing ties at the very top of the canopy creates a pivot point far above the ground, which concentrates stress on the lower trunk and can lead to breakage. As a rule, ties should be placed no higher than two-thirds of the total tree height. This allows the upper portion to move freely while the lower trunk remains stable.
Mistake 3: Leaving Stakes On Too Long
Perhaps the most common and harmful mistake is forgetting to remove stakes. Stakes should be considered temporary — typically needed for only one to two growing seasons. Leaving stakes in place for years allows ties to girdle the trunk as it grows, cutting off the flow of water and nutrients through the cambium layer. Set a calendar reminder to inspect and remove stakes no later than the end of the second growing season after planting.
Mistake 4: Using Abrasive or Narrow Materials
Wire, thin rope, and narrow straps concentrate force on a small area of bark, causing cuts that invite disease and pest infestations. Always use wide, soft, flexible materials that distribute pressure evenly. Inspect ties monthly during the growing season and loosen or replace them as the trunk expands.
Mistake 5: Staking Trees That Do Not Need It
Not every newly planted tree requires staking. If a tree can stand upright on its own and the root ball is stable in the soil, skip the stakes entirely. Unnecessary staking creates dependency and slows the natural strengthening process. For tips on assessing tree stability and overall health, explore our tree health assessment resources.
Seasonal Care Tips and Stake Maintenance
Staking is not a "set it and forget it" task. Proper maintenance throughout the seasons ensures that your staking system continues to support the tree without causing harm.
Spring Inspection and Adjustment
As the growing season begins, inspect all stakes, ties, and anchors. Winter frost heaving may have shifted stakes or loosened soil around anchor points. Tighten any loose stakes, replace damaged ties, and verify that straps are not cutting into the expanding bark. Spring is also an excellent time to evaluate whether the tree has developed enough root stability to have stakes removed entirely. Check our spring lawn care checklist for a complete seasonal landscape maintenance plan.
Summer Monitoring
During the active growing season, tree trunks can expand significantly. Check ties every four to six weeks to ensure they are not becoming too tight. Loosen or reposition straps as needed. Summer storms can also test the integrity of your staking system, so inspect stakes and ties after any severe weather event. If the tree appears to be developing good trunk taper and the root ball no longer shifts when you gently push the trunk, consider removing stakes in late summer.
Autumn Preparation
Before winter arrives, do a final check of the staking system. Ensure stakes are firmly anchored to withstand winter winds and freeze-thaw cycles. If you plan to remove stakes the following spring, this is a good time to assess the tree's readiness. A tree that stands upright without support on a calm day and shows only minor lean in moderate wind is likely ready to transition to independence.
Winter Protection
In regions with harsh winters, consider wrapping the lower trunk with tree wrap or burlap to protect against frost cracks and rodent damage. Stakes and ties should remain in place through winter if the tree has not yet completed its establishment period. Avoid piling snow against stakes, as the weight can bend or break them. For comprehensive seasonal lawn and landscape care strategies, visit our seasonal lawn maintenance guide.
When to Remove Stakes
The ultimate goal of staking is to remove it. Here is a simple test to determine if your tree is ready:
- Loosen all ties and step back.
- Observe the tree on a calm day — does it stand upright on its own?
- On a breezy day, does the trunk flex without the root ball shifting in the soil?
- If the answer to both questions is yes, remove the stakes entirely.
Most trees are ready for stake removal within 12 to 24 months of planting. Larger transplants may need up to three seasons. Once stakes are removed, fill the holes left behind with soil and mulch the area lightly. Continue to monitor the tree for the first few weeks to ensure it remains stable.
Frequently Asked Questions About Tree Staking
How long should I leave stakes on a newly planted tree?
In most cases, stakes should remain in place for one to two full growing seasons. Small trees in sheltered locations may only need support for six to twelve months, while large-caliper trees in exposed areas might require staking for up to three seasons. The key is to monitor the tree regularly and remove stakes as soon as the root system is established enough to anchor the tree independently. Leaving stakes on too long is one of the most common mistakes and can lead to girdling, weakened trunk development, and increased susceptibility to disease. For more on establishing healthy trees from the start, read our guide on planting trees correctly.
Can staking actually damage my young tree?
Yes, improper staking can absolutely damage a young tree. Ties that are too tight will cut into the bark and girdle the trunk, restricting the flow of water and nutrients through the vascular system. Rigid staking that prevents all movement inhibits the development of trunk taper and reaction wood, resulting in a tree that is structurally weaker than it would have been without stakes. Stakes driven too close to the trunk can sever critical anchoring roots. Additionally, stakes left in place for too long create wounds and entry points for disease organisms and boring insects. Always use wide, soft ties, allow some movement, and remove stakes as soon as the tree can stand on its own.
Should I stake every tree I plant?
No, not every tree needs to be staked. In fact, many trees are better off without stakes. Small container-grown trees with well-developed root systems planted in sheltered locations with firm, loamy soil typically do not require staking. Trees that are allowed to experience natural wind movement from the time of planting often develop stronger trunks and root systems than staked trees. Stake only when the tree cannot support itself upright, when the root ball shifts in the soil, or when site conditions (extreme wind, sandy soil, slopes) make stability a genuine concern. When in doubt, observe the tree for a few days after planting — if it remains upright without support, stakes are likely unnecessary.
What is the best type of tie to use for staking trees?
The best tree ties are wide, flat, soft, and flexible. Commercial tree straps made from woven nylon, polypropylene, or rubber are excellent choices because they distribute pressure across a broad area and will not cut into bark. Look for ties that are at least 1.5 to 2 inches wide. Canvas strips, soft cotton cloth, and specialized rubber tree ties are also suitable options. The tie should be durable enough to withstand UV exposure and weather for one to two seasons but flexible enough to accommodate trunk growth. Always use the figure-eight looping technique to prevent the trunk from contacting the stake directly. Avoid wire, thin rope, zip ties, and tape, as these materials concentrate pressure and cause bark damage. For related tips on protecting trees in your landscape, see our guide to protecting trees from weather damage.
My staked tree is leaning — what should I do?
If a staked tree is leaning, first check whether the stakes have shifted or the ties have stretched. Tighten or reposition the ties to bring the tree back to a vertical position, ensuring you do not pull too tightly. If the stakes themselves have loosened, drive them deeper or replace them with longer stakes. In some cases, leaning occurs because the root ball was not properly settled during planting — if the root ball itself is tilted, you may need to carefully excavate around it, straighten it, and recompact the soil. For trees that develop a persistent lean despite proper staking, consider consulting a certified arborist to evaluate whether the root system has developed asymmetrically. Remember that a very slight lean (less than 5 degrees) is normal and generally not a cause for concern. Regular monitoring and timely adjustments are the keys to keeping young trees growing straight and strong. Learn more about ongoing tree maintenance in our complete tree care section.
Proper tree staking is a temporary measure that, when executed correctly, gives young trees the support they need during their most vulnerable stage. By choosing the right materials, applying the appropriate technique for your site conditions, maintaining the system throughout the seasons, and removing stakes at the right time, you set the stage for a lifetime of healthy, vigorous growth. Combined with sound practices in lawn care and overall landscape management, your trees will become lasting assets that enhance the beauty, value, and ecological health of your property for generations to come.