
Tree Care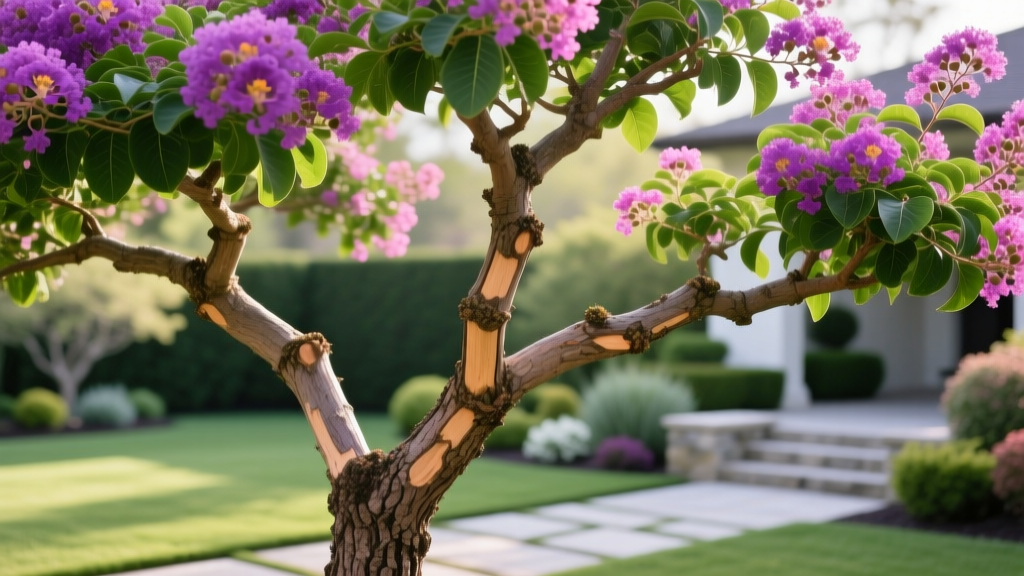
How to Prune a Crepe Myrtle Tree and Avoid Crape Murder
The Anatomy of a Proper Crepe Myrtle Prune
Crepe myrtles (Lagerstroemia indica and its hybrids) are resilient, fast-growing ornamental trees that reward proper maintenance with spectacular summer blooms and striking winter bark. However, a pervasive landscaping malpractice known as "crape murder"—the severe, indiscriminate topping of the tree's main trunks—ruins the natural architectural beauty of the species, delays flowering, and invites fungal pathogens. Learning how to prune a crepe myrtle tree correctly requires shifting your mindset from aggressive hacking to selective, structural thinning. The goal is to maintain a vase-shaped or multi-trunk canopy that allows air circulation and sunlight penetration, which directly correlates to flower production and powdery mildew resistance.
⚠ Warning: Identify and Stop "Crape Murder"
Topping a crepe myrtle by chopping off the top third of its main branches creates ugly, swollen "knuckles" at the cut sites. These knuckles sprout dozens of weak, whip-like shoots that cannot support the weight of heavy bloom clusters, leading to drooping and branch breakage. Topping also drastically reduces the tree's photosynthetic capacity, stunting root growth and increasing susceptibility to Cercospora leaf spot.
Optimal Timing for Dormant Pruning
Timing is critical for wound compartmentalization and spring energy allocation. Prune crepe myrtles during their fully dormant phase, after the leaves have dropped and before new spring buds swell. In USDA Zones 7 and 8, this typically falls between late January and early March. In Zones 9 and 10, where dormancy is brief, target the coolest month (usually January).
Avoid pruning in late fall (November or early December). Early pruning can stimulate tender new growth if a warm spell hits, which will be killed by subsequent freezing temperatures, causing dieback that you will have to prune again in the spring. Furthermore, never prune heavily during the summer blooming cycle; while deadheading spent flowers (removing seed pods) can encourage a second, lighter flush of blooms, structural pruning must wait for winter.
Essential Arboriculture Tools for 2026
Using the correct tools ensures clean cuts that heal rapidly. Ragged cuts from dull blades crush the cambium layer, creating entry points for wood-decaying fungi. Below is a professional-grade tool matrix for crepe myrtle maintenance.
| Tool Type | Recommended Model | Est. Price (2026) | Specific Use Case |
|---|---|---|---|
| Bypass Hand Pruner | Felco F-2 Classic | $65 - $75 | Branches up to 1 inch; precise bud-level cuts. |
| Bypass Lopper | Corona SL 3264 (24") | $45 - $55 | Interior canopy branches up to 2.5 inches. |
| Folding Pruning Saw | Silky Gomboy 240 | $55 - $65 | Main trunks or heavy structural limbs over 3 inches. |
| Pole Pruner/Saw | Silky Hayauchi 17ft | $280 - $320 | High canopy thinning without ladders (safety critical). |
Pro-Tip on Tool Hygiene: Keep a spray bottle of 70% isopropyl alcohol or a 10% bleach solution in your bucket. Sterilize your blades between every tree, and immediately after cutting any wood that shows signs of cankers or fungal fruiting bodies, to prevent cross-contamination.
Step-by-Step Guide: How to Prune a Crepe Myrtle Tree
Follow this sequential framework to systematically thin the canopy without compromising the tree's structural integrity.
Step 1: Execute the "Three D's"
Begin by removing all Dead, Damaged, and Diseased wood. Cut dead branches back to the nearest healthy lateral branch or the main trunk. Look for the "branch collar"—the swollen area where the branch meets the trunk—and make your cut just outside this collar. Never cut flush with the trunk, as this removes the tree's natural chemical defense zone and prevents proper wound sealing.
Step 2: Eradicate Suckers and Water Sprouts
- Root Suckers: These are fast-growing vertical shoots emerging from the base of the trunk or the root crown. Do not just snap them off; use your hand pruners to cut them as flush to the root crown as possible. Leaving a tiny stub guarantees three more suckers will sprout from that node next year.
- Water Sprouts: These are the thin, vertical, whip-like branches shooting straight up from the horizontal canopy branches. They clutter the interior, block airflow, and rarely produce quality blooms. Snip them off flush to the parent branch.
Step 3: Resolve Crossing and Inward-Growing Branches
Evaluate the canopy's architecture. Crepe myrtles should have an open, vase-like structure. Identify branches that are rubbing against each other (which strips bark and invites pests) or growing inward toward the center of the tree. Remove the weaker of the two crossing branches entirely, making a thinning cut back to the main branch. This opens the center to sunlight, which is vital for flower bud initiation on interior wood.
Step 4: Strategic Heading Cuts for Height Management
If your tree is encroaching on power lines or a roofline, you may need to reduce its height. Never chop across the top. Instead, trace the overly tall main trunk down to a lower, well-placed lateral branch that is growing outward. Make your cut just above this lateral branch. The lateral branch must be at least one-third the diameter of the trunk you are removing to assume apical dominance and continue the natural growth line. According to the Clemson University Home and Garden Information Center, this drop-crotch method preserves the tree's natural weeping habit and prevents knuckle formation.
Recovery Protocol: Fixing a Previously "Murdered" Tree
If you have inherited a property with a severely topped crepe myrtle, rehabilitation is a multi-year process. Do not attempt to fix it all in one winter.
- Year 1: Identify the large, ugly knuckles at the top of the trunks. Select 3 to 5 of the strongest, best-angled whips growing from each knuckle to become the new main branches. Ruthlessly thin out the remaining 80% of the whips, cutting them flush to the knuckle.
- Year 2: The retained whips will have thickened. Now, make selective reduction cuts on these new branches to encourage lateral branching and establish a secondary canopy structure. Remove any new water sprouts that attempt to grow vertically from the knuckles.
- Year 3: By the third year, the tree should begin to mask the old knuckles with a newly established, naturally flowing canopy. Continue standard dormant thinning.
Debunking the Pruning Paint Myth
A common mistake among novice gardeners is applying black pruning sealant or wound dressing to fresh cuts, believing it protects the tree from rot. Modern arboriculture science has thoroughly debunked this. As noted by NC State Extension, wound dressings actually trap moisture and fungal spores against the exposed wood, accelerating decay rather than preventing it. Crepe myrtles are highly efficient at compartmentalizing wounds (CODIT). A clean, sharp cut left exposed to the air and sun will callus over naturally and rapidly. Save your money and skip the sealants entirely.
Seasonal Maintenance Beyond Pruning
Pruning is only one pillar of crepe myrtle health. To maximize the results of your winter cuts, pair them with proper spring nutrition. Apply a balanced, slow-release fertilizer (such as a 10-10-10 or 8-8-8 NPK ratio) in early March just as buds break dormancy. Avoid high-nitrogen lawn fertilizers near the root zone, as excessive nitrogen promotes aggressive, weak vegetative growth at the expense of flower production and increases susceptibility to aphid infestations. Maintain a 2-to-3-inch layer of organic mulch over the root zone, keeping it strictly pulled back 3 inches from the main trunk to prevent collar rot.

