
Tree Care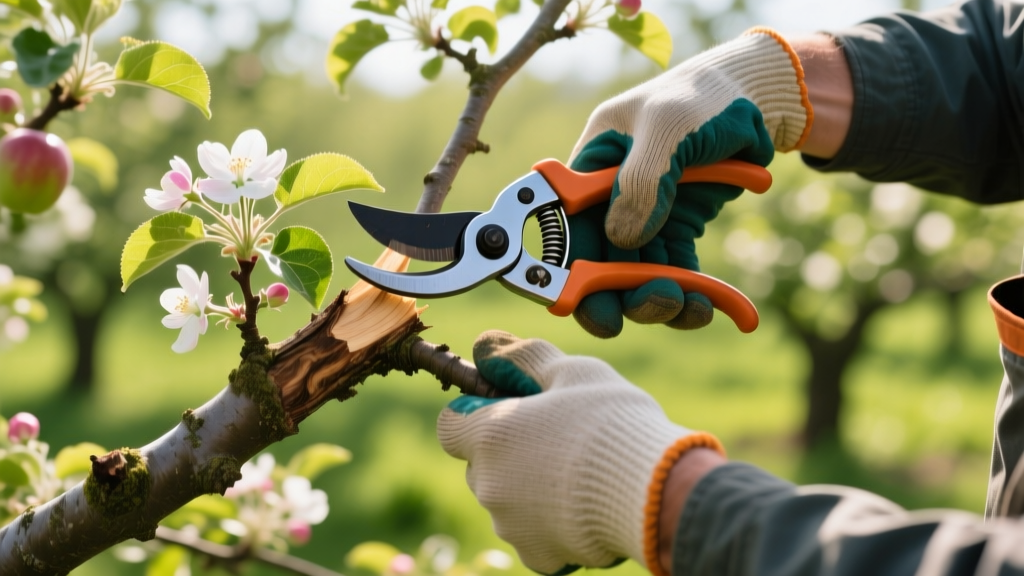
Pruning Apples: Step-by-Step Guide for Maximum Fruit Yield
The Physiology of Apple Wood: Spurs vs. Shoots
Successful orchard management begins with understanding carbohydrate allocation. When pruning apples, you are fundamentally deciding where the tree will invest its energy. Apple trees produce two distinct types of wood: vegetative shoots and fruiting spurs. Vegetative shoots (often called water sprouts when growing vertically from scaffold branches) are long, smooth, and aggressive. They consume massive amounts of photosynthetic energy but produce zero fruit. Fruiting spurs, conversely, are short, stubby, gnarled lateral shoots measuring 1/2 to 3 inches in length. These spurs develop on wood that is at least two years old and can remain productive for up to a decade.
The primary objective of dormant season pruning is to maximize light penetration into the canopy, which directly correlates to spur initiation and fruit sugar concentration (Brix levels). According to Penn State Extension, a well-pruned apple tree should allow enough sunlight to reach the inner canopy so that a shadow of a person standing on the ground is visible through the branches during midday.
Architectural Frameworks: Central Leader vs. Open Center
Before making a single cut, you must identify the tree's intended architecture. The two dominant frameworks for home orchards are the Central Leader and the Open Center (Vase) systems. Your choice dictates your pruning strategy for the next five years.
| Framework | Structure Profile | Best For | Pruning Focus |
|---|---|---|---|
| Central Leader | Dominant main trunk with tiered, horizontal scaffold branches resembling a Christmas tree. | Vigorous varieties (Honeycrisp, Fuji), standard rootstocks, maximum yield per tree. | Maintaining apical dominance, heading back the leader, thinning competing lateral branches. |
| Open Center | No central trunk; 3 to 4 primary scaffold branches radiating outward in a vase shape. | Dwarfing rootstocks, limited vertical space, easier harvest without ladders. | Removing central water sprouts, spreading scaffold angles to 45-60 degrees using limb spreaders. |
The 3-Cut Method for Safe Limb Removal
When removing branches larger than 1.5 inches in diameter, a single cut will inevitably cause the heavy limb to tear down the trunk, stripping the bark and exposing the cambium to wood-decaying fungi. To preserve the branch collar—the swollen tissue at the base of the branch that contains the chemical defense zones described in Dr. Alex Shigo's CODIT (Compartmentalization of Decay in Trees) model—you must use the 3-cut method.
⚠️ CRITICAL WARNING: The Branch Collar
Never make a flush cut against the trunk. Removing the branch collar destroys the tree's natural compartmentalization barrier, guaranteeing that decay will enter the main trunk. Always leave the slight ridge where the branch meets the trunk intact.
- The Undercut: Position your pruning saw 6 to 12 inches away from the trunk. Cut upward from the bottom of the branch, penetrating about one-third of the way through the wood. This severs the bark and prevents it from tearing down the trunk when the branch falls.
- The Relief Cut: Move 2 inches further out on the branch (away from the trunk). Cut downward from the top until the branch snaps off cleanly. This removes the bulk of the weight.
- The Finish Cut: Locate the branch bark ridge (the top crease) and the branch collar (the bottom swelling). Make a precise, clean cut just outside the collar, angling slightly outward to match the collar's natural line. Do not leave a stub, as stubs cannot compartmentalize and will rot.
Essential Tool Loadout and 2026 Pricing
Using dull or improperly sized tools crushes the cambium layer, delaying wound closure and inviting pathogens like Neonectria galligena (European canker). Invest in high-carbon steel or SK5 steel blades that hold an edge through dozens of cuts. Below is the professional-grade loadout required for pruning apples effectively.
| Tool Type | Recommended Model | Est. Price (2026) | Specific Use Case |
|---|---|---|---|
| Hand Pruner | Felco F-2 Classic (Bypass) | $60 - $65 | Cuts up to 1 inch. Ideal for thinning spurs and removing small water sprouts. |
| Folding Saw | Silky Gomboy 240mm (Fine Teeth) | $55 - $60 | Cuts 1.5 to 4 inches. The fine teeth leave a glass-smooth finish that heals rapidly. |
| Bypass Loppers | Corona SL 3264 ComfortGEL | $50 - $55 | Cuts 1 to 2 inches. The compound action provides leverage for dense, older wood. |
| Pole Pruner | Fiskars 12 ft Telescoping Bypass | $85 - $95 | Reaching high central leader tips without using an unstable A-frame ladder. |
Sanitation Protocols to Prevent Pathogen Spread
Fire blight (Erwinia amylovora) is a devastating bacterial disease that spreads rapidly during pruning. If you are pruning apples in an area with known fire blight pressure, or if you notice the characteristic "shepherd's crook" wilting on branch tips, strict sanitation is non-negotiable.
- The Solution: Use 70% isopropyl alcohol or a commercial quaternary ammonium disinfectant. Avoid household bleach (sodium hypochlorite), as it severely pits and corrodes the steel blades of premium tools like the Felco F-2, ruining their cutting geometry.
- The Protocol: Wipe the blades thoroughly with an alcohol-soaked rag between every single cut when removing suspected blighted wood. When moving from a diseased tree to a healthy tree, submerge the tool heads in the solution for 60 seconds.
- Timing: Never prune apples during spring bloom or active vegetative growth if fire blight is present in your region. Restrict structural pruning to the late dormant season (late February to early March in USDA zones 5-7), just before bud swell but after the risk of severe sub-zero freezes has passed.
Post-Pruning Care: Debunking the Wound Dressing Myth
For decades, homeowners applied black asphalt-based pruning paints or tar to fresh cuts, believing it sealed out disease. Modern arboricultural science has thoroughly debunked this practice.
"Wound dressings do not prevent decay. In fact, they often trap moisture against the exposed wood, creating an ideal environment for decay fungi to thrive, and can inhibit the tree's natural callus tissue from forming over the wound."
— University of Minnesota Extension
Leave all pruning cuts bare. The tree will naturally generate callus tissue from the cambium edges, slowly rolling over the wound at a rate of roughly 1/4 inch per year. Your only post-pruning task should be applying a balanced 10-10-10 granular fertilizer to the drip line in early spring if a soil test indicates a nitrogen deficiency.
Troubleshooting Common Pruning Mistakes
Why is my apple tree producing only vegetative growth and no fruit?
You are likely overusing "heading cuts." A heading cut removes the terminal bud of a branch, which breaks apical dominance and forces the tree to push out dozens of aggressive, non-fruiting water sprouts below the cut. Transition to "thinning cuts" (removing the entire branch back to its point of origin). A mature apple tree's pruning should consist of 80% thinning cuts and no more than 20% heading cuts.
How much of the canopy can I safely remove in one winter?
Never remove more than 25% of the live canopy in a single dormant season. Removing 40% or more triggers a massive stress response, causing the tree to push out a dense thicket of sterile water sprouts the following summer to replace the lost photosynthetic factory. If a tree is severely overgrown, spread the restoration pruning over three consecutive winters.
Should I prune apples in the summer?
Summer pruning is a specialized technique used strictly for vigor control, not structural framing. If a tree is overly vigorous (often due to excessive nitrogen or dwarfing rootstock mismatch), removing water sprouts in late July or early August reduces the tree's carbohydrate reserves, slowing overall growth and encouraging the formation of fruiting spurs for the following year. However, summer pruning leaves open wounds during peak insect activity, increasing the risk of fungal infections.

