
Tree Care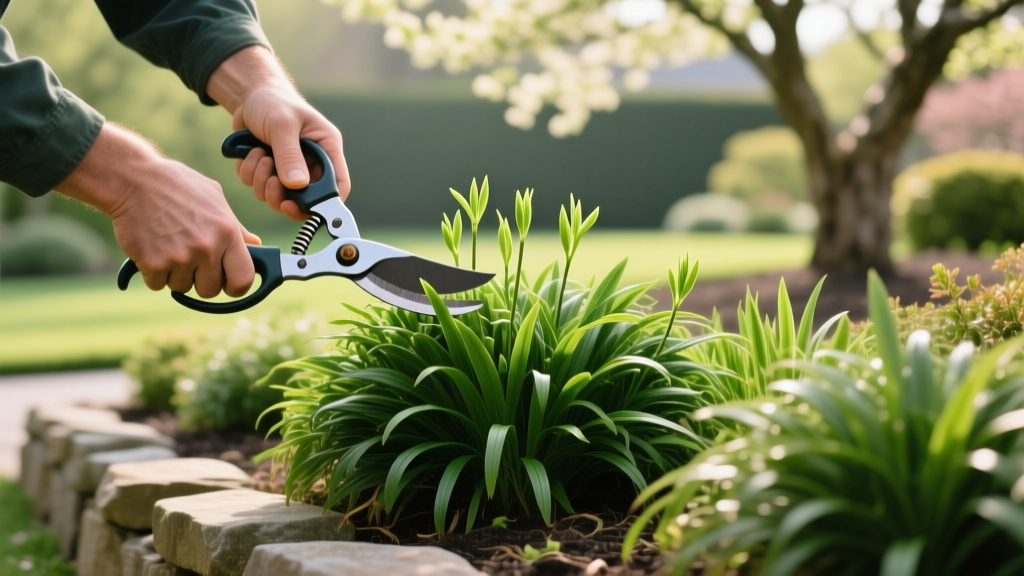
When and How to Prune Liriope for Healthier Spring Growth
The Biology of Liriope: Why Annual Rejuvenation is Non-Negotiable
Liriope, commonly known as monkey grass or lilyturf, is a workhorse in landscape borders and groundcover applications. However, leaving last year's foliage in place is one of the most common maintenance errors homeowners make. Whether you are growing the clumping Liriope muscari or the spreading Liriope spicata, annual rejuvenation pruning is critical for plant vigor.
As a monocot, liriope pushes new growth directly from the central crown at the soil line. If the previous year's necrotic (dead) foliage is not removed, it creates a physical barrier that strangles emerging shoots, resulting in a sparse, ragged appearance by mid-summer. More importantly, old foliage harbors overwintering spores for Colletotrichum species, the pathogen responsible for liriope anthracnose—a devastating fungal disease that causes rust-colored lesions and dieback. By executing a hard cutback in late winter, you physically remove the inoculum before the spring rains can spread it to new tissue.
According to the Clemson University Cooperative Extension, maintaining proper sanitation through annual pruning is the most effective cultural control for preventing severe anthracnose outbreaks without relying on preventative fungicide applications.
Choosing the Right Cutting Tools for the Job
The tool you select for pruning liriope should be dictated by the square footage of your planting bed and your tolerance for cleanup. While manual shears work for a few linear feet, larger landscapes require motorized efficiency.
| Tool Type | Best Application | Pros | Cons | Recommended Model |
|---|---|---|---|---|
| String Trimmer | Large, open groundcover beds | Extremely fast; easily cuts through thick, matted thatch | Throws mulch and debris everywhere; difficult to edge precisely | Echo SRM-225 (Gas) or Ego ST1510T (Battery) |
| Hedge Trimmer | Linear borders and walkways | Provides a clean, uniform cut height; minimal debris scatter | Heavier to operate; blades can jam on thick, woody base stems | STIHL HSA 56 (Cordless) |
| Manual Hedge Shears | Small patches and tight corners | Quiet; precise; inexpensive; no fuel or batteries required | Causes severe hand and wrist fatigue on jobs over 50 sq ft | Felco 322 Hedge Shears |
| Walk-Behind Mower | Massive, open-area monocultures | Fastest method; bags clippings simultaneously | High risk of scalping the crown if terrain is uneven | Honda HRX217 (Set to highest deck setting) |
Step-by-Step Rejuvenation Pruning Guide
Timing is the most critical variable when pruning liriope. You must execute the cutback after the hardest freezes of winter have passed, but before the new green shoots elongate more than 1 to 2 inches. In USDA Hardiness Zones 6 and 7, this window typically falls between late February and mid-March. In Zones 8 and 9, you may need to prune as early as late January.
Warning: The Crown Rot Danger Zone
Never scalp liriope down to the bare soil. Cutting into the actual crown tissue (the pale, bulbous base at the soil line) invites bacterial soft rot and crown rot. Always maintain a minimum cutting height of 2.5 to 3 inches above the soil grade.
The Execution Phase
- Rake the Bed First: Use a flexible leaf rake to pull out fallen leaves, twigs, and loose winter debris from within the liriope clumps. This prevents your trimmer from throwing hidden rocks or mulch.
- Set Your Height Guide: If using a string trimmer, rest the guard head on the mulch to maintain a consistent 3-inch height. If using a hedge trimmer, use the width of your hand (roughly 3 inches) from the soil line as a visual guide.
- Cut at a Slight Angle: When using manual or motorized shears, angle the blades slightly downward toward the center of the clump. This creates a subtle dome shape that sheds water away from the vulnerable center crown.
- Remove All Clippings: Do not leave the cut foliage in the bed. Rake it out immediately. Leaving decaying organic matter at the base of the plant creates a humid microclimate that accelerates fungal diseases.
Troubleshooting Common Liriope Pruning Mistakes
Even experienced landscapers make errors when managing aggressive groundcovers. Use this diagnostic matrix to identify and correct issues arising from improper pruning techniques.
| Symptom Observed in Spring | Root Cause | Corrective Action |
|---|---|---|
| New shoots have white, shredded, or blunt tips | Pruned too late; the trimmer sliced through emerging green tissue | Leave it alone. The damaged tips will grow out and be pushed above the canopy in 4-6 weeks. Do not re-cut. |
| Center of the clump is yellowing and mushy | Crown rot caused by burying the plant in heavy mulch or thick thatch after pruning | Pull back all mulch within 2 inches of the crown. Apply a copper-based fungicide (e.g., Bonide Liquid Copper) as a drench. |
| Leaf ends are heavily frayed and brown weeks after pruning | Dull trimmer blades crushed the vascular tissue rather than slicing it | Sharpen hedge trimmer blades with a flat file, or replace the string trimmer line with heavy-duty .095-inch nylon. |
| Patchy, uneven regrowth across the bed | Scalped some areas down to the dirt while leaving other areas too tall | Apply a balanced liquid fertilizer to stimulate uniform growth from the surviving lateral buds. |
Dividing vs. Pruning: Knowing the Difference
While annual pruning maintains the health of existing clumps, it does not solve the problem of a "dead center." As Liriope muscari ages (typically after 4 to 5 years), the center of the clump becomes woody, compacted, and stops producing foliage, resulting in a donut-shaped plant.
According to the NC State Extension Plant Database, when clumping liriope exhibits this dieback pattern, pruning alone is insufficient. The plant must be divided.
Pro-Tip for Division: Divide liriope in early spring, immediately after your annual pruning cutback. Use a sharp, flat-edged nursery spade to slice the clump into quarters. Discard the woody, dead center section, and replant the vigorous outer wedges, spacing them 12 to 18 inches apart to allow for mature spread.
Post-Pruning Care and Fertilization Protocol
Once the bed is pruned and cleared of debris, the plants require immediate nutritional support to fuel the rapid cellular division needed for spring emergence. Avoid high-nitrogen synthetic fertilizers (like 32-0-4), which can push weak, succulent growth that is highly susceptible to aphid damage and late-spring frost burn.
Instead, apply a slow-release, organic fertilizer with a balanced NPK ratio. Espoma Plant-tone (5-3-3) or Milorganite (6-4-0) are excellent choices. Apply at a rate of 4 pounds per 100 square feet of bed area. Broadcast the granules evenly over the cut crowns and water the bed deeply with 0.5 inches of irrigation to activate the microbial breakdown of the organic nutrients.
Finally, apply a fresh 1.5-inch layer of double-shredded hardwood mulch to suppress early spring weeds. Keep the mulch strictly 2 inches away from the direct center of the liriope crowns to ensure adequate air circulation and prevent moisture-related rot. Following this precise pruning and aftercare regimen will yield a dense, dark-green, disease-free liriope border by late May.

