
Tree Care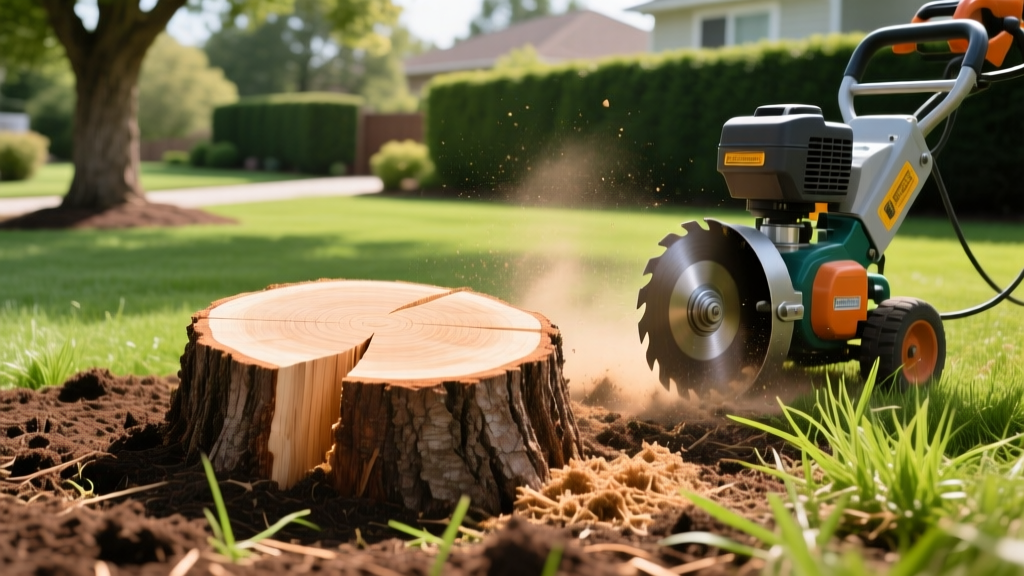
Removing Tree Stumps: DIY Methods vs. Professional Grinding Costs
Once a tree is felled, the remaining stump poses immediate logistical and ecological challenges for your landscape. Leaving it in place invites wood-boring pests, creates a tripping hazard, and complicates future mowing or landscaping projects. When it comes to removing tree stumps, homeowners generally face three distinct pathways: hiring a professional with heavy machinery, accelerating decay with chemical treatments, or relying on manual excavation. Each method carries vastly different costs, timelines, and physical demands.
The Hidden Liabilities of Ignoring a Tree Stump
Before evaluating removal techniques, it is critical to understand why stumps must be addressed. A decaying stump acts as a biological magnet. According to university extension research, untreated stumps are primary breeding grounds for Armillaria (honey fungus), a destructive root rot pathogen that can spread through the soil to infect nearby healthy trees and shrubs. Furthermore, stumps attract carpenter ants and subterranean termites, which may eventually migrate to your home's wooden structures. Removing the stump eliminates this localized food source and reclaims valuable yard space.
Method 1: Professional Stump Grinding (The Industry Standard)
Stump grinding is the most efficient and common method for removing tree stumps, utilizing a machine equipped with a high-torque rotating cutting wheel featuring carbide-tipped teeth. The grinder pulverizes the stump into small woodchips, typically reaching 8 to 12 inches below grade.
Equipment and Process
Professional arborists typically use track-driven or wheeled grinders like the Vermeer SC362 or Bandit 990XP. These machines can chew through dense hardwoods (like oak or hickory) in minutes. The operator sweeps the cutting wheel side-to-side, systematically reducing the wood to mulch. Importantly, grinding removes the main trunk base and the upper lateral roots, but it leaves the deeper taproot and far-reaching lateral roots in the soil to decay naturally over the next decade.
Pricing Breakdown
In 2026, the national average cost for professional stump grinding ranges from $3.00 to $5.00 per inch of diameter, measured at ground level. However, pricing structures almost always include a minimum service fee. Expect to pay a $75 to $150 minimum call-out charge, regardless of stump size, to cover equipment transport and fuel. Therefore, a single 20-inch maple stump might cost $125 total, while clearing five 20-inch stumps in the same yard could drop the per-stump average closer to $60 to $80 each due to mobilization efficiencies.
Method 2: Chemical Stump Removal (The Slow DIY Route)
If you have a high tolerance for delayed gratification and a limited budget, chemical removal is a viable alternative for removing tree stumps. This method does not dissolve the wood; rather, it accelerates the natural fungal decomposition process.
The Chemistry of Accelerated Decay
The active ingredient in commercial stump removers (such as Spectracide Stump Remover) is potassium nitrate (KNO3). Wood-decaying fungi require high nitrogen levels to break down lignin and cellulose. By saturating the stump with potassium nitrate, you create an optimal feeding environment for these microorganisms, reducing a 10-year natural decay cycle into roughly 4 to 8 weeks.
Step-by-Step Application Protocol
- Preparation: Use a chainsaw to cut the stump as close to the ground as safely possible. Freshly cut wood absorbs chemicals more effectively than dried, sealed wood.
- Drilling: Using a heavy-duty cordless drill and a 1-inch spade bit, bore holes into the top of the stump. Drill at a slight angle toward the center, reaching a depth of 10 to 12 inches. Space the holes in concentric rings, approximately 3 inches apart.
- Saturation: Pour the potassium nitrate granules into each hole until they are nearly full. Top off each hole with warm water to dissolve the granules and carry the nitrogen deep into the wood's vascular system.
- Sealing: Cover the stump with a dark plastic tarp, securing the edges with landscape staples. This traps moisture and heat, further accelerating fungal activity.
- Extraction: After 4 to 8 weeks, the wood will become spongy and soft. You can then break it apart with a mattock or axe and dig out the remaining fragments.
Method 3: Manual Extraction (The Sweat Equity Approach)
For stumps under 18 inches in diameter, or in areas where heavy machinery cannot access (such as fenced backyards or steep slopes), manual extraction is the most thorough method for removing tree stumps. This approach extracts the entire root ball, leaving no wood behind to decay.
Required Tooling
Do not attempt manual extraction with standard garden shovels. You will need specialized leverage and cutting tools:
- 72-inch Steel Digging Bar (15+ lbs): For fracturing compacted soil and prying heavy roots.
- Cutter Mattock: For severing smaller lateral roots and trenching.
- Reciprocating Saw with Pruning Blades: A high-torque cordless model (like the Milwaukee M18 Fuel) equipped with 9-inch bi-metal pruning blades to cleanly slice through roots up to 6 inches thick without binding in the dirt.
The Excavation Technique
Begin by digging a circular trench roughly 2 feet away from the base of the stump, creating a workspace. As you dig downward, expose the lateral roots. Use the reciprocating saw to sever these roots as they are uncovered. Once the lateral roots are cut, use the digging bar to wedge under the central root ball and lever it upward. The taproot will be the final anchor; sever it as deep as possible or use a heavy-duty come-along winch strapped to a nearby vehicle or heavy anchor to pull the stump free.
Cost, Time, and Effort Comparison Matrix
Selecting the right method depends entirely on your budget, timeline, and physical capability. The following matrix outlines the practical realities of each approach for an average 24-inch hardwood stump.
| Method | Estimated Cost | Time to Completion | Physical Effort | Best Use Case |
|---|---|---|---|---|
| Professional Grinding | $100 - $180 | 1 - 2 Hours | Minimal (Supervision) | Multiple stumps, large diameters, immediate landscaping needs. |
| Chemical Treatment | $15 - $25 | 4 - 8 Weeks | Low (Drilling/Pouring) | Small budgets, isolated stumps, no immediate rush. |
| Manual Extraction | $0 - $50 (Tool rental) | 3 - 6 Hours | Extreme | Small stumps, tight access areas, desire for total root removal. |
CRITICAL SAFETY PROTOCOL: Call Before You Dig
Before initiating any manual excavation or deep chemical drilling, you must contact your local utility locating service. In the United States and Canada, dialing 811 is a legal requirement. Utility companies will dispatch locators to mark underground gas, water, and fiber-optic lines for free. Striking a buried utility line with a digging bar or reciprocating saw can result in fatal injuries and tens of thousands of dollars in liability.
Before initiating any manual excavation or deep chemical drilling, you must contact your local utility locating service. In the United States and Canada, dialing 811 is a legal requirement. Utility companies will dispatch locators to mark underground gas, water, and fiber-optic lines for free. Striking a buried utility line with a digging bar or reciprocating saw can result in fatal injuries and tens of thousands of dollars in liability.
Managing the Aftermath: Woodchips and Soil Settling
The job is not finished once the wood is gone. How you manage the resulting void and debris dictates the long-term health of your lawn or garden bed.
The Nitrogen Robbery Effect
If you used a stump grinder, you will be left with a massive pile of fresh woodchips. Do not immediately use these chips as mulch around shallow-rooted plants or mix them directly into garden soil. Fresh woodchips have a carbon-to-nitrogen (C:N) ratio of approximately 400:1. As soil bacteria break down this high-carbon material, they consume massive amounts of ambient nitrogen, effectively starving nearby plants. Instead, use the chips for driveway pathways, or compost them in a dedicated pile for 12 to 18 months, adding high-nitrogen materials like grass clippings or urea to balance the ratio before using them in garden beds.
Filling the Void
When filling the hole left by the stump, use high-quality topsoil rather than the native clay-heavy subsoil you excavated. Because the buried root fragments will continue to decompose over the next few years, the soil will settle and sink. To prevent a depression from forming in your lawn, overfill the hole with topsoil, mounding it roughly 2 to 3 inches above the surrounding grade. Water it heavily to initiate settling, add grass seed or sod, and monitor the area for the first year, topping it off with additional soil as needed.

