
Tree Care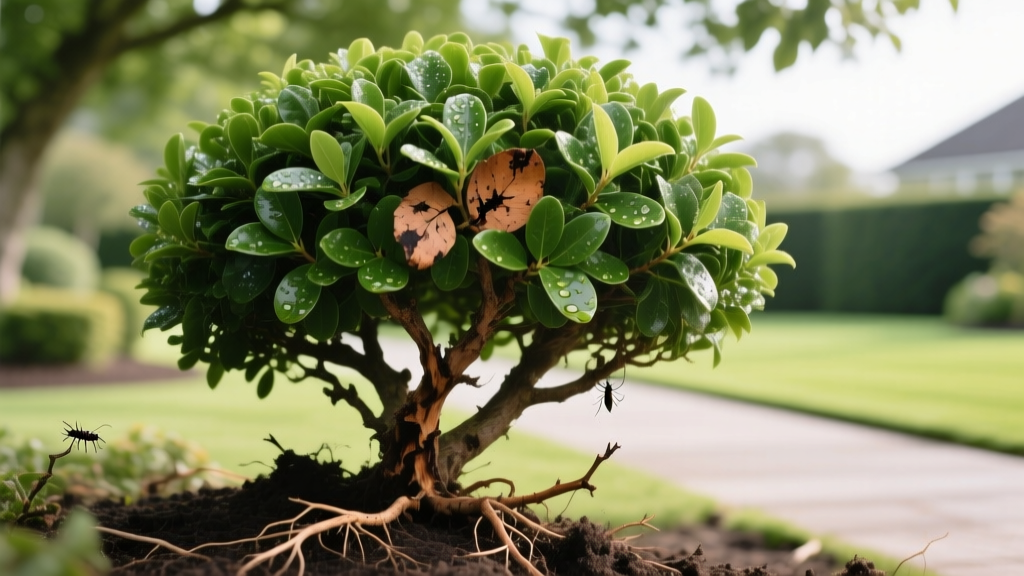
Shrub Topiary Rescue: Diagnosing and Fixing Brown Patches & Dieback
The Topiary Triage Framework
Maintaining a precise shrub topiary requires more than routine shearing. When geometric forms degrade, develop brown patches, or suffer asymmetrical dieback, the root cause is rarely the pruning itself. It is almost always a micro-climate, root-level, or pathogenic failure exacerbated by the dense canopy structure. Before applying fungicides or radically altering the shape, run through this three-step diagnostic triage to identify the exact failure mode.
- Canopy Density Test: Part the outer foliage. If the interior is completely devoid of green tissue and light cannot penetrate past the outer 1-inch shell, you have a Photosynthetically Active Radiation (PAR) deprivation issue.
- Root Flare Inspection: Brush away mulch at the base. If the root flare is buried or you see sawdust/frass near the soil line, suspect girdling roots or vole damage.
- Pathogen Swab: Look for distinct margins between healthy and dead tissue. Black streaking on the inner bark indicates vascular wilt or blight, requiring immediate chemical intervention.
Symptom 1: Interior Browning and Needle/Leaf Drop
Diagnosis: Light Deprivation & Fungal Pathogens
The most common failure in shrub topiaries—particularly Buxus (Boxwood) and Taxus (Yew)—is the "hollow center" effect. Repeated mechanical shearing creates a dense outer canopy shell that is often only 0.5 to 1 inch thick. This shell blocks sunlight from reaching the interior scaffold branches. Once the interior leaves drop due to light starvation, the dead organic matter accumulates, trapping moisture and creating an ideal incubator for fungal pathogens like Volutella buxi (Boxwood blight/canker).
The Fix: Selective Thinning & Targeted Fungicide
Stop using mechanical hedge trimmers immediately. Switch to high-quality bypass pruners, such as the Felco 2 or ARS VS-8R. You must perform "windowing" or selective thinning. Remove 15% to 20% of the outer branches, cutting them all the way back to the main interior scaffold. This opens micro-windows that allow light and airflow into the core.
After thinning, clear all dead debris from the interior using a specialized blower or a soft-bristled brush. If you observe salmon-pink spore masses or dark brown leaf spots, apply a preventative fungicide containing Chlorothalonil or Tebuconazole. Apply at a rate of 2 to 3 fluid ounces per gallon of water, ensuring thorough coverage of the newly exposed interior branches. According to Penn State Extension, rotating active ingredients is critical to prevent pathogen resistance.
Symptom 2: Asymmetrical Dieback (One Side Dead)
Diagnosis: Root Girdling, Vole Damage, or Sun Scald
When a topiary dies back on exactly one side—often the side facing a structure or a prevailing wind—the issue is subterranean or environmental. Asymmetrical dieback is frequently caused by girdling roots that are strangling the vascular tissue on one side of the trunk, or by voles chewing the cambium layer under the snow line during winter. If the topiary is near a reflective surface (like a white fence or south-facing brick wall), winter sun scald can also desiccate the foliage on that specific exposure.
The Fix: Root Crown Excavation and Physical Barriers
For girdling roots, you must expose the root flare. Renting an AirSpade (pneumatic soil excavation tool) costs between $150 and $250 per day and is the safest way to remove compacted soil without severing fine feeder roots. Alternatively, hire a certified arborist for a root crown excavation, which typically costs $300 to $500 per tree. Once exposed, use a Silky Gomboy 210 pull saw to cleanly sever any roots wrapping around the main trunk.
If the cambium has been chewed by voles, the damage is often irreversible for that specific quadrant. To protect the remaining topiary, install a cylinder of 1/4-inch galvanized hardware cloth around the base. Bury the bottom edge 4 to 6 inches deep and extend it 18 inches above the expected snow line to physically block rodent access.
Symptom 3: Loss of Geometric Definition (The "Blob" Effect)
Diagnosis: Improper Shearing Timing & Apical Dominance Failure
Topiaries lose their crisp edges and turn into amorphous blobs when shearing is done at the wrong time of year, or when the gardener fails to respect the plant's apical dominance. Shearing in late summer or early fall stimulates a flush of tender new growth that will be killed by the first frost, resulting in dieback that ruins the geometric lines.
The Fix: Hand-Pruning and Seasonal Timing
Restrict major shaping to late spring (after the first flush of growth has hardened off) and early summer. For crisp lines on complex shapes like spirals or animals, abandon powered trimmers. Use dedicated topiary shears with a straight or slightly curved blade, such as the ARS HS-KR-1000. When refining the shape, always cut at a slight angle so the top of the topiary is slightly narrower than the base. This taper ensures that lower branches receive adequate sunlight, preventing the base from thinning out and destroying the bottom-heavy geometry of cones and pyramids.
Shrub Topiary Species Vulnerability Matrix
Not all shrubs respond to topiary stress equally. Use this matrix to understand the specific failure modes of common topiary species and adjust your maintenance accordingly.
| Species | Common Topiary Failure | Primary Pathogen / Pest | Recovery Time |
|---|---|---|---|
| Buxus sempervirens (Boxwood) | Interior hollowing, sudden branch drop | Boxwood Blight (Calonectria pseudonaviculata) | 12–24 months |
| Taxus baccata (Yew) | Root rot from poor drainage, brown needles | Phytophthora root rot | 6–12 months |
| Ligustrum (Privet) | Rapid loss of shape, scale insect infestation | Euonymus scale (on related species) | 3–6 months |
| Ilex crenata (Japanese Holly) | Black root rot, severe winter desiccation | Thielaviopsis basicola | 18–36 months |
CRITICAL WARNING: Boxwood Blight Protocol
If you diagnose Boxwood Blight (characterized by dark brown spots on leaves and black streaking on stems), do not compost the clippings. Bag them in heavy-duty contractor trash bags and send them to a landfill. Sterilize your pruning tools with a 10% bleach solution or 70% isopropyl alcohol between every single cut to prevent spreading the spores to healthy sections of the topiary.
If you diagnose Boxwood Blight (characterized by dark brown spots on leaves and black streaking on stems), do not compost the clippings. Bag them in heavy-duty contractor trash bags and send them to a landfill. Sterilize your pruning tools with a 10% bleach solution or 70% isopropyl alcohol between every single cut to prevent spreading the spores to healthy sections of the topiary.
Advanced Soil & Root Interventions
When a shrub topiary fails to respond to canopy thinning and pest control, the issue is almost certainly soil compaction or nutrient lockout. Topiaries are often planted in high-traffic lawn areas where soil becomes heavily compacted, restricting oxygen to the root zone.
Implement a radial trenching technique. Using a 2-inch auger, drill holes 12 to 18 inches deep in a radial pattern starting 2 feet from the trunk and extending to the drip line. Fill these holes with a mixture of expanded shale, composted pine bark, and a mycorrhizal inoculant (such as MycoApply Endo). This reduces soil bulk density, improves water infiltration, and introduces beneficial fungi that expand the root system's absorptive capacity. For detailed soil amendment strategies, refer to the diagnostic tools provided by the Missouri Botanical Garden Plant Doctor.
Frequently Asked Questions
Can I use hedge trimmers on a newly planted shrub topiary?
No. For the first two years, use hand pruners to selectively shape the plant and encourage deep interior branching. Hedge trimmers will create a dense outer shell too early, starving the interior of light before the scaffold structure has fully established.
Why is my boxwood topiary turning orange in the winter?
Winter bronzing is a natural defense mechanism in some boxwood cultivars (like 'Winter Gem') to protect against UV radiation and cold temperatures. However, if the orange color is accompanied by dry, brittle leaves, it is winter desiccation. Apply an anti-desiccant spray like Wilt Stop in late November when temperatures are above 40°F to seal the stomata and prevent moisture loss.
How often should I fertilize a formal topiary?
Over-fertilizing causes rapid, weak, leggy growth that ruins the topiary's shape. Apply a slow-release, balanced fertilizer (such as a 10-10-10 or 14-14-14 formulation) only once a year in early spring. Use a rate of 1 pound of actual nitrogen per 1,000 square feet of root zone area, as recommended by the University of Maryland Extension. Avoid high-nitrogen synthetic fertilizers in late summer.

