
Tree Care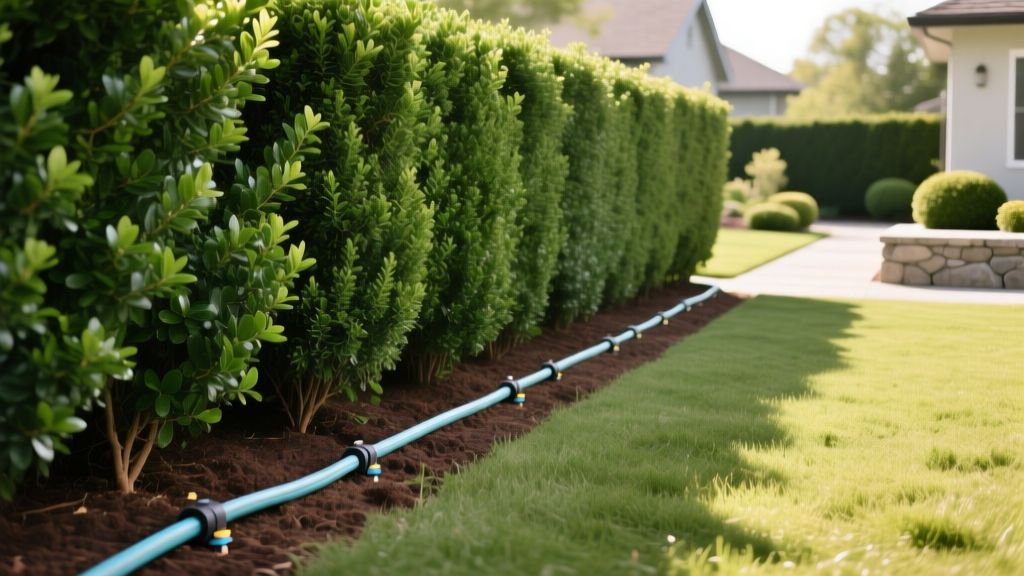
Optimal Soaker Hose Layout for Arborvitae Privacy Hedges
Arborvitae (Thuja occidentalis and Thuja plicata) are notorious for masking drought stress until it is too late. By the time the interior foliage turns brown and sheds, the shallow root system has already suffered severe damage. While overhead sprinklers waste water on the dense canopy—inviting fungal pathogens like Cercospora blight—a properly configured soaker hose for arborvitae delivers moisture directly to the critical root zone. This guide details the exact hydraulic layout, component specifications, and seasonal runtimes required to maintain a thriving privacy hedge.
The Root Science: Why Arborvitae Require Slow Drip Irrigation
Unlike deep-rooted oaks or pines, arborvitae possess a dense, fibrous, and remarkably shallow root system. According to the University of Minnesota Extension, the vast majority of an arborvitae's feeder roots reside in the top 12 to 18 inches of soil, extending slightly beyond the drip line.
Because these roots are near the surface, they are highly susceptible to rapid drying from sun and wind. However, they also drown easily in poorly draining clay soils. A soaker hose operates at a low flow rate (typically 0.6 gallons per hour per foot), allowing water to percolate slowly downward via capillary action rather than running off the surface. This slow saturation perfectly matches the absorption rate of the arborvitae root profile.
Essential System Components and Specifications
Connecting a raw soaker hose directly to your outdoor spigot is the most common installation mistake. Municipal water pressure averages 40 to 60 PSI, which will blow out the seams of a porous hose and create uneven watering. Build your supply line in this exact order:
- Spigot Timer: Automates the schedule (e.g., Orbit 94865, approx. $35).
- Vacuum Breaker / Backflow Preventer: Prevents contaminated soil water from siphoning back into your home's drinking supply.
- 200-Mesh Filter: Soaker hoses have microscopic pores that clog easily with hard water minerals and sediment. A 200-mesh screen ($8-$12) is mandatory.
- Pressure Regulator: Reduces line pressure to 10-15 PSI. Look for a brass 15-PSI model ($10-$15) rather than cheap plastic variants that crack under UV exposure.
- 1/2-Inch Poly Tubing: Use solid poly tubing to transport water from the spigot to the start of the hedge without leaking.
- 1/2-Inch Soaker Hose: Recycled rubber or porous polyethylene. Expect to pay $15-$25 for a high-quality 50-foot roll.
Pro Tip: Never exceed 50 feet of continuous soaker hose on a single line. Beyond 50 feet, pressure drops significantly, resulting in heavy weeping at the spigot end and dry soil at the far end. For hedges longer than 50 feet, run solid poly tubing down the center and use a manifold to branch off multiple 50-foot soaker segments.
Step-by-Step Soaker Hose Layout for Hedges
Laying the hose in a straight line directly against the trunks guarantees crown rot and leaves the outer feeder roots parched. Follow this snaking layout pattern for optimal coverage:
1. Maintain Trunk Clearance
Keep the hose at least 4 to 6 inches away from the main trunk of each arborvitae. Piling wet mulch and water directly against the bark invites Phytophthora root rot and vole damage during winter.
2. The Serpentine Loop
Weave the hose in a shallow "S" or serpentine pattern down the length of the hedge bed. Ensure the loops extend 12 inches past the outermost foliage (the drip line) on both sides. The roots extend further horizontally than the canopy.
3. Anchor and Mulch
Use 6-inch metal landscape stakes every 4 feet to hold the hose in place; soil expansion and frost heave will push unanchored hoses to the surface over time. Once pinned, cover the hose with 2 to 3 inches of shredded hardwood mulch. This shields the rubber from UV degradation—which cuts the hose lifespan from 2 years to 6+ years—and reduces surface evaporation by up to 30%.
Calculating Runtime Based on Soil Type
Arborvitae generally require 1 to 1.5 inches of water per week during the growing season. Because soaker hoses do not provide uniform coverage like sprinklers, we calculate runtime based on soil infiltration rates. The Michigan State University Extension emphasizes that deep, infrequent watering promotes stronger root structures than daily shallow sprinkling.
| Soil Type | Infiltration Rate | Runtime (per 50ft section) | Summer Frequency |
|---|---|---|---|
| Heavy Clay | 0.5 inches / hour | 2.5 to 3 hours | 1x per week |
| Loam / Mixed | 1.0 inch / hour | 1.5 to 2 hours | 2x per week |
| Sandy / Fast-Draining | 2.0+ inches / hour | 45 to 60 minutes | 3x per week |
Warning: The Tuna Can Test
To verify your specific flow rate, place three empty tuna cans at the beginning, middle, and end of the soaker hose run. Run the system for 60 minutes. Measure the water depth in the cans. If the end can has less than half the water of the starting can, your line is too long or your pressure is too low.
To verify your specific flow rate, place three empty tuna cans at the beginning, middle, and end of the soaker hose run. Run the system for 60 minutes. Measure the water depth in the cans. If the end can has less than half the water of the starting can, your line is too long or your pressure is too low.
Common Failure Modes and Troubleshooting
Even well-designed soaker hose arborvitae systems degrade if maintenance is ignored. Watch for these specific failure points:
- Mineral Calcification: If you have hard water, calcium carbonate will plug the microscopic pores within 12 months. Fix: Disconnect the hose, cap one end, and flush it with a 50/50 mixture of white vinegar and water for 30 minutes once a year.
- Root Intrusion: Arborvitae roots will actively seek out the moisture weeping from the hose, eventually growing into the pores or crushing the hose. Fix: Lift and reposition the hose 2 inches to the left or right every other spring to break root adhesions.
- Winter Freeze Cracking: Water left inside the hose expands when frozen, splitting the rubber. Fix: See the winterizing section below.
Seasonal Watering and Winter Desiccation
Arborvitae watering is not a "set it and forget it" summer task. The most critical watering window for evergreens is actually late autumn.
Spring and Summer
Rely on the soil-type chart above. During extreme heat waves (above 90°F for consecutive days), increase runtime by 25%, but do not increase frequency. Deep saturation is the goal.
The Critical Fall Hydration Window
Arborvitae continue to transpire moisture through their needles all winter, especially when hit by dry, freezing winds. If the ground freezes while the root zone is dry, the plant cannot replace lost moisture, leading to "winter burn" (brown, dead foliage on the windward side). Continue running your soaker hose weekly until the ground completely freezes solid, usually late November or early December in northern zones.
Winterizing the Line
Before the first hard freeze, turn off the spigot and disconnect the timer, filter, and pressure regulator (store these indoors). Use an air compressor set to a maximum of 50 PSI to blow out the remaining water from the soaker lines. Higher PSI will rupture the porous rubber. Leave the hose caps off to allow any residual condensation to drain over the winter.
Frequently Asked Questions
Can I bury the soaker hose under the soil?
No. Standard porous soaker hoses are not rated for sub-surface burial; soil pressure will collapse the hose, and roots will rapidly infiltrate it. Always lay them on top of the soil and cover with 2-3 inches of organic mulch.
My arborvitae are on a slope. Will a soaker hose work?
Standard soaker hoses will leak heavily at the bottom of a slope due to gravity-induced pressure buildup. For slopes greater than a 10% grade, switch to pressure-compensating (PC) drip emitter lines with 1-gallon-per-hour emitters spaced every 12 inches.
How do I know if I am overwatering?
Overwatered arborvitae often exhibit yellowing at the tips of the newest growth, and the soil will smell sour or anaerobic. If you dig down 6 inches and the soil forms a tight, muddy ball that drips water when squeezed, you are overwatering. Reduce runtime by 30%.

