
Tree Care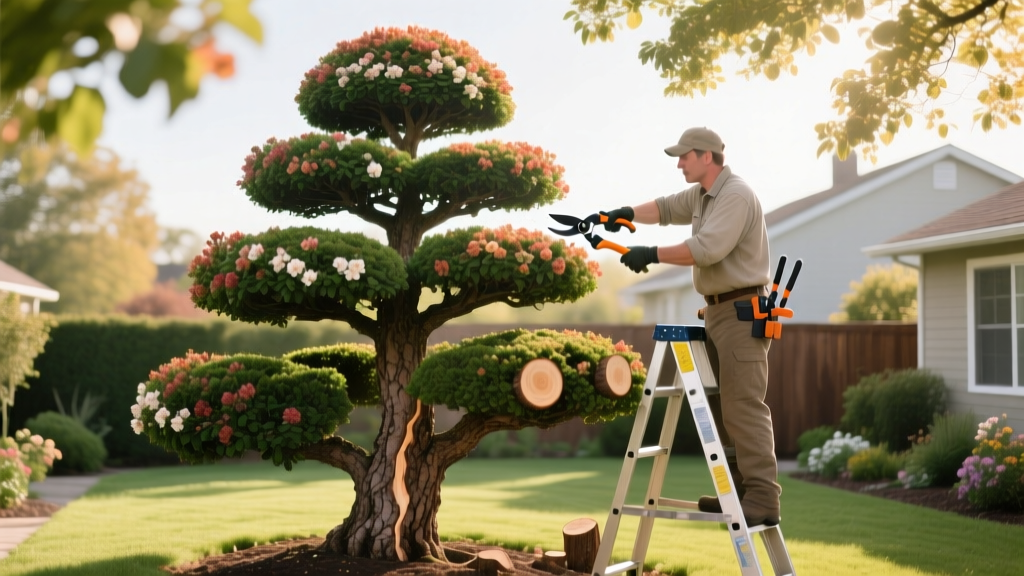
How to Train and Prune a Multi-Tiered Shaped Tree in Your Yard
The Architecture of a Multi-Tiered Shaped Tree
Creating a multi-tiered shaped tree—often referred to as a poodle tier, pom-pom topiary, or niwaki-style standard—requires manipulating a plant's natural apical dominance. Unlike standard shade trees that are pruned for clearance and health, a shaped tree is pruned to restrict growth into distinct, horizontal foliage pads (poms) separated by bare trunk sections. This process takes three to five years to establish from a standard nursery sapling, but it yields a high-end architectural focal point that typically costs $400 to $800 if purchased mature from a specialty nursery in 2026.
The fundamental biological requirement for this technique is adventitious back-budding. The species you choose must be capable of pushing new growth from old, bare wood when exposed to light. Conifers like pines generally lack this ability on old wood, making them poor candidates for beginners, while junipers, yews, and broadleaf evergreens like privet excel at it.
Species Selection Matrix for Shaping
Not every tree can withstand the rigorous pruning required to maintain a shaped tree. According to the Royal Horticultural Society (RHS), small-leaved, dense evergreens are the gold standard for topiary and tiered shaping. Below is a comparison of the most reliable species for homeowner shaping projects.
| Species | Common Name | Growth Rate | USDA Hardiness | Shaping Difficulty |
|---|---|---|---|---|
| Juniperus chinensis 'Spartan' | Spartan Juniper | Medium (12-18 in/yr) | 4-9 | Beginner |
| Taxus baccata | English Yew | Slow (6-12 in/yr) | 6-7 | Intermediate |
| Ligustrum japonicum | Japanese Privet | Fast (24+ in/yr) | 7-10 | Beginner |
| Ilex crenata | Japanese Holly | Slow-Medium | 5-8 | Intermediate |
Essential Tools and Materials
Do not use hedge shears for the structural training phase. Shears crush vascular tissue and promote disease. You need precision tools to make clean cuts that heal rapidly.
- Bypass Pruners: Felco 2 or ARS VS-8Z. Must be bypass (scissor-action), never anvil.
- Wire: 14-gauge and 10-gauge aluminum bonsai wire. Aluminum is malleable and forgiving; copper is too stiff for thick landscape branches and can girdle the bark if left unmonitored.
- Stakes: 1/2-inch diameter bamboo stakes, 6 feet tall, for central leader support.
- Grafting Tape: Parafilm or green polyethylene tape to protect bark from wire bite.
- Concave Cutter: For removing thick, unwanted structural branches flush with the trunk without leaving a stub.
Step-by-Step Training Process (Years 1-3)
Year 1: Establishing the Central Leader and Tier Placement
Start in late winter or early spring before the first flush of growth. Select a healthy, 5-to-6-foot nursery sapling with a straight central trunk.
- Clear the Trunk: Remove all lateral branches from the bottom 18 to 24 inches of the trunk. Make cuts at a 45-degree angle, exactly 1/4 inch above the branch collar. Do not cut flush into the trunk, as this destroys the branch collar's natural defense zone, a critical principle emphasized by Penn State Extension.
- Select the Tiers: Identify 3 to 4 strong, laterally growing branches spaced 18 to 24 inches apart vertically. These will become your foliage pads. Remove all other lateral branches between these selected tiers.
- Stake the Leader: Drive a bamboo stake 12 inches into the soil next to the trunk. Use soft nursery tie tape to secure the trunk to the stake every 12 inches to ensure perfectly vertical growth.
Year 2: Wiring and Bending the Foliage Pads
The goal in Year 2 is to reposition the selected lateral branches from an upward angle to a strictly horizontal or slightly downward angle. This slows the sap flow to the tip and encourages lateral back-budding.
- Protect the Bark: Wrap the base of the target branch with grafting tape to prevent the wire from cutting into the cambium layer as the branch thickens.
- Apply the Wire: Anchor your 10-gauge aluminum wire into the soil or wrap it securely around the main trunk. Wrap the wire around the lateral branch at a 45-degree angle. Keep the coils snug but not tight.
- Bend the Branch: Hold the branch with both hands, placing your thumbs on the outside of the curve. Apply slow, steady pressure to bend the branch downward until it is horizontal. If you hear cracking, stop immediately; lower it only as far as the wood allows.
Warning: The Girdling Risk
Aluminum wire left on a growing branch for more than 12 to 18 months will bite into the bark, girdling the phloem and killing the branch. Inspect your wired branches every spring. If the wire is pressing into the bark, remove it by cutting it off with wire cutters—do not attempt to unwind it, as this will snap the newly shaped branch.
Aluminum wire left on a growing branch for more than 12 to 18 months will bite into the bark, girdling the phloem and killing the branch. Inspect your wired branches every spring. If the wire is pressing into the bark, remove it by cutting it off with wire cutters—do not attempt to unwind it, as this will snap the newly shaped branch.
Year 3: Refining the Poms and Pinching
By Year 3, your horizontal branches will have pushed new vertical growth. Now you must build the density of the foliage pads.
- Pinching vs. Shearing: Never use mechanical shears on junipers or yews. Shearing cuts needles in half, causing them to turn brown and die, creating a 'dead zone' inside the canopy where light cannot penetrate. Instead, use your fingers or precision pruners to pinch or snip the soft, new growth tips.
- Thinning: Remove inward-growing shoots and downward-hanging twigs from the bottom of the horizontal branches. The finished foliage pad should look like a flat, slightly convex cloud, with an empty space of clear air between the bottom of one pad and the top of the pad below it.
Ongoing Maintenance and Seasonal Pruning Schedule
Maintaining a shaped tree requires a strict seasonal schedule. According to UMass Amherst Extension, timing your pruning to the plant's natural growth cycles prevents stress and disease vulnerability.
| Season | Action Required | Objective |
|---|---|---|
| Early Spring (Pre-flush) | Structural pruning, wire removal, deadwood extraction. | Direct energy into selected buds; prevent wire girdling. |
| Late Spring (Post-flush) | Pinch new candle growth (especially on pines/yews). | Control elongation; force secondary lateral budding. |
| Mid-Summer | Light thinning and interior cleaning. | Improve airflow; prevent fungal issues like Phomopsis blight. |
| Late Fall | Avoid heavy pruning; only remove broken limbs. | Prevent winter desiccation and frost cracking on fresh cuts. |
Cost Breakdown: DIY Training vs. Buying Mature
Shaped trees carry a massive premium in the landscaping market due to the years of skilled labor required. Here is a realistic cost comparison for a 6-foot, 3-tier Juniper standard in 2026.
- DIY from Standard Nursery Stock: $85 - $140. Includes a 5-foot unshaped 'Spartan' Juniper in a 15-gallon pot ($60-$90), aluminum wire ($25), and bypass pruners ($35).
- Professional Nursery Purchase (Pre-shaped): $450 - $850. Prices spike based on the age of the topiary and the tightness of the foliage pads. Specimen trees with 10+ years of training easily exceed $1,200.
- Professional Maintenance Service: $75 - $150 per visit (bi-annual). Topiary specialists charge premium hourly rates ($100-$150/hr) because shaping requires artistic precision, not just hedge trimming.
Frequently Asked Questions
Can I shape a deciduous tree like a Maple or Crepe Myrtle into tiers?
While you can technically prune them into standard forms (a single trunk with a rounded canopy on top), creating distinct, bare-trunk horizontal tiers is highly discouraged for deciduous trees. Without leaves in the winter, the structural wiring and heavy pruning scars look jarring and unnatural. Furthermore, deciduous trees bleed sap heavily if pruned in late winter, and their rapid, coarse spring growth ruins the clean lines of a tiered pad within weeks. Stick to fine-textured evergreens.
My shaped tree has a 'dead zone' in the middle of the foliage pad. How do I fix it?
Dead zones occur when the outer canopy becomes too dense, blocking sunlight from reaching the interior branches, causing them to abort their needles. To fix this, you must aggressively thin the outer edges of the pom. Pluck out 20% to 30% of the outer green growth to allow dappled sunlight to hit the bare interior wood. If the interior wood is completely brown and brittle, it is dead and will not back-bud; you will need to prune the branch back to a living lateral node and restart the pad building process.
How do I protect my shaped tree from heavy snow loads?
Flat, horizontal foliage pads act like shelves, catching heavy snow and ice, which can snap the carefully trained branches. In late autumn, wrap the individual tiers loosely with green burlap or apply a flexible netting to hold the branches together. Alternatively, use a soft broom to gently brush snow off the pads immediately after a storm. Never shake the trunk violently to dislodge snow, as the sudden kinetic shock will snap frozen, brittle branches.

