
Tree Care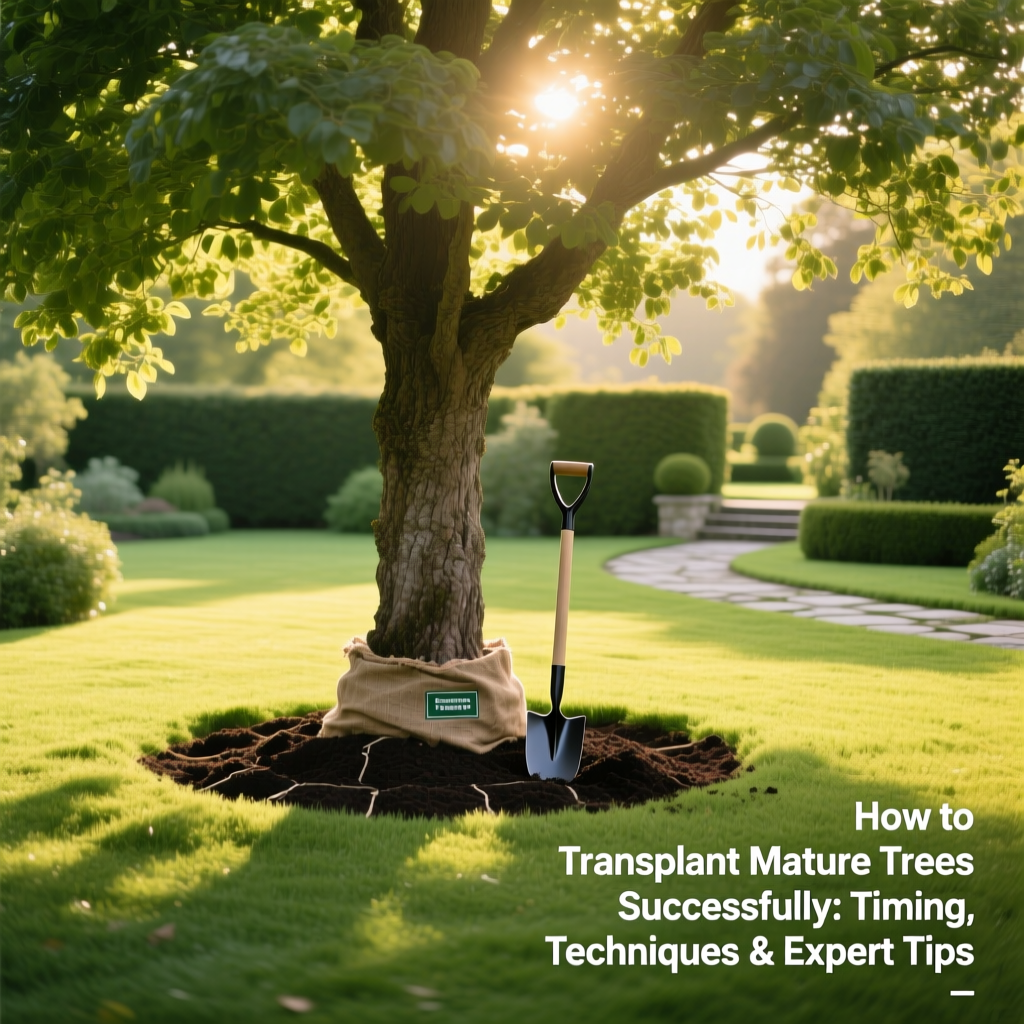
How to Transplant Mature Trees Successfully: Timing, Techniques & Expert Tips
Lisa ThompsonPublished
Transplanting a mature tree is one of the most rewarding & challenging tasks a homeowner or landscaper can undertake. Whether you are relocating a beloved shade tree to a better spot in your yard, saving a specimen from a construction zone, or simply redesigning your landscape, moving an established tree requires careful planning, precise timing, & proven techniques. Unlike young saplings, mature trees have extensive root systems & established growth patterns that make them more vulnerable to transplant shock. However, with the right knowledge & preparation, you can give your tree the best possible chance of thriving in its new location.
This comprehensive guide covers everything you need to know about transplanting mature trees — from choosing the ideal season & preparing the root ball to digging, moving, planting, & providing long-term aftercare. We will also address common diseases & problems that can arise during the process & answer frequently asked questions. For more tips on maintaining a healthy landscape, explore our complete lawn care guides & related tree care resources.
Understanding When to Transplant: Timing Is Everything
The single most critical factor in successfully transplanting a mature tree is timing. Trees have natural growth cycles, & moving them during the wrong phase can lead to severe transplant shock, stunted growth, or even death. Understanding dormancy cycles & seasonal considerations will dramatically improve your success rate.
The Dormant Season: Your Best Window
The ideal time to transplant most mature deciduous trees is during their dormant season — typically late fall after leaf drop or early spring before bud break. During dormancy, the tree's metabolic processes slow significantly, meaning it requires less water & nutrients while it focuses energy on root establishment rather than supporting foliage. This natural rest period gives the tree a head start in its new location before the demands of the growing season begin.
For deciduous trees such as oaks, maples, elms, & birches, aim for the window between late autumn & very early spring when the ground is still workable but the tree is fully dormant. In colder climates, avoid transplanting when the ground is frozen solid, as this makes digging nearly impossible & can damage roots.
Evergreen Trees: Slightly Different Rules
Evergreen trees — including pines, spruces, firs, & cedars — do not go fully dormant in the same way deciduous species do. The best time to transplant evergreens is in early spring, just before new growth begins, or in early fall when temperatures have cooled but the ground remains warm enough for root growth. Avoid transplanting evergreens during the heat of summer or the depths of winter, as both extremes place enormous stress on the tree.
Regional Climate Considerations
Your local climate plays a major role in determining the exact transplanting window. In warmer southern regions, winter transplanting is often ideal because mild temperatures allow roots to establish before the intense summer heat. In northern regions with harsh winters, early spring transplanting is generally safer because it avoids the risk of frost heaving & gives the tree an entire growing season to recover. Always check your local frost dates & soil conditions before scheduling your transplant.
Root Pruning Months in Advance
One of the most effective techniques for improving transplant success is root pruning six to twelve months before the actual move. This process involves cutting a circle around the tree's root zone to encourage the development of new, compact feeder roots within the root ball. Root pruning in the spring for a fall transplant — or in the fall for a spring transplant — gives the tree time to regenerate a dense network of absorbing roots that will travel with it to the new location. This technique is especially important for larger mature trees that have spread their roots far beyond the drip line.
Step-by-Step Techniques for Transplanting Mature Trees
Once you have identified the right timing, the physical process of transplanting requires careful execution. Each step — from preparation to planting — must be performed methodically to minimize stress & maximize the tree's chances of survival.
Step 1: Assess the Tree & Plan the Move
Before any digging begins, evaluate whether the tree is a good candidate for transplanting. Healthy trees with no significant disease, structural damage, or severe pest infestations are the best candidates. Consider the tree's size, species, & current health. Some species transplant more readily than others — for example, red maples, elms, & bald cypress tend to handle transplanting well, while species like black walnuts, hickories, & many oaks with deep taproots are more difficult. If you are unsure, consulting with a certified arborist is always a wise investment.
Also plan the new planting site carefully. Ensure the location provides appropriate sunlight, drainage, & space for the tree's mature canopy & root system. Consider proximity to structures, utilities, lawn maintenance areas, & other plants. The new hole should be prepared before you dig up the tree to minimize the time the roots are exposed.
Step 2: Determine the Root Ball Size
A general rule of thumb for root ball size is to allow 10 to 12 inches of root ball diameter for every inch of trunk diameter measured at chest height. For example, a tree with a 4-inch trunk would need a root ball approximately 40 to 48 inches in diameter. Larger root balls preserve more of the tree's root system but are significantly heavier & harder to move. For mature trees with trunk diameters exceeding 6 inches, you will likely need professional equipment such as a tree spade, crane, or heavy-duty rigging system.
Step 3: Dig the New Hole First
Always dig the new planting hole before removing the tree from its current location. The hole should be two to three times wider than the root ball but no deeper than the root ball's height. Planting too deep is one of the most common mistakes in tree transplanting & can lead to root suffocation, trunk rot, & eventual death. The top of the root ball should sit slightly above the surrounding soil grade — approximately one to two inches high — to account for settling. If your yard has soil composition challenges, amend the backfill soil accordingly to ensure proper drainage & nutrition.
Step 4: Digging & Wrapping the Root Ball
Using a sharp spade, cut a trench around the marked root ball circle, working your way down at a slight angle to create a tapered, ball-shaped mass of roots & soil. As you dig, you will encounter larger structural roots that must be cleanly severed with pruning shears or a pruning saw — never tear or rip roots, as jagged wounds are slow to heal & invite disease. Once the root ball is fully undercut & free, wrap it tightly in burlap & secure it with twine or wire to keep the soil intact during the move. Keeping the root ball together is absolutely essential — if the soil crumbles away from the roots, the tree loses most of its fine feeder roots & its chances of survival drop dramatically.
Step 5: Moving & Placing the Tree
For small to medium root balls, a team of strong helpers with a sturdy tarp or heavy-duty straps may suffice. For larger trees, you will need mechanical assistance such as a front-end loader, crane, or professional tree spade. Always lift the tree by the root ball — never by the trunk — as lifting by the trunk can separate the root ball from the tree & cause catastrophic root damage. Transport the tree to its new location carefully, keeping the root ball wrapped & moist. Place the tree in the prepared hole, checking orientation & depth. Remove any synthetic wrappings (plastic, nylon twine) but natural burlap can be left in place as it will decompose over time. Peel back the top few inches of burlap from the top of the root ball to expose the root flare.
Step 6: Backfilling & Watering
Backfill the hole with the native soil you removed, adding it in layers & gently tamping to eliminate large air pockets. Avoid compacting the soil too tightly, as roots need oxygen. Water thoroughly as you backfill to help settle the soil around the root ball. Once the hole is filled, create a shallow berm or watering ring around the outer edge of the planting hole to help direct water toward the root zone. Apply a two- to four-inch layer of organic mulch over the root zone — but keep it several inches away from the trunk to prevent rot. Proper mulching techniques are covered in detail in our tree care section.
Pruning Strategies Before & After Transplanting
Pruning is an important component of the transplanting process, but it must be done strategically. Over-pruning can weaken the tree, while under-pruning can leave an imbalance between the reduced root system & the canopy it must support.
Pre-Transplant Pruning
Before transplanting, focus on removing dead, diseased, damaged, or crossing branches. This structural pruning reduces the tree's overall water demand & eliminates limbs that could break during the move. However, avoid heavy canopy reduction — the tree needs its leaves (once they emerge) to produce energy for root recovery. A light thinning of up to 15 to 20 percent of the canopy is usually sufficient. Remove any low-hanging branches that could interfere with rigging or transport.
Post-Transplant Pruning
After the tree is in its new location, resist the urge to prune heavily. The tree needs every leaf it can produce to fuel root regeneration. Limit post-transplant pruning to removing any branches that were damaged during the move. Do not top the tree or strip it of foliage — this is a common mistake that severely weakens transplanted trees. Wait until the tree has gone through at least one full growing season in its new location before performing any significant pruning. For detailed pruning guidance, see our guide on pruning trees correctly.
Crown Reduction vs. Thinning
If canopy reduction is necessary to balance the root-to-shoot ratio, opt for selective thinning rather than crown reduction. Thinning removes entire branches back to their point of origin, maintaining the tree's natural form & allowing light & air to circulate through the canopy. Crown reduction — cutting branch tips — stimulates dense, weak regrowth & creates numerous wound sites that can attract pests & diseases.
Common Diseases & Problems After Transplanting
Transplanted trees are under significant stress, making them more susceptible to diseases, pests, & environmental problems. Recognizing the warning signs early can mean the difference between saving the tree & losing it entirely.
Transplant Shock
Transplant shock is the most common issue & is characterized by wilting, leaf scorch, premature leaf drop, dieback of branch tips, & slow or stunted growth. While some degree of transplant shock is nearly inevitable, severe shock can be fatal. Minimize shock by keeping the tree well-watered (but not waterlogged), mulched, & protected from extreme weather. Anti-desiccant sprays can help evergreens retain moisture during the critical first months. Recovery from transplant shock can take one to three years depending on the tree's size & species.
Root Rot & Fungal Diseases
Overwatering is a leading cause of root rot in newly transplanted trees. Soggy, poorly drained soil creates anaerobic conditions that foster pathogens like Phytophthora & Armillaria. Signs of root rot include yellowing leaves, wilting despite moist soil, dark or mushy roots, & a foul odor from the soil. To prevent root rot, ensure your planting site has adequate drainage & water deeply but infrequently. If root rot is suspected, reduce watering immediately & consider applying a targeted fungicide. Good drainage practices also benefit your surrounding lawn health, preventing fungal issues from spreading across your landscape.
Borer Insects & Bark Beetles
Stressed trees emit chemical signals that attract borers & bark beetles. These insects tunnel into the wood, disrupting the tree's vascular system & introducing fungal pathogens. Signs of borer activity include small holes in the bark, sawdust-like frass, oozing sap, & sudden branch dieback. Prevention is the best defense — keep the tree healthy & well-watered to reduce stress. If borers are detected, systemic insecticides applied as soil drenches can provide protection, but treatment must be timed correctly to be effective.
Canker Diseases
Cankers are localized dead areas on branches or the trunk, often caused by fungal or bacterial pathogens that enter through wounds. Transplanting creates many potential entry points — severed roots, bark abrasions, & pruning cuts. Look for sunken, discolored, or cracked bark areas that may ooze sap. Prune out affected branches well below the canker margin, sterilizing your tools between cuts to prevent spreading the infection. Maintaining overall tree vigor through proper watering & mulching is the best long-term defense.
Girdling Roots
Girdling roots grow in a circular pattern around the trunk or root ball, eventually strangling the tree's vascular system. This problem is especially common in trees that were container-grown or planted too deeply. After transplanting, inspect the root flare for circling roots & redirect or remove them. Girdling roots may not cause visible symptoms for several years, by which time the damage can be irreversible. Addressing this issue at planting time is essential for long-term health.
Seasonal Aftercare Tips for Transplanted Trees
The care you provide in the first year after transplanting is absolutely critical. A mature tree that has been moved has lost a significant portion of its root system & needs consistent support while it re-establishes itself in the new location.
Spring Aftercare
As temperatures warm & the tree breaks dormancy, monitor closely for signs of new growth — this is an encouraging indicator that roots are functioning. Water deeply once or twice per week if rainfall is insufficient, providing approximately 10 gallons of water per inch of trunk diameter per week. Avoid fertilizing in the first spring after transplanting — the tree needs to focus on root growth, & high-nitrogen fertilizers can push excessive top growth that the diminished root system cannot support. Inspect stakes & guy wires (if used) to ensure they are not girdling the trunk.
Summer Aftercare
Summer is the most stressful season for a newly transplanted tree. Heat, drought, & intense sunlight can overwhelm a compromised root system. Maintain consistent watering — deep soakings are far better than frequent shallow sprinklings. A soaker hose or drip irrigation system placed over the root zone is ideal. Refresh mulch if it has thinned, maintaining a two- to four-inch layer. Watch for signs of heat stress including wilting, leaf curl, & scorching along leaf margins. Temporary shade cloth can protect vulnerable trees during extreme heat events. Keep the surrounding area maintained with regular summer lawn care practices to reduce competition for water & nutrients.
Fall Aftercare
As temperatures cool, continue watering until the ground freezes — fall is a crucial time for root growth, & the tree needs adequate moisture to sustain this process. This is also the time to evaluate the tree's progress. Look for healthy new growth, intact bark, & absence of pest or disease symptoms. If the tree appears to be establishing well, you can apply a slow-release, balanced fertilizer in late fall to support continued root development over the winter. Remove any stakes after the first growing season unless the tree is in an extremely windy location.
Winter Aftercare
Protect newly transplanted trees from winter damage by wrapping the trunks of thin-barked species (such as maples, ash, & linden) with tree wrap to prevent sunscald & frost cracking. In areas with heavy snow, gently brush accumulated snow from branches to prevent breakage. Anti-desiccant sprays applied to evergreens in late fall can reduce moisture loss from winter winds. Continue to monitor soil moisture during winter thaws — if the ground is dry & not frozen, a deep watering can be beneficial. Avoid piling snow from salted driveways or walkways onto the root zone, as salt accumulation can damage roots & degrade soil structure. For comprehensive seasonal landscape tips, visit our seasonal lawn care hub.
Long-Term Monitoring: Years Two & Beyond
Most experts recommend treating a transplanted mature tree as "establishing" for a period of one year per inch of trunk diameter. A tree with a 5-inch trunk, for example, may take up to five years to fully re-establish its root system. During this period, maintain vigilant watering during dry spells, annual mulching, & regular inspections for pests & diseases. Once the tree is fully established, it should require minimal supplemental care beyond normal landscape maintenance.
Frequently Asked Questions
How large of a tree can I transplant myself without professional help?
As a general guideline, homeowners can safely transplant trees with trunk diameters up to about 3 to 4 inches using manual tools & a small team of helpers. The root ball for a 4-inch tree can weigh over 1,500 pounds, so even at this size, you will need equipment like a sturdy dolly, come-along, or small tractor. Trees larger than 4 inches in diameter typically require professional tree spades, cranes, & experienced crews. Attempting to move a very large tree without proper equipment is dangerous & greatly increases the risk of killing the tree. If you are considering moving a large specimen, get quotes from licensed & insured tree-moving professionals.
What is the survival rate for transplanted mature trees?
With proper timing, technique, & aftercare, the survival rate for transplanted mature trees can range from 70 to 90 percent. Species selection, tree health, root ball size, & post-transplant care all influence outcomes. Trees that receive consistent watering, appropriate mulching, & protection from stress during the first two to three years have the highest success rates. Conversely, trees that are moved at the wrong time of year, with undersized root balls, or into poorly prepared sites may experience survival rates below 50 percent. The investment in proper preparation & technique pays enormous dividends in long-term tree health.
Should I fertilize a tree immediately after transplanting?
No — it is generally best to avoid fertilizing immediately after transplanting. The tree's priority should be root establishment, not top growth. High-nitrogen fertilizers can stimulate excessive foliage production that the reduced root system cannot adequately support, leading to further stress. Instead, focus on providing consistent moisture, proper mulching, & protecting the tree from environmental extremes. After the tree has gone through one full growing season & shows signs of healthy new growth, you can begin a modest fertilization program using a slow-release, balanced formula. A soil test can help determine which nutrients your tree actually needs.
How often should I water a newly transplanted mature tree?
Newly transplanted mature trees need deep, thorough watering two to three times per week during the first growing season, adjusting based on rainfall & soil conditions. The goal is to keep the root ball consistently moist but never saturated. A good method is to place a soaker hose over the root ball area & let it run slowly for several hours. Check soil moisture by probing with a long screwdriver or soil probe — if it penetrates easily to a depth of 8 to 12 inches, moisture is adequate. During hot, dry, or windy periods, you may need to water more frequently. Reduce watering gradually in fall as the tree enters dormancy, but do not stop entirely until the ground freezes.
Can I transplant a mature tree that is growing near other trees or structures?
Yes, but it requires additional planning & care. Trees growing close together often have intertwined root systems, meaning you will inevitably sever roots of neighboring trees when excavating the root ball. This can stress adjacent trees. When transplanting near structures, be mindful of foundations, underground utilities, irrigation systems, & septic fields. Call your local utility locating service before digging to avoid damaging buried lines. If the tree is growing in a confined space where a proper root ball cannot be excavated, it may not be a viable transplant candidate. In these situations, consulting a certified arborist can help you weigh the risks & explore alternative options. For more guidance on managing trees in your landscape, browse our complete tree care library.
What tools & equipment do I need to transplant a mature tree?
For a do-it-yourself transplant of a moderately sized tree, you will need a sharp round-point shovel, a digging spade, pruning shears, a pruning saw, burlap (natural, untreated), heavy-duty twine or wire, a tarp or heavy-duty straps for lifting, & potentially a come-along or winch for moving the root ball. For larger trees, you may need to rent a mini-excavator, front-end loader, or tree spade attachment. Additional helpful tools include a root pruning saw, a soil knife, a garden hose or soaker hose for watering, & a wheelbarrow for moving soil. Always wear sturdy gloves, steel-toed boots, & eye protection during the process. Having the right tools on hand before you begin ensures the process goes smoothly & minimizes the time the tree's roots are exposed.

