
Tree Care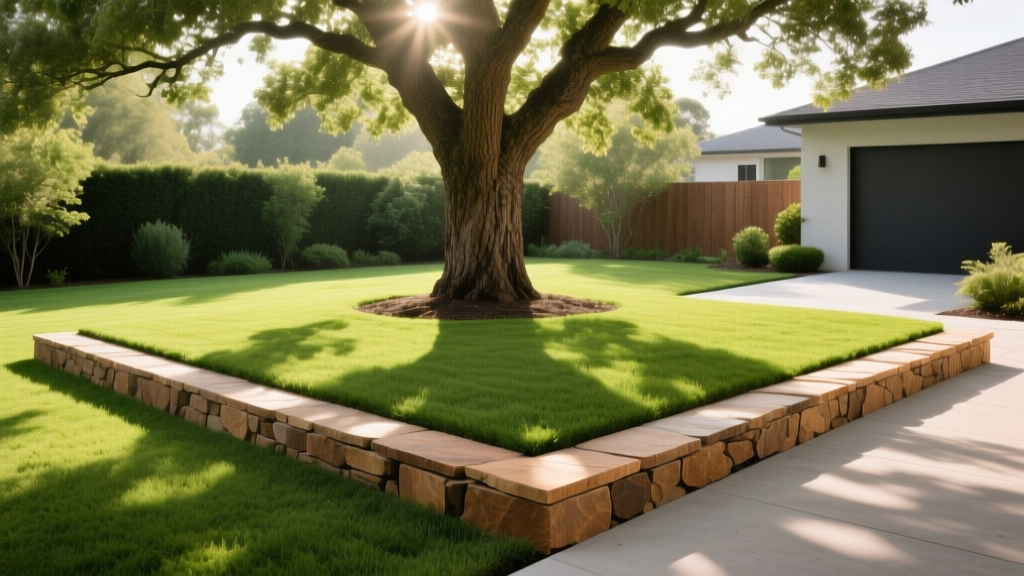
Creative Tree Edging Ideas: Step-by-Step Installation Guide
The Hidden Cost of Unedged Trees in Lawn Maintenance
Integrating trees into a turfgrass lawn creates a constant battle for resources and space. Without a defined border, routine lawn maintenance becomes a hazard. String trimmers and rotary mowers routinely scrape the lower trunk, causing mechanical damage to the vascular cambium. Over time, this 'weed whacker blight' girdles the tree, severing the nutrient pathways between the roots and the canopy. Furthermore, soil compaction from heavy mower traffic suffocates the fine feeder roots located in the top 12 inches of the soil profile.
Implementing strategic tree edging ideas into your seasonal lawn maintenance schedule solves these issues. A properly installed tree ring establishes a clear boundary for mowers, protects the trunk flare, and creates a dedicated zone for moisture-retaining mulch. However, not all edging methods are safe for tree health. Poorly planned borders can girdle surface roots, trap excess moisture against the bark, or introduce toxic chemicals into the root zone.
WARNING: The Mulch Volcano Trap
Never pile mulch or soil against the tree trunk. The root flare (where the trunk widens at the base) must remain exposed to the air. Burying the flare traps moisture, invites fungal pathogens like Armillaria root rot, and encourages secondary roots to grow in a circle around the trunk, eventually strangling the tree.
Material Decision Matrix: Choosing the Right Border
Selecting the right material is the first critical step in any tree edging project. The ideal material must withstand freeze-thaw heaving, resist degradation from UV exposure and soil microbes, and allow for the natural radial expansion of the trunk and roots. Below is a comparison of the most effective materials used by landscape professionals in 2026.
| Material | Est. Cost (per linear ft) | Lifespan | Tree Safety & Notes |
|---|---|---|---|
| 14-Gauge Cor-Ten Steel | $4.50 - $6.50 | 30+ Years | Excellent. Rusts to a protective patina. Minimal soil disruption. |
| Permeable Paver Grates | $9.00 - $14.00 (sq ft) | 40+ Years | Excellent for high-traffic urban zones. Allows water/gas exchange. |
| Extruded Aluminum | $3.00 - $5.00 | 15 - 20 Years | Good. Lightweight, won't rust, but can bend under heavy mower impact. |
| Natural Fieldstone (Dry-set) | $6.00 - $10.00 | Lifetime | Good. Highly aesthetic, but gaps can harbor turfgrass rhizomes. |
| Pressure-Treated Timber | $2.50 - $4.00 | 5 - 8 Years | Poor. Rot-prone. Chemical leaching (copper azole) can harm sensitive feeder roots. |
Top Tree Edging Ideas for Specific Landscape Scenarios
1. The Modern Minimalist: Cor-Ten Steel Rings
For contemporary landscapes, flexible Cor-Ten (weathering steel) edging provides a razor-thin, virtually invisible profile that contrasts beautifully with green turf. Brands like EverEdge offer 4-inch tall flexible steel rings specifically designed for tree circles. The steel develops a stable, rust-like appearance that seals the metal from further corrosion. Because it is only 2mm thick, it requires a trench barely wider than a blade, minimizing the severing of surface roots during installation.
2. The High-Traffic Urban Solution: Permeable Paver Tree Grates
In patios, driveways, or commercial frontages where soil compaction is a severe threat, removing the turf entirely and installing a permeable paver tree grate is the ultimate maintenance hack. Using systems like Belgard's permeable pavers set over a 6-inch base of washed #57 gravel, you create a load-bearing surface that allows rainwater and oxygen to reach the root zone. This eliminates the need for string trimming entirely while protecting the critical root zone from foot and vehicle traffic.
3. The Rustic Organic: Dry-Set Fieldstone Trench
For naturalized or woodland-style lawns, a dry-set fieldstone edge provides a soft, organic boundary. Instead of mortaring stones together (which creates an impermeable barrier to water and root expansion), stones are set into a shallow trench and backfilled with crushed gravel. This allows the tree's lateral roots to eventually grow beneath and between the stones without being restricted or girdled by a solid concrete collar.
Step-by-Step Installation Procedure
Executing a tree edging project requires precision to avoid damaging the tree's critical root zone. The critical root zone is generally calculated as 1 foot of radius for every 1 inch of trunk Diameter at Breast Height (DBH, measured at 4.5 feet off the ground). While your edging ring will be smaller than the full critical root zone, you must respect the major structural roots.
Step 1: Define the Radius and Mark the Boundary
For young trees, establish a minimum 36-inch diameter circle (18-inch radius from the trunk center). For mature trees, extend the edge to at least the drip line if space permits. Use a measuring tape and a stake at the trunk's center to swing a consistent radius, marking the turf with bright landscaping spray paint.
Step 2: Sever the Turf and Excavate the Trench
Using a sharp, flat-edged half-moon spade (such as the Fiskars 46-inch steel edger), cut straight down along the painted line to a depth of 4 inches. This depth severs the turfgrass rhizomes and creates a clean barrier. Next, use a trenching spade to remove a 2-inch wide strip of soil along the inside of the cut line. This trench will seat your edging material.
Step 3: Address Surface Roots (The Pruning Protocol)
If you encounter roots in your trench, assess their size. According to arboricultural standards, you may safely prune roots that are less than 1.5 inches in diameter, provided they are not located directly under the trunk flare. Use sharp bypass pruners or a fine-toothed pruning saw to make clean, flush cuts. Never tear or rip roots with a shovel, as jagged wounds invite decay fungi. If a root is larger than 2 inches, reroute your edging line outside the root to avoid compromising the tree's structural stability.
Step 4: Set and Secure the Edging
Place your chosen edging material into the trench. For steel or aluminum, ensure the top edge sits exactly 0.5 inches above the soil grade. This allows mower wheels to glide over the edge without scalping the turf, while completely blocking the string trimmer's path. Backfill the trench on both sides with the excavated soil, tamping it firmly with a hand tamper to eliminate air pockets and lock the edging in place against frost heaving.
Step 5: Apply Mulch Using the 'Donut' Method
Remove any remaining turfgrass inside the ring using a flat shovel or a non-selective herbicide (if organic certification is not a concern). Apply a 2-to-3-inch layer of double-shredded hardwood bark or pine straw. As highlighted by the Arbor Day Foundation, mulch must be kept at least 3 inches away from the actual bark of the trunk. Shape the mulch like a donut, with the hole in the center exposing the root flare, and the thickest part of the mulch resting against the inner wall of your new edging.
Pro-Tip: The Herbicide Alternative
If you are converting a grassy area inside a new, large tree ring, avoid digging out the grass, which destroys the shallow feeder roots. Instead, smother the grass by laying down overlapping layers of uncoated cardboard, wetting it thoroughly, and applying your 3 inches of mulch directly on top. The grass will decompose in place, adding organic matter to the soil without root disturbance.
Seasonal Maintenance and Edge Refreshing
Tree edging is not a 'set it and forget it' installation. As the tree grows and the surrounding lawn shifts, routine maintenance is required to keep the boundary functional and aesthetically pleasing.
- Spring Trench Refresh: In early spring, before the turf begins aggressive growth, run a half-moon spade along the outside edge of your border to cut any creeping rhizomes (especially aggressive grasses like Bermuda or Zoysia) that have bridged the gap over winter.
- Monitor for Trunk Girdling: As the tree's trunk expands in diameter (radial growth), rigid materials like stone or fixed steel rings can eventually press into the bark. Inspect the inner clearance annually. If the trunk is within 2 inches of the edging, it is time to expand the ring's diameter outward.
- Mulch Top-Dressing: Organic mulches decompose at a rate of roughly 1 inch per year. During your fall lawn cleanup, top-dress the tree ring with a fresh inch of mulch to maintain the 3-inch total depth, ensuring the 'donut' clearance around the trunk is maintained.
- Check for Frost Heave: In regions with severe freeze-thaw cycles, rigid edging materials may push upward. Use a rubber mallet to gently tap heaved sections back down to the proper 0.5-inch above-grade height before the spring mowing season begins.
Frequently Asked Questions
Can I use landscape fabric under the mulch inside the tree ring?
No. Woven and non-woven landscape fabrics restrict the vital exchange of oxygen and water between the atmosphere and the tree's shallow feeder roots. Over time, fabric also degrades, leaving plastic fragments in the soil. According to the International Society of Arboriculture, organic mulch applied directly to the soil surface is the superior method for weed suppression and soil health.
How do I edge a tree on a sloped lawn?
On a slope, a standard circular ring will cause mulch and water to wash out the downhill side. Instead, build a terraced, semi-circular berm on the downhill side of the tree using compacted topsoil and faced with fieldstone or timber. This captures rainwater runoff, directing it toward the root zone rather than letting it sheet across the lawn.
Is it safe to use brick pavers for tree edging?
Yes, if dry-set. Laying brick pavers flat or in a 'soldier course' (standing on end) over a 2-inch sand base provides a durable, mower-friendly edge. Avoid mortaring the bricks together with concrete; a rigid concrete collar prevents water infiltration and will crack as the tree's roots expand and shift the soil beneath it.

