
Tree Care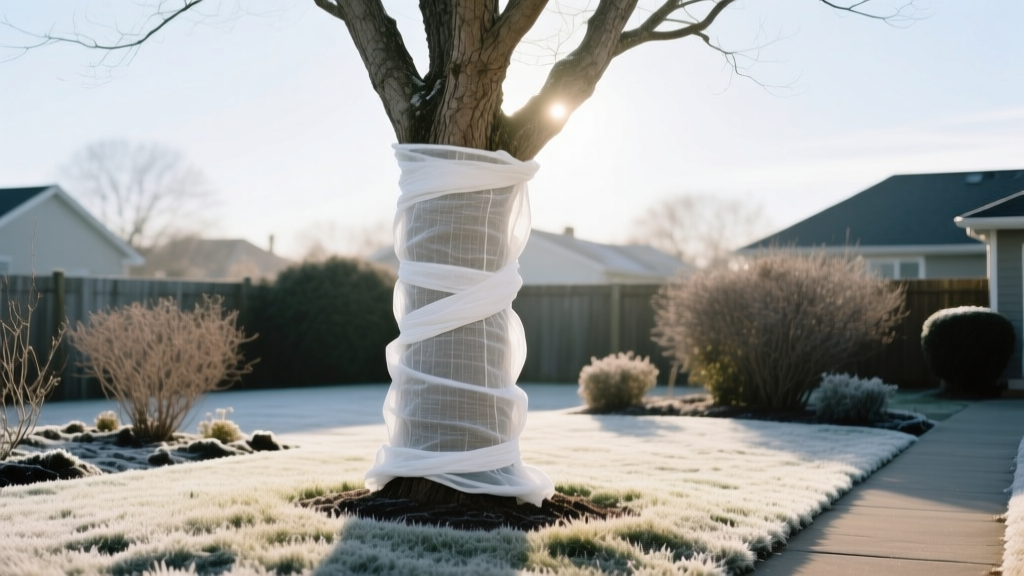
When Should a Tree Wrapped for Winter Protection Be Uncovered?
Leaving winter trunk protection on too long is one of the most common and fatal mistakes homeowners make with young landscaping. Knowing exactly when a tree wrapped for winter protection should be uncovered is critical to preventing girdling, moisture trapping, and fungal infections. The universal rule is to remove the wrap in early spring as soon as the buds begin to swell and the threat of hard freezes has passed—typically between late March and mid-April, depending on your USDA Hardiness Zone.
This guide details the exact timeline for application and removal, the biological mechanics of winter sunscald, and a material matrix to ensure you are using the correct products for your specific tree species in 2026.
The Biology of Sunscald: Why We Wrap at All
Before discussing removal, it is vital to understand what the wrap is preventing. Winter sunscald (or southwest injury) occurs on bright, freezing winter days. The sun heats the dark, thin bark on the southwest side of the trunk, activating the cambium and phloem cells. When the sun dips behind a cloud or sets, the temperature plummets rapidly. The active cells freeze and rupture, leading to vertical bark splitting, structural weakness, and entry points for Phytophthora and other canker diseases.
According to the Colorado State University Extension, wrapping reflects solar radiation, keeping the bark temperature stable and the cells dormant. However, if a tree wrapped in non-breathable material is left into the heat of late spring, the trapped humidity creates a greenhouse effect, rotting the bark from the outside in.
The "Tree Wrapped" Timeline: When to Apply and Remove
Timing is dictated by soil temperature and bud dormancy, not just the calendar. Follow this seasonal framework to maximize protection and minimize trunk damage.
Late Fall (Application)
- Trigger: After the first hard freeze (28°F or below) and when the tree has fully dropped its leaves and entered dormancy.
- Action: Apply the wrap starting from the soil line up to the first scaffold branch.
- Why wait? Applying too early in autumn traps autumn rains against the trunk and delays the tree's natural cold-hardening process.
Mid-Winter (Inspection)
- Trigger: Late January or early February.
- Action: Check the top and bottom securing points. Mice and voles often use tree wrap as a winter shelter and will chew the bark underneath. If you see signs of nesting, carefully unwrap the bottom section, clear debris, and re-secure.
Early Spring (Removal)
- Trigger: Forsythia bushes begin to bloom, or tree buds visibly swell (usually April).
- Action: Completely remove the wrap. Do not leave it on "just in case" of a late frost. A late frost will not cause sunscald because the days are shorter and the sun angle is higher, reducing the intense, localized heating effect on the trunk.
⚠️ CRITICAL WARNING: The Plastic Wrap Trap
Never use plastic sheeting, PVC pipe, or black plastic nursery tape as a winter wrap. Plastic lacks breathability and traps condensation against the cambium layer. The Morton Arboretum explicitly warns against plastic wraps, noting they promote severe fungal cankers and fail to insulate against rapid temperature drops. Stick strictly to crepe paper, spun polypropylene, or burlap.
Never use plastic sheeting, PVC pipe, or black plastic nursery tape as a winter wrap. Plastic lacks breathability and traps condensation against the cambium layer. The Morton Arboretum explicitly warns against plastic wraps, noting they promote severe fungal cankers and fail to insulate against rapid temperature drops. Stick strictly to crepe paper, spun polypropylene, or burlap.
Material Matrix: What to Wrap Your Trees With
The market for tree protection has evolved, with specialized fabrics replacing older, less effective methods. Below is a comparison of the top materials available for residential use in 2026.
| Material Type | Best For | Breathability | Cost (per roll/yd) | Pros & Cons |
|---|---|---|---|---|
| Crepe Paper Wrap | Very young saplings (1-2" DBH) | High | $6 - $10 | Pros: Biodegradable, stretches with trunk growth. Cons: Tears easily in heavy ice; must be replaced annually. |
| Spun Polypropylene | Most residential deciduous trees | Very High | $12 - $18 | Pros: Reusable for 3-4 seasons, excellent UV reflection, resists tearing. Cons: Does not biodegrade; must be manually removed. |
| Jute Burlap | Evergreens, windburn protection, B&B transplants | Moderate | $8 - $15 | Pros: Excellent windbreak, natural aesthetic. Cons: Absorbs water and can freeze solid against the bark if not layered properly. |
| Rigid Plastic Guards | Mower damage / Animal browsing ONLY | Low | $4 - $8 each | Pros: Stops deer rubbing and string trimmers. Cons: Terrible for winter sunscald; traps moisture. Remove before winter. |
Step-by-Step Wrapping Technique (The 1/3 Overlap Rule)
Improper application is just as dangerous as leaving a tree wrapped too long into the spring. If applied too tightly, the wrap will girdle the trunk as it expands during the spring growth flush. Follow the "shingle method" recommended by the University of Minnesota Extension:
- Start at the Base: Anchor the end of the wrap at the soil line. Bury the very bottom edge an inch into the mulch/soil to prevent rodents from crawling underneath.
- Wrap Upward: Always wrap from the bottom up. This creates a "shingle effect," allowing rain and melting snow to run off the outside of the wrap rather than funneling down into the layers and soaking the bark.
- Maintain the 1/3 Overlap: With each rotation around the trunk, overlap the previous layer by exactly one-third of the wrap's width. This provides double-layer insulation without suffocating the tree.
- Stop at the Scaffold Branch: You only need to protect the main trunk. Once you reach the first major lateral branch (the scaffold branch), stop wrapping. The canopy will naturally shade the upper trunk from low winter sun.
- Secure with Natural Twine: Tie off the top securely with biodegradable jute twine or specialized tree tape. Never use duct tape, electrical tape, or wire, which will cut into the bark and disrupt phloem transport.
Which Species Actually Need Wrapping?
Not every tree in your yard requires winter wrapping. Mature trees with thick, furrowed bark (like Oaks and Sycamores) are naturally insulated. Wrapping is specifically reserved for thin-barked deciduous trees and recently transplanted specimens. Focus your efforts and budget on the following species, particularly those with a trunk diameter (DBH) of less than 4 inches:
- Maples (Acer species): Especially Red Maples, Sugar Maples, and Japanese Maples.
- Honeylocust (Gleditsia triacanthos): Highly susceptible to southwest injury due to extremely smooth, thin bark.
- Crabapples (Malus species): Prone to both sunscald and subsequent fungal cankers.
- Linden (Tilia species): Young lindens suffer severe bark splitting if left exposed to reflective snow glare.
- Ash (Fraxinus species): Though declining in planting due to Emerald Ash Borer, young ash trees are highly vulnerable to frost cracks.
- Fruit Trees: Cherries, plums, and peaches have very thin bark and benefit heavily from crepe paper wraps in Zones 4-6.
Troubleshooting: Signs Your Tree Wrapped Incorrectly
When you remove the wrap in April, inspect the trunk. Here is how to diagnose and fix common application errors:
Symptom: Deep Horizontal Indentations (Girdling)
Cause: The wrap was tied too tightly at the top, or wire/tape was used, cutting off the flow of carbohydrates from the leaves to the roots.
Fix: Carefully slice the bark vertically with a sterilized knife just below the girdle to encourage callus tissue formation. In future years, use loose jute twine and check the tension in late winter.
Symptom: Black, Mushy Bark or Fungal Fruiting Bodies
Cause: The wrap was applied top-to-bottom (funneling water in), or non-breathable plastic was used, leading to bacterial wetwood or Nectria canker.
Fix: Peel away the dead bark to expose healthy tissue. Apply a copper-based fungicide if recommended by a local arborist, and ensure the trunk is completely dry and exposed to air circulation in the spring. Never reuse moldy wrap.
Symptom: Chewed Bark at the Soil Line
Cause: Voles used the wrap as a winter hideout and fed on the cambium.
Fix: If less than 50% of the trunk's circumference is girdled by chewing, the tree can usually heal via bridge grafting or natural callusing. To prevent this next year, keep mulch pulled 3 inches away from the trunk base and lay a hardware cloth cylinder around the base before applying the fabric wrap.

