
Tree Care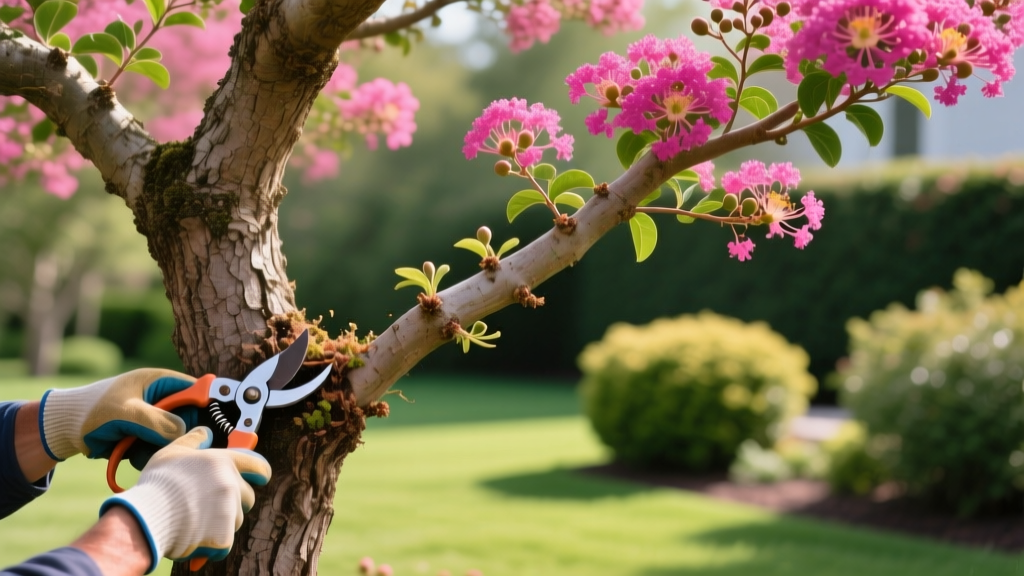
How to Trim a Crepe Myrtle: Diagnosing and Fixing Crape Murder
The Epidemic of Crape Murder: Diagnosing the Problem
Crepe myrtles (Lagerstroemia indica and its hybrids) are cornerstone specimens in Southern landscapes, prized for their exfoliating bark, extended summer bloom periods, and elegant winter silhouettes. However, a pervasive landscaping malpractice known as 'crape murder'—the severe, indiscriminate topping of the tree's main trunks—destroys their natural form and compromises their health. If you are researching how to trim a crepe myrtle, the first step is diagnosing whether your tree has already suffered from this destructive practice.
Diagnostic Checklist: Signs of Previous Topping
- Knuckle Formation: Bulbous, swollen scar tissue at the ends of main trunks where previous heading cuts were made.
- Epicormic Sprouting: Dense, broom-like clusters of weak, vertical shoots emerging from a single cut point.
- Delayed Blooming: Topped trees expend massive energy regenerating vegetative growth, often delaying summer flowering by 3 to 4 weeks compared to properly pruned specimens.
- Winter Dieback: The tips of the thin, whippy shoots generated after topping frequently die back during winter freezes due to a lack of lignification (wood hardening).
The Biological Cost of Indiscriminate Topping
When a homeowner or inexperienced landscaper chops off the top third of a crepe myrtle, they remove the apical meristem—the dominant growth point that regulates hormone distribution. This triggers a survival response. The tree pushes out latent buds just below the cut, resulting in a flush of succulent, nitrogen-rich vegetative growth.
This specific biological reaction creates a secondary problem: pest vulnerability. The crape myrtle aphid (Tinocallis kahawaluokalani) specifically targets this tender new growth. As aphids feed, they excrete honeydew, which rapidly cultivates black sooty mold on the leaves and trunks beneath the canopy. Furthermore, the weakly attached epicormic shoots lack the structural integrity of naturally formed branches, making them highly susceptible to tearing away from the trunk during high winds or when weighed down by heavy summer rain and blooms.
Essential Tool Kit for Proper Reduction Cuts
Executing proper pruning requires tools that make clean, crush-free cuts to facilitate rapid callus formation. Bypass blades are mandatory; anvil pruners will crush the relatively soft wood of the crepe myrtle, inviting fungal pathogens like Cercospora leaf spot into the vascular tissue.
- Hand Pruners: Felco 2 Classic Bypass Pruners (approx. $65). The hardened steel blade holds an edge through hundreds of cuts and can be disassembled for sterilization.
- Folding Saw: Silky Gomboy 210 with a medium teeth blade (approx. $48). Ideal for flush-cutting branches up to 3 inches in diameter without tearing the bark.
- Loppers: Corona SL 3264 ComfortGEL Bypass Loppers (approx. $55) for branches between 1 and 2 inches thick.
- Sanitization: 70% Isopropyl alcohol in a spray bottle. Sterilize blades between every single tree to prevent the spread of wood-decaying fungi.
How to Trim a Crepe Myrtle: The Correct Method
Proper pruning of a healthy, un-topped crepe myrtle focuses on structural integrity, canopy airflow, and aesthetic form. According to guidelines from the Clemson University Home & Garden Information Center, pruning should be minimal and purposeful.
Step 1: Basal Sucker Removal
Crepe myrtles naturally attempt to grow as multi-stemmed shrubs. To maintain a tree form, remove all root suckers and basal shoots emerging from the ground or the lower 12 inches of the main trunks. Cut these flush with the trunk or root collar; do not leave stubs.
Step 2: Canopy Thinning and Crossing Branches
Move into the canopy and identify branches that cross, rub against each other, or grow inward toward the center of the tree. Remove the weaker of the two crossing branches. This opens the canopy to UV penetration and airflow, which is critical for drying morning dew and preventing powdery mildew (Erysiphe lagerstroemiae).
Step 3: Making Reduction Cuts
If the tree is encroaching on a structure or walkway, use reduction cuts rather than heading cuts. Identify the overly long branch and trace it back to a lateral side branch that is at least one-third the diameter of the parent branch. Make the cut just outside the branch collar. This allows the lateral branch to assume apical dominance and naturally suppresses the explosion of water sprouts.
Corrective Pruning Matrix: Fixing a Murdered Tree
If your tree already suffers from severe knuckle formation and broom-like sprouting, a single pruning session will not fix it. You must employ a multi-year corrective strategy. The University of Florida IFAS Extension outlines two primary paths for remediation, depending on the severity of the knuckles.
| Condition Severity | Corrective Action | Expected Recovery Timeline |
|---|---|---|
| Mild Topping (Small knuckles, 1-2 years of bad cuts) |
Select the 2 or 3 strongest, most outward-facing sprouts on each knuckle. Remove all other sprouts flush with the knuckle. Allow the selected sprouts to mature into new lateral branches. | 2 to 3 growing seasons to regain natural branching structure. |
| Severe Topping (Massive, rotting knuckles, 5+ years of abuse) |
Cut the entire trunk down to 12 inches above the ground in late winter. Select 3 to 5 vigorous new root suckers in spring to retrain as entirely new main trunks. | 3 to 4 years to achieve a 10-foot canopy; 5+ years for full maturity. |
Phenological Timing: When to Make the Cuts
Timing is critical to minimize stress and prevent cold damage to exposed vascular tissue. The optimal window for pruning crepe myrtles is late winter to very early spring, while the tree is fully dormant but just before bud break.
The Phenological Indicator: Do not rely strictly on the calendar, as late freezes vary by zone. Instead, observe the leaf buds on the crepe myrtle. The ideal time to prune is when the dormant leaf buds swell to the size of a match head (approximately 1/8 inch) but before the green tissue unfurls. In USDA Zones 7-8, this typically aligns with the blooming of Forsythia shrubs in late February to early March.
Wound Care and Post-Pruning Maintenance
A common mistake homeowners make after executing large reduction cuts is applying commercial pruning sealers or wound paints. Arboricultural research conclusively shows that these petroleum-based sealants trap moisture against the cut surface, accelerating wood decay and preventing the tree from forming its natural protective boundary (the reaction zone). Leave all cuts exposed to the air to dry and callus naturally.
Following a heavy corrective pruning, the tree will require nutritional support to fuel the generation of new structural wood. Apply a balanced, slow-release granular fertilizer (such as a 10-10-10 or 16-4-8 NPK ratio) at a rate of 1 pound of actual nitrogen per 1,000 square feet of root zone area in early April, once the first flush of new leaves has fully expanded. Avoid high-nitrogen synthetic fertilizers, as they will encourage the exact type of weak, aphid-attracting succulent growth you are trying to eliminate.

