
Tree Care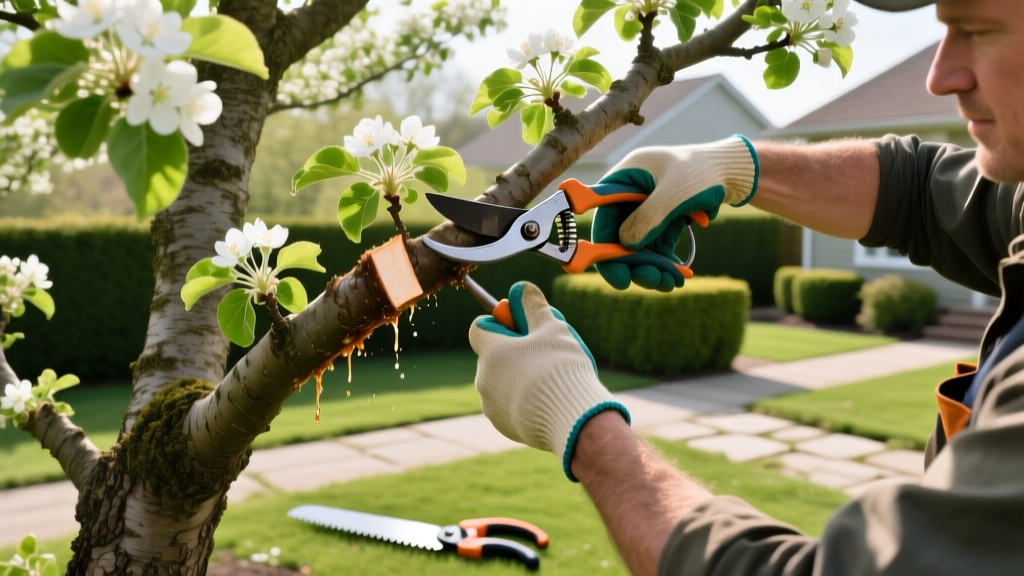
When Should You Cut Back Apple Trees? A Pruning Timeline
The Dormancy Window: Exact Timing for Cutting Back
The single most critical factor in apple tree maintenance is timing. If you are asking when you should cut back apple trees, the definitive answer for structural pruning is during the late winter dormancy window. This period occurs after the tree has fully hardened off for winter but before the spring bud swell begins. Pruning during this window minimizes the risk of transmitting diseases like fire blight and allows the tree to rapidly compartmentalize wounds once spring growth initiates.
The exact calendar dates shift dramatically based on your USDA Hardiness Zone. In colder climates (Zones 4 and 5), the optimal window is typically mid-March to early April. For temperate regions (Zones 6 and 7), late February through March is ideal. In warmer climates (Zone 8 and above), you should execute your primary cut-backs between late January and mid-February. The physiological trigger to look for is daytime temperatures consistently hovering above 20°F, which prevents the wood from becoming brittle and shattering under the pressure of your pruning saw.
Regional Pruning Calendar
| USDA Zone | Optimal Pruning Window | Bud Swell Indicator | Primary Risk Factor |
|---|---|---|---|
| Zones 4-5 | March 15 - April 10 | Silver tip to green tip | Late spring frost damage to fresh cuts |
| Zones 6-7 | February 20 - March 20 | Dormant to silver tip | Fire blight transmission via tools |
| Zones 8-9 | January 15 - February 15 | Deep dormancy | Premature sap bleeding if pruned too late |
Winter vs. Summer Pruning: A Decision Matrix
While the heavy structural cut-back happens in winter, understanding the difference between winter and summer pruning is essential for long-term orchard management. Winter pruning invigorates the tree, stimulating vigorous vegetative growth in the spring. Summer pruning, conversely, devigorates the tree, redirecting energy from leaf production to fruit development and wood hardening.
| Pruning Season | Primary Objective | Sap Flow Status | Best Application | Wound Healing Speed |
|---|---|---|---|---|
| Late Winter | Structural training, canopy opening, removing dead wood | Dormant (No flow) | Young tree framework, major limb removal, renewing fruiting spurs | Fast (Begins immediately at spring bud break) |
| Early Summer | Light penetration, growth control, water sprout removal | Active (High flow) | Mature tree maintenance, improving fruit color, slowing overly vigorous trees | Slow (Relies on current season photosynthesis) |
Warning: The Fall Pruning Trap
Never cut back apple trees in the autumn. Fall pruning stimulates new, tender growth that will not harden off before the first freeze, leading to severe winter kill. Furthermore, fungal spores are highly active in autumn, and fresh wounds provide a direct entry point for wood-rot pathogens before the tree's natural defense mechanisms are fully dormant.
Never cut back apple trees in the autumn. Fall pruning stimulates new, tender growth that will not harden off before the first freeze, leading to severe winter kill. Furthermore, fungal spores are highly active in autumn, and fresh wounds provide a direct entry point for wood-rot pathogens before the tree's natural defense mechanisms are fully dormant.
Step-by-Step: Executing the Winter Cut-Back
Proper technique prevents bark tearing and accelerates the tree's natural compartmentalization process (CODIT). Before making a single cut, sterilize your tools. Use a 10% bleach solution or 70% isopropyl alcohol to wipe down the blades of your pruners between every tree to prevent the mechanical transmission of canker diseases and fire blight.
Essential Tool Loadout
- Hand Pruners: Felco F-2 Classic Bypass Pruners (approx. $60). Bypass blades create clean, crushing-free cuts on live wood up to 1 inch in diameter.
- Loppers: Fiskars 32-inch PowerGear2 Bypass Loppers (approx. $55). The compound action provides the leverage needed for 2-inch structural scaffold branches.
- Pruning Saw: Silky Gomboy 240mm Folding Saw (approx. $45). The impulse-hardened teeth cut through dense apple wood on the pull stroke without binding.
The 3-Cut Method for Limbs Over 1.5 Inches
Removing heavy scaffold branches requires a specific three-step sequence to prevent the weight of the falling limb from stripping the bark down the main trunk.
- The Undercut: Position your saw 6 to 8 inches away from the trunk. Cut upward from the bottom of the branch, going about one-third of the way through the wood. This severs the bark and prevents tearing.
- The Relief Cut: Move 1 to 2 inches further out from the undercut. Cut downward from the top of the branch until it snaps off. This removes the bulk of the branch's weight.
- The Collar Cut: Locate the branch bark ridge (the raised line where the branch meets the trunk) and the branch collar (the swollen base of the branch). Make your final cut just outside the collar, angling slightly away from the trunk. Never cut flush with the trunk. Leaving the collar intact preserves the chemical boundary zone the tree uses to seal out decay.
Age-Based Pruning Strategies
The way you cut back an apple tree changes fundamentally as the tree matures. According to guidelines from Penn State Extension, the goal shifts from building a physical framework to managing a biological fruiting engine.
Years 1 to 3: Establishing the Central Leader
During the establishment phase, your primary objective is to create a strong central leader with well-spaced scaffold branches. Select 3 to 5 primary branches that are spaced vertically by at least 6 to 8 inches and radiate outward like a spiral staircase. Cut back the central leader by one-third of its previous year's growth to a south-facing bud, which encourages straight, upward growth. Remove any branches that form narrow crotch angles (less than 45 degrees), as these are structurally weak and prone to splitting under the weight of mature fruit loads.
Years 4 and Beyond: Fruiting Spur Management
Once the framework is established, shift your focus to light penetration and fruiting wood renewal. Apple trees produce fruit on spurs located on wood that is two years or older. Your goal is to maintain a balance of 1-year-old wood (which will become next year's fruiting wood) and older fruiting spurs. Thin out crowded interior branches so that a basketball could theoretically be tossed through the canopy without hitting a branch. This ensures UV light reaches the inner fruit, which is strictly required for proper anthocyanin development (the red pigmentation in apple skin).
Common Pruning Mistakes and Failure Modes
Even experienced gardeners make errors that compromise the long-term health of their apple trees. Avoid these critical failure modes:
- Flush Cuts: Cutting perfectly flush with the trunk removes the branch collar, destroying the tree's natural chemical defense zone and virtually guaranteeing interior trunk rot.
- Leaving Stubs: Cutting too far from the trunk leaves a dead stub that cannot compartmentalize. The stub will die back to the trunk, creating a permanent entry point for borers and fungal pathogens.
- Lion-Tailing: Stripping all the interior lateral branches off a primary limb and leaving a tuft of foliage only at the very end. This causes the limb to become top-heavy, highly susceptible to wind breakage, and triggers a massive flush of unwanted water sprouts along the bare wood.
Post-Pruning Care and the Truth About Wound Sealers
Historically, gardeners were advised to paint pruning cuts with asphalt-based wound sealers or pruning paints to 'protect' the tree from disease. Modern arboriculture science has thoroughly debunked this practice. Research highlighted by the University of Minnesota Extension demonstrates that pruning sealers actually trap moisture and fungal spores against the exposed wood, accelerating decay rather than preventing it.
The most effective post-pruning care is to make clean, precise cuts during the correct dormancy window and allow the tree's natural biological processes to seal the wound. Do not apply any chemical treatments, paints, or sealants to your apple tree's pruning cuts. Simply clean your tools, dispose of the pruned wood (especially if you suspect any canker or blight issues, in which case the wood should be burned or removed from the property, not composted), and allow the spring sap flow to initiate the callusing process naturally.

