
Documenting Pergola Builds 2026: Attached vs Freestanding Fan Mounts
The Evolution of Garden Documentation in 2026
As we navigate through 2026, the realm of garden photography has expanded far beyond capturing the perfect bloom or the golden hour glow on a patio. Today, meticulous garden documentation bridges the gap between aesthetic landscaping and structural engineering. Homeowners, landscape architects, and contractors alike are realizing the immense value of visually recording hardscape projects. Nowhere is this more critical than in pergola construction—specifically when comparing attached versus freestanding designs equipped with modern smart fan mounts. Documenting these structures is no longer just about creating a beautiful portfolio; it is about creating a vital visual manual for future maintenance, smart home troubleshooting, and permit compliance.
Whether you are a professional garden photographer expanding into architectural documentation or a DIY homeowner building a visual diary of your property's evolution, understanding how to capture the structural nuances of pergolas is essential. This guide will walk you through the specific photographic techniques required to document both attached and freestanding pergolas, with a special focus on the often-overlooked electrical and structural details of outdoor fan mounts.
Capturing the Foundation: Attached vs. Freestanding Structures
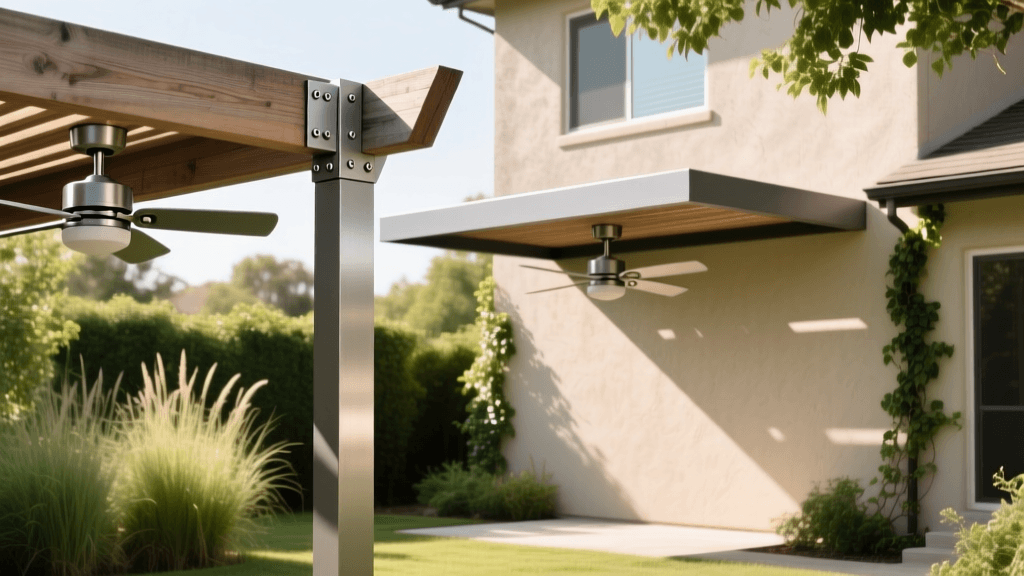
The fundamental difference between an attached and a freestanding pergola lies in how it transfers its load to the ground. From a documentation perspective, these two styles require entirely different photographic approaches to capture their structural integrity properly.
Documenting the Attached Ledger Board
An attached pergola relies on a ledger board bolted directly to the home's exterior framing. When documenting this style, your photography must focus on the connection points. Before any flashing is covered or beams are hung, use a wide-angle lens (such as a 16-35mm on a full-frame sensor) to capture the ledger board's relationship to the house's rim joist. You must photograph the lag screws, the structural washers, and the waterproofing membrane. In 2026, building inspectors heavily scrutinize water intrusion points, so high-resolution macro shots of the flashing integration are invaluable for your permanent property records.
Documenting Freestanding Post Anchors
Freestanding pergolas transfer their load entirely through independent posts down to concrete footings. Your documentation here should focus on the subterranean and ground-level elements. Photograph the sonotubes before the concrete is poured to document the depth and rebar placement. Once the posts are set, capture the post-to-pier anchors (like the Simpson Strong-Tie ZMAX series). Shoot these from a low angle with a tilt-shift lens if possible, ensuring the vertical plumb lines of the posts are perfectly straight in the frame, which serves as both an aesthetic choice and a structural verification record.
The Fan Mount: Wiring and Smart Home Integration
In 2026, outdoor ceiling fans are no longer simple pull-chain appliances; they are integrated smart home nodes utilizing the Matter protocol for seamless automation. Documenting the fan mount requires a two-phase photographic approach: the structural blocking phase and the electrical rough-in phase.
Structural Blocking Photography
Outdoor fans, especially large damp-rated models like the Hunter Atlas or Minka-Aire smart fans, generate significant torque. Before the ceiling panels or rafters are sealed, you must photograph the structural blocking between the joists. Use a flash bounced off a nearby white card to illuminate the dark cavities between the pergola beams. Capture the heavy-duty fan-rated junction box and the carriage bolts securing the mounting bracket to the structural wood. This visual proof is critical if the fan ever wobbles or requires warranty service down the line.
Electrical and Smart Wiring Documentation
According to the U.S. Department of Energy's cooling guidelines, proper installation and maintenance of outdoor airflow devices are key to energy-efficient patio cooling. To support this, document the electrical wiring before the canopy is closed up. Photograph the color-coded wires, the smart switch relays (such as Lutron Caseta or Matter-compatible smart modules), and the weatherproof conduit runs. These close-up, well-lit macro photos will save hours of guesswork if a smart home hub fails to communicate with the fan's receiver in the future.
Comparison Table: Documentation Checklists for Both Styles
Use this structured checklist to ensure your photographic documentation covers all critical structural and technical elements, regardless of the pergola style you are building.
| Documentation Element | Attached Pergola Focus | Freestanding Pergola Focus |
|---|---|---|
| Primary Load Path | Ledger board, house rim joist, lag screws | Concrete footings, post bases, sonotubes |
| Water Management | Flashing integration, house wrap overlap | Post cap flashing, ground slope drainage |
| Fan Mount Structure | Joist blocking, fan-rated junction box | Beam reinforcement, cross-bracing for torque |
| Smart Wiring | Conduit runs along house siding | Underground trenching, post interior routing |
| Code Compliance | Clearance from windows/doors, fire egress | Property line setbacks, wind load bracing |
Camera Gear and Settings for Construction Documentation
Construction sites are dusty, bright, and full of tight spaces. To properly document a pergola build in 2026, you need gear that can handle the environment while delivering high-resolution detail.
- Wide-Angle Zoom (14-24mm or 16-35mm): Essential for capturing the full span of the pergola roof and the tight spaces between joists where the fan mount is secured.
- Macro Lens (90mm or 100mm): Crucial for documenting the serial numbers on smart fan receivers, the gauge of the electrical wire, and the exact type of structural screws used.
- Weather-Sealed Mirrorless Body: Cameras like the Canon EOS R6 Mark II or Sony A7 IV offer excellent dust and moisture resistance, which is vital when shooting in an unfinished garden environment.
- Compact Drone (e.g., DJI Mini 4 Pro): A top-down drone shot is the absolute best way to document the overall footprint, the roof rafter spacing, and the placement of the fan mount relative to the seating area below.
When shooting structural details, always use a narrow aperture (f/8 to f/11) to ensure maximum depth of field. You want both the foreground joist and the background fan bracket to be in tack-sharp focus. Bounce a portable LED panel off the pergola beams to fill in the harsh shadows created by direct midday sun.
Lighting Techniques for Structural Photography
Natural light is rarely sufficient for documenting the underside of a pergola or the interior of a post base. Because you are documenting for technical clarity rather than just mood, you must control the light. Use a technique called 'light painting' during the twilight hours. Set your camera on a sturdy tripod, use a 10-second exposure, and walk through the pergola frame with a high-CRI LED flashlight, illuminating the ledger board, the fan junction box, and the post anchors. This technique reveals every structural detail without the harsh, flat look of an on-camera flash.
Pro-Tip for 2026: Always shoot your structural documentation in RAW format and embed GPS metadata. Modern asset management software can automatically map your photos to the exact coordinates of the pergola footings, making it incredibly easy to locate underground wiring or footings years later using an AR (Augmented Reality) garden app.
Creating a Visual Maintenance and Smart Home Manual
The final step in garden documentation is organization. A folder full of random JPEGs is useless when you need to reset a smart fan receiver or replace a flashing strip. Compile your photos into a digital visual manual. Group the images chronologically: Site Prep, Footings, Framing, Fan Mount Rough-In, Electrical, and Final Aesthetics. Reference the International Code Council (ICC) guidelines in your manual's text notes to remind yourself of the specific wind-load and structural codes your build adhered to. By treating your pergola build as a serious architectural documentation project, you protect your investment, streamline future smart-home troubleshooting, and elevate your garden photography portfolio to a professional, technical standard.

