Lawn Care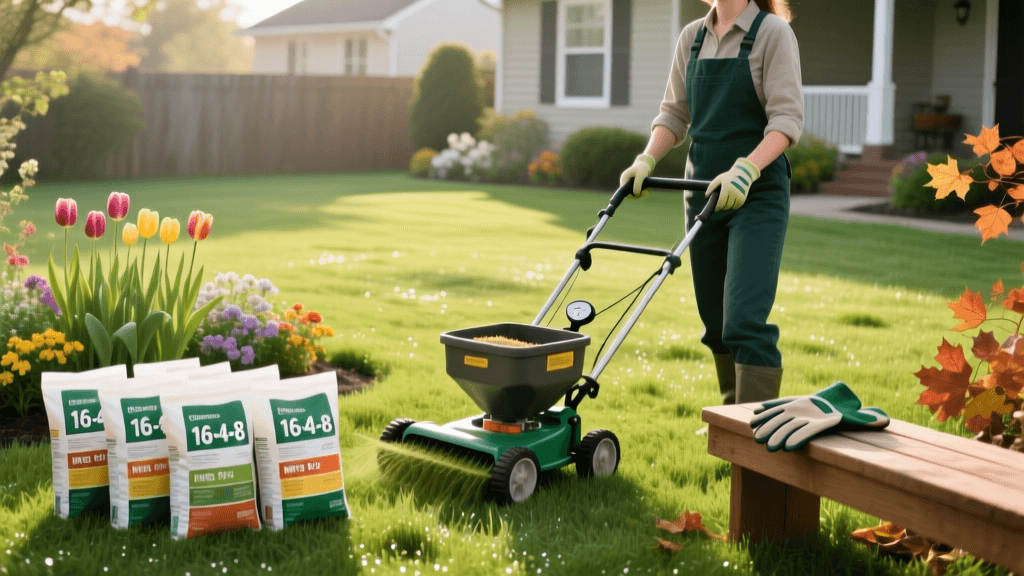
A Beginner's Guide to First-Time Lawn Fertilization
Welcome to the World of Lawn Nutrition
Starting your lawn care journey can feel incredibly overwhelming, especially when you walk down the fertilizer aisle at your local garden center. With dozens of brands, confusing numbers, and varying application methods, it is easy to feel lost. However, fertilizing your lawn does not require a degree in agronomy. By understanding a few basic principles, you can transform a patchy, yellowing yard into a thick, vibrant carpet of green. This beginner-friendly guide will walk you through everything you need to know about first-time lawn fertilization, from decoding the label to calibrating your spreader, ensuring your grass gets exactly what it needs to thrive.
Why Your Lawn Needs Fertilizer
Just like humans need a balanced diet to thrive, your grass requires specific nutrients to grow deeply rooted and resistant to environmental stressors. While soil naturally contains some of these nutrients, continuous mowing, rainfall, and seasonal temperature shifts deplete them over time. According to turfgrass experts at the University of Minnesota Extension, regular fertilization replenishes these vital elements, promoting vigorous leaf growth, deep root development, and enhanced resistance to weeds, diseases, and drought. Without supplemental feeding, even the most carefully mowed and watered lawn will eventually thin out and become vulnerable to invasion by crabgrass and broadleaf weeds.
Decoding the NPK Ratio
Every bag of fertilizer features three prominent numbers, such as 16-4-8 or 32-0-10. This is the NPK ratio, representing the percentage by weight of the three primary macronutrients: Nitrogen (N), Phosphorus (P), and Potassium (K).
- Nitrogen (N): The engine of your lawn, responsible for the lush, green color and rapid blade growth.
- Phosphorus (P): Stimulates strong root development, which is especially critical for newly seeded or overseeded lawns.
- Potassium (K): Acts as the plant's immune system, fortifying the grass against cold winters, scorching summers, and heavy foot traffic.
The Clemson University Home and Garden Information Center highly recommends conducting a soil test before your first application. A soil test will reveal exactly which nutrients your yard lacks, preventing you from wasting money on unnecessary chemicals and protecting local waterways from nutrient runoff. Many states offer low-cost soil testing kits through their local cooperative extension offices.
Choosing the Right Fertilizer Type
As a beginner, you will primarily choose between granular and liquid fertilizers, as well as synthetic and organic formulations. Granular fertilizers are generally the most beginner-friendly because they are easy to store, simple to apply with a broadcast spreader, and often feature slow-release technology that feeds the lawn gradually over several weeks. Liquid fertilizers act faster but require more frequent applications and careful mixing to avoid burning the grass. Below is a comparison chart to help you decide which option fits your current skill level and lawn needs.
| Feature | Granular (Synthetic) | Granular (Organic) | Liquid Fertilizer |
|---|---|---|---|
| Ease of Use | Very Easy (Spreader) | Very Easy (Spreader) | Moderate (Hose-end sprayer) |
| Release Rate | Slow to Fast | Very Slow (Microbial) | Immediate / Fast |
| Burn Risk | Moderate (if over-applied) | Very Low | High (if mixed improperly) |
| Cost (per 5k sq ft) | $25 - $45 | $35 - $60 | $15 - $30 |
| Best For Beginners? | Yes (e.g., Scotts Turf Builder) | Yes (e.g., Milorganite) | No (Requires precision) |
Timing is Everything: Cool-Season vs. Warm-Season Grasses
Applying fertilizer at the wrong time of year is one of the most common mistakes beginners make. Feeding your grass during its dormant period or peak summer stress can cause severe damage. You must first identify whether you have a cool-season or warm-season grass. Cool-season grasses (like Kentucky Bluegrass, Tall Fescue, and Perennial Ryegrass) thrive in cooler temperatures and should be fertilized primarily in the early fall and late spring. Warm-season grasses (like Bermuda, Zoysia, and St. Augustine) grow aggressively in the heat and require feeding from late spring through late summer.
| Grass Type | Spring Application | Summer Application | Fall Application |
|---|---|---|---|
| Cool-Season | Light feeding (Late May) | Avoid (Causes stress) | Heavy feeding (Sept - Nov) |
| Warm-Season | Start after green-up (April) | Maintain (June - Aug) | Avoid (Disrupts dormancy) |
Step-by-Step Application Guide
Now that you have the right product and the timing is correct, it is time to apply. Follow these actionable steps for a flawless application that maximizes growth and minimizes waste.
1. Mow and Prep the Lawn
Mow your lawn a day or two before applying fertilizer. This allows the granules to reach the soil surface more easily rather than getting trapped in tall grass blades. Ensure the lawn is dry when you apply granular fertilizer; wet grass will cause the granules to stick to the blades, which can lead to fertilizer burn.
2. Calibrate Your Spreader
The fertilizer bag will recommend a specific spreader setting (e.g., Scotts EdgeGuard Mini Spreader setting 'H'). Do not skip this step. To ensure accuracy, measure out the amount of fertilizer needed for a 500-square-foot test area. Pour it into your spreader and walk over a paved driveway at your normal, steady walking pace. Adjust the dial until the product runs out exactly as you finish the 500-square-foot space.
3. Apply Using the Perimeter Method
Start by creating a perimeter pass around the outer edges of your lawn. This creates a turning zone so you do not overlap and double-apply fertilizer when turning around. Next, fill in the center of the lawn using straight, parallel lines. Overlap your wheel tracks slightly to avoid leaving unfertilized stripes.
4. Water it In
Unless you are using a specific weed-and-feed product that requires sticking to the leaves, most granular fertilizers need to be watered into the soil to activate. Apply about 1/4 inch of water via your irrigation system or a sprinkler immediately after application. This washes the nutrients off the grass blades and down to the root zone where they can be absorbed.
Environmental Best Practices and Cleanup
Responsible lawn care extends beyond your property line. Fertilizer runoff is a leading cause of harmful algae blooms in local lakes and streams. The Penn State Extension strongly advises homeowners to use a broadcast spreader with a side-guard or edge-control feature when working near driveways, sidewalks, and streets. If any granules land on hard surfaces, sweep them back onto the grass or into your garden beds. Never hose off your driveway into the storm drain, as storm drains typically lead directly to local waterways without filtration.
Common Beginner Mistakes to Avoid
- Over-fertilizing: More is not better. Excess nitrogen will cause rapid, weak blade growth that is highly susceptible to disease and pest damage. Always stick to the bag's recommended coverage rates.
- Ignoring the Soil Test: Applying phosphorus to a lawn that already has high phosphorus levels is a waste of money and an environmental hazard. Let your soil test dictate your NPK needs.
- Fertilizing Dormant Grass: Feeding brown, dormant grass in the dead of winter or the peak of a summer drought will not help the grass; it will only feed emerging weeds.
Conclusion
Fertilizing your lawn for the first time is a major milestone in your landscaping journey. By understanding the NPK ratio, choosing a beginner-friendly granular product, and adhering to the correct seasonal schedule, you set your turf up for long-term success. Remember that consistency and patience are key. A single application will not create a golf-course-quality lawn overnight, but establishing a routine, eco-friendly fertilization schedule will reward you with a dense, resilient, and beautiful landscape for years to come.