
Landscaping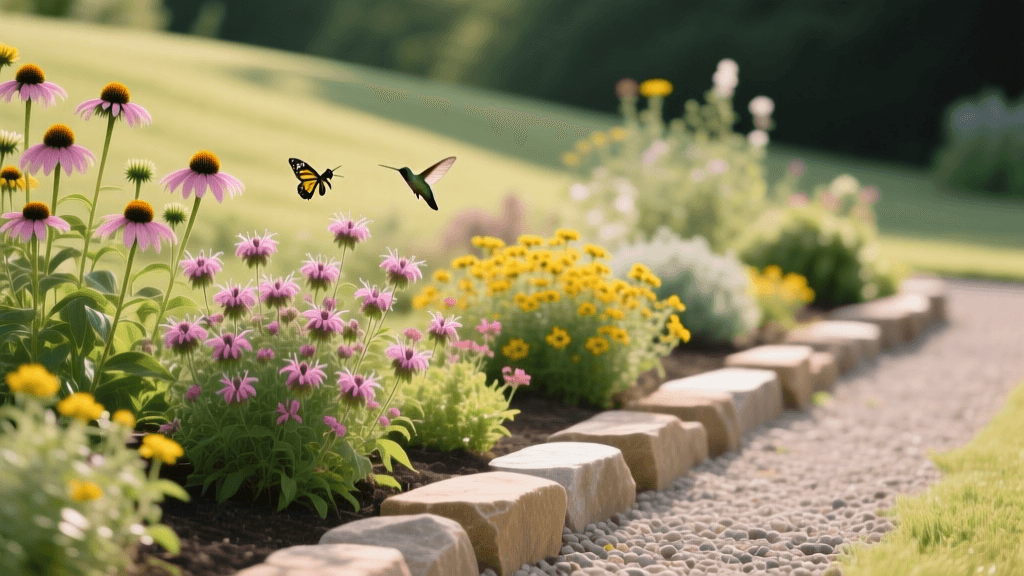
Beginner Guide to Starting a Native Pollinator Garden Bed
Transform Your Landscape with a Native Pollinator Garden
Landscaping is about more than just maintaining a pristine, grassy lawn; it is about creating a thriving, sustainable ecosystem right in your front or backyard. For beginners looking to elevate their garden bed planning while supporting local ecology, starting a native pollinator garden is one of the most rewarding projects you can undertake. Not only does a pollinator bed dramatically improve your curb appeal with vibrant, seasonal colors, but it also provides essential habitat for bees, butterflies, and beneficial insects.
According to the National Wildlife Federation's Garden for Wildlife program, native plants are the foundation of a healthy local ecosystem. They have evolved alongside local pollinators, providing the exact nectar, pollen, and host environments these creatures need to survive. If you are ready to trade a patch of high-maintenance turf for a beautiful, low-maintenance perennial garden bed, this beginner-friendly growing guide will walk you through the process step-by-step.
Step 1: Site Selection and Sunlight Mapping
Before you buy a single plant or dig a trench, you need to evaluate your landscape. Most native pollinator-friendly perennials thrive in full sun, which is defined as receiving at least six to eight hours of direct sunlight per day. Spend a weekend observing your yard. Note which areas get morning sun, which bake in the harsh afternoon heat, and where shadows from trees or your home fall.
For a beginner, a 4-foot by 8-foot garden bed (32 square feet) is the perfect starting size. It is large enough to create a dramatic visual impact and support a diverse plant list, but small enough to manage without feeling overwhelmed. Choose a relatively flat area to prevent water runoff, and ensure the bed is at least a few feet away from large tree roots, which will compete with your new perennials for water and nutrients.
Step 2: Soil Preparation and Bed Edging
Healthy landscaping starts from the ground up. You have two main options for removing the existing grass: manual removal or the smothering method. If you are starting in the fall or early spring, manual removal using a sharp square spade or a rented sod cutter is the fastest route. Cut the sod into manageable strips, roll them up, and compost them or use them to patch other areas of your lawn.
Alternatively, the smothering method (often called sheet mulching) is less labor-intensive but takes longer. Mow the grass as short as possible, lay down overlapping layers of plain brown cardboard, and wet it thoroughly. Cover the cardboard with 3 to 4 inches of organic compost and topsoil. Over a few months, the grass will die and decompose, enriching the soil.
Unlike traditional vegetable gardens or exotic rose beds, native plants generally prefer unamended, native soil. They are adapted to your local dirt. However, adding a 2-inch layer of organic compost (such as Espoma Organic Compost) during bed preparation will improve soil structure and drainage. Avoid synthetic fertilizers; they promote weak, leggy growth and can harm sensitive soil microbes. Once the soil is prepped, install landscape edging. Steel or aluminum edging provides a clean, modern border that prevents aggressive grasses from creeping back into your new garden bed.
Step 3: Selecting Beginner-Friendly Native Plants
When planning your garden bed, aim for a succession of blooms from early spring through late fall. This ensures a steady food source for pollinators and keeps your landscape looking vibrant for months. Always consult the Xerces Society's regional plant lists to ensure the species you choose are truly native to your specific hardiness zone and county.
Below is a comparison chart of five incredibly resilient, beginner-friendly native perennials that perform beautifully in most North American landscapes:
| Plant Name | Sun Needs | Mature Height | Bloom Time | Est. Cost (Plug) |
|---|---|---|---|---|
| Purple Coneflower (Echinacea purpurea) | Full Sun | 2 - 4 feet | Summer to Fall | $3.50 - $5.00 |
| Black-Eyed Susan (Rudbeckia hirta) | Full Sun | 2 - 3 feet | Summer | $3.00 - $4.50 |
| Butterfly Weed (Asclepias tuberosa) | Full Sun | 1 - 2 feet | Early Summer | $4.00 - $6.00 |
| Bee Balm (Monarda fistulosa) | Full to Part Sun | 2 - 4 feet | Mid-Summer | $4.50 - $6.50 |
| New England Aster (Symphyotrichum novae-angliae) | Full Sun | 3 - 5 feet | Late Fall | $3.50 - $5.50 |
Note: Buying 'plugs' (small, deep-rooted starter plants) from native plant nurseries is highly cost-effective and allows plants to establish robust root systems faster than large, root-bound nursery pots.
Step 4: Planting and Spacing Guidelines
Proper spacing is crucial for airflow, disease prevention, and aesthetic maturity. While it is tempting to pack plants closely together for an 'instant garden' look, perennials need room to expand. For the plants listed above, aim for 18 to 24 inches of spacing between each plant. Arrange them in staggered, triangular patterns rather than straight, rigid rows to mimic a natural landscape.
When planting, dig a hole twice as wide as the plug's root ball, but no deeper. The 'crown' of the plant (where the stems meet the roots) should sit exactly level with the surrounding soil surface. Planting too deeply can cause crown rot, a common killer of new perennials. Gently loosen any circling roots at the bottom of the plug before placing it in the hole, backfill with native soil, and press down firmly with your hands to eliminate air pockets.
Step 5: Mulching and First-Year Watering
Even drought-tolerant native plants need consistent moisture during their first year to establish deep root systems. Immediately after planting, apply a 2-inch layer of shredded hardwood mulch or leaf mold over the garden bed. Mulch regulates soil temperature, retains moisture, and suppresses weeds. Crucially, keep the mulch at least 2 inches away from the base of the plant stems to prevent rot and deter burrowing pests like voles.
For the first growing season, plan to provide about 1 inch of water per week, either through rainfall or supplemental irrigation. Use a soaker hose or a drip irrigation system rather than overhead sprinklers. Overhead watering wets the foliage, which can lead to fungal diseases like powdery mildew, especially on plants like Bee Balm and Coneflowers. Water deeply and infrequently to encourage roots to grow downward in search of moisture, which will make your landscape incredibly drought-resilient in subsequent years.
Long-Term Maintenance and Winter Prep
One of the greatest advantages of native landscaping is the drastic reduction in long-term maintenance. By year two or three, your established pollinator bed will require minimal weeding and zero fertilization. However, your approach to fall and winter cleanup must shift from traditional landscaping norms.
According to Penn State Extension's guide on pollinator gardens, the urge to 'put the garden to bed' by cutting everything down to the ground in late autumn is detrimental to local wildlife. Many native bee species overwinter in the hollow stems of dead perennials, while birds rely on the standing seed heads of Coneflowers and Black-Eyed Susans for winter foraging.
Instead of chopping your plants down in November, leave the stalks and seed heads standing all winter. They provide beautiful, architectural interest in the snowy landscape and serve as critical habitat. Wait until early spring, when daytime temperatures are consistently above 50°F (10°C), to cut back the dead stalks. Even then, consider chopping the stems into 12-to-18-inch pieces and leaving them loosely piled in a hidden corner of your yard to allow any remaining overwintering insects to emerge naturally.
By following this beginner-friendly guide, you will transform a sterile patch of lawn into a dynamic, living landscape. You will save time, reduce water usage, and enjoy a front-row seat to the beautiful, bustling ecosystem you helped create.
