
Landscaping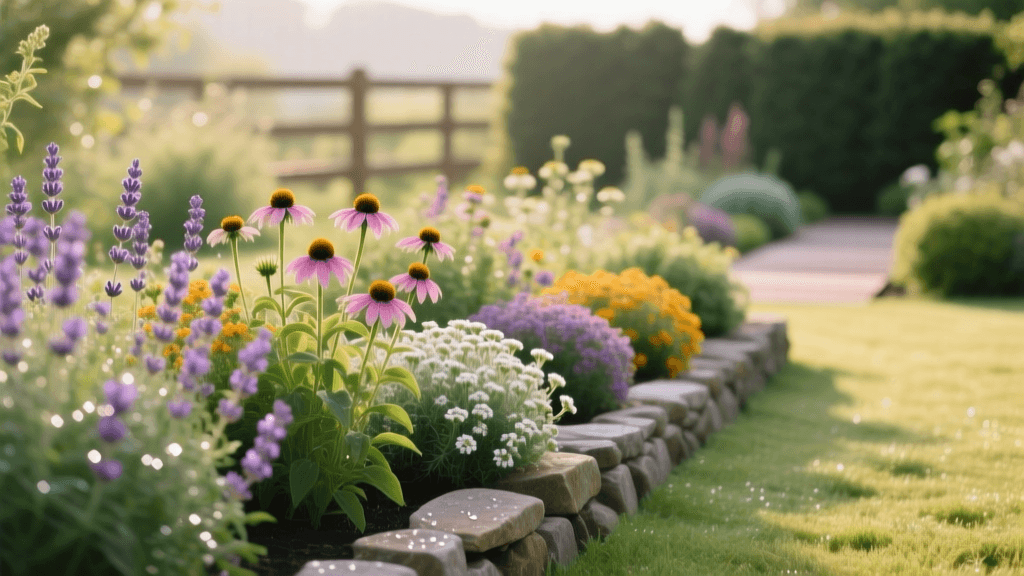
Beginner's Guide to Growing a Perennial Flower Border
Introduction to Perennial Landscaping
Designing and growing a perennial flower border is one of the most rewarding landscaping projects a homeowner can undertake. Unlike annuals that require replanting every spring, perennials return year after year, building stronger root systems and more spectacular blooms with each passing season. For beginners, a perennial border offers a forgiving, low-maintenance way to boost curb appeal, support local ecosystems, and create a dynamic outdoor living space.
This beginner-friendly growing guide will walk you through the entire process of planning, prepping, planting, and maintaining a stunning perennial landscape. Whether you are transforming a bare patch of grass or upgrading an existing garden bed, these actionable steps will set you up for long-term success.
Why Choose Perennials for Your Landscape?
Perennials are the backbone of sustainable landscaping. While the initial investment in plants and soil amendments might be slightly higher than buying flats of annuals, the long-term return on investment is undeniable. Perennials reduce soil erosion, require less water once established, and provide vital habitat for pollinators. Furthermore, they save you countless hours of labor since you do not need to till, amend, and replant the same beds every single year.
Essential Tools for the Beginner Gardener
Before you break ground, ensure you have the right equipment. You do not need an expensive arsenal of tools to start a perennial border. Here is a basic checklist:
- Round-Point Shovel: For digging large holes and moving soil.
- Garden Trowel: Perfect for smaller planting tasks and mixing amendments.
- Spading Fork: Essential for breaking up compacted clay soil and lifting established plants.
- Bypass Pruners: For clean cuts when deadheading or trimming damaged foliage.
- Garden Hose with Adjustable Nozzle: Gentle watering is crucial for young transplants.
- Soil Test Kit: To determine your baseline pH and nutrient levels.
Step 1: Site Selection and Sun Mapping
The most common mistake beginners make is planting shade-loving perennials in full sun, or vice versa. Before purchasing a single plant, spend a weekend observing your chosen landscape site. Track how many hours of direct sunlight the area receives during the peak of the day.
- Full Sun: 6 to 8+ hours of direct sunlight daily.
- Part Sun / Part Shade: 3 to 6 hours of direct sunlight, preferably morning sun.
- Full Shade: Less than 3 hours of direct sunlight, or dappled light throughout the day.
Map out your bed dimensions using a garden hose to outline the curves. A width of at least 4 to 6 feet allows for proper layering, placing taller specimens in the back and shorter border plants in the front.
Step 2: Soil Testing and Preparation
Healthy perennials start with healthy soil. According to Penn State Extension, understanding your soil texture and pH is critical for nutrient uptake. Most perennials thrive in a slightly acidic to neutral pH range of 6.0 to 7.0.
Once you have your soil test results, prepare the bed by removing all existing turf grass and weeds. Use a spade to skim off the grass, or smother it with layers of cardboard and compost for a few months prior to planting. Loosen the top 12 inches of soil with your spading fork. If you have heavy clay soil, incorporate 2 to 3 inches of organic compost to improve drainage. For sandy soils, compost helps retain moisture and nutrients.
Step 3: Selecting Beginner-Friendly Perennials
When curating your plant list, focus on hardy, disease-resistant varieties that offer staggered bloom times. This ensures your landscape remains vibrant from early spring through late fall. The University of Minnesota Extension recommends choosing plants that match your specific USDA Hardiness Zone to ensure winter survival.
Below is a comparison chart of five incredibly resilient, beginner-friendly perennials that provide excellent structure and color to any garden border:
| Plant Name | Sun Requirements | Bloom Season | Mature Height | Spacing |
|---|---|---|---|---|
| Purple Coneflower (Echinacea) | Full Sun | Summer to Fall | 24 - 36 inches | 18 - 24 inches |
| Black-Eyed Susan (Rudbeckia) | Full Sun | Mid to Late Summer | 24 - 30 inches | 18 inches |
| Hosta (Plantain Lily) | Part to Full Shade | Summer | 12 - 24 inches | 24 - 36 inches |
| Catmint (Nepeta) | Full Sun | Late Spring to Summer | 12 - 18 inches | 18 - 24 inches |
| Coral Bells (Heuchera) | Part Shade | Spring to Early Summer | 12 - 18 inches | 12 - 18 inches |
Step 4: The Planting Process
When planting day arrives, arrange your potted perennials on the soil surface while still in their nursery pots. This allows you to visualize the final layout and adjust spacing before digging. Remember that perennials will expand to their mature width, so avoid the beginner trap of overcrowding them to fill empty gaps immediately.
Dig a hole twice as wide as the nursery pot but no deeper than the root ball. The crown of the plant (where the stems meet the roots) should sit exactly level with the surrounding soil grade. Planting too deep can cause crown rot, while planting too shallow exposes roots to drying out. Backfill the hole with native soil mixed with a handful of compost, gently firming it down to eliminate large air pockets.
Step 5: Mulching and Watering Strategies
Immediately after planting, apply a 2 to 3-inch layer of organic mulch, such as shredded hardwood or pine bark, around the base of your plants. Keep the mulch a few inches away from the actual stems to prevent moisture buildup and fungal diseases. Mulch suppresses weeds, regulates soil temperature, and slowly breaks down to feed the soil microbiome.
Water your new perennials deeply and slowly. A gentle soaking for 20 to 30 minutes encourages roots to grow downward in search of moisture. For the first growing season, plan to water your bed with about 1 inch of water per week, either from rainfall or supplemental irrigation.
Step 6: Seasonal Maintenance and Winterizing
Maintaining a perennial border is highly manageable if you stay ahead of the seasons. During the summer, practice deadheading, which involves snipping off spent flower blooms with your bypass pruners. This redirects the plant's energy away from seed production and encourages a second flush of flowers.
As autumn approaches, resist the urge to aggressively clean up your garden beds. The Xerces Society strongly advises leaving dead perennial stems and seed heads standing through the winter. These structures provide essential overwintering habitat for native bees and offer a crucial food source for birds during the colder months. Wait until early spring, when temperatures consistently stay above 50°F, to cut back the dead foliage and apply a fresh layer of compost to wake up your garden for a new year of growth.
Conclusion
Starting a perennial flower border is a fantastic entry point into the world of landscaping. By taking the time to understand your sunlight conditions, properly amending your soil, and selecting resilient plants, you will create a thriving, low-maintenance landscape that matures beautifully year after year. Grab your shovel, test your soil, and enjoy the lifelong rewards of growing perennials.
