Gardening
How to Build and Fill a 4x8 Raised Vegetable Garden Bed
Why Choose a 4x8 Raised Bed?
Raised bed gardening has completely transformed how homeowners approach vegetable and flower cultivation. Among the various dimensions available, the 4-foot by 8-foot raised bed is widely considered the gold standard for home gardens. This specific footprint offers an ideal balance of growing space and accessibility. Because the maximum recommended width for a raised bed is four feet, you can easily reach the center from either side without stepping on the soil, thereby preventing compaction. The eight-foot length aligns perfectly with standard lumber sizing, minimizing the need for complex cuts and reducing material waste.
According to the Cornell University College of Agriculture and Life Sciences, raised beds warm up significantly faster in the spring compared to in-ground garden rows. This thermal advantage allows gardeners to extend their growing season, plant heat-loving crops earlier, and achieve superior drainage in areas with heavy clay soil. Whether you are growing heirloom tomatoes, crisp bell peppers, or a vibrant cut-flower garden, mastering the construction and soil preparation of a 4x8 raised bed is the foundational step toward a bountiful harvest.
Materials and Tools Required
Before heading to the lumber yard, it is essential to gather the right materials. Building a durable raised bed requires an upfront investment, but choosing the correct lumber and hardware will ensure your bed lasts for a decade or more. Below is a comprehensive list of materials and estimated costs based on national averages.
- Lumber (Frame): Three pieces of 2x10x8 untreated cedar or ground-contact pressure-treated pine. Cedar is naturally rot-resistant and can last 10 to 15 years (Cost: $45 to $65 per board). Pine is a budget-friendly alternative but may need replacement after 5 to 7 years (Cost: $15 to $25 per board).
- Fasteners: One box of 3-inch exterior-grade star-drive wood screws. Do not use standard galvanized nails, as they can pull out over time as the wood expands and contracts with moisture (Cost: $10).
- Weed Barrier: One roll of heavy-duty, permeable landscape fabric to suppress aggressive weeds like Bermuda grass (Cost: $20).
- Pest Protection: One roll of 1/2-inch galvanized hardware cloth to prevent gophers and moles from entering the bed from below (Cost: $35).
- Corner Braces (Optional): Four interior corner brackets for added structural stability if using softer woods (Cost: $15).
Tools Needed: A power drill with a star-bit and a 1/8-inch drill bit for pre-drilling, a tape measure, a carpenter's speed square, a 4-foot bubble level, a rubber mallet, a shovel, and heavy-duty wire cutters.
Step-by-Step Construction Guide
Step 1: Site Selection and Preparation
Select a location that receives a minimum of six to eight hours of direct sunlight daily. Avoid placing the bed directly under large trees, as their root systems will compete for water and nutrients, and their canopies will block vital sunlight. Once you have chosen the site, clear the area of large rocks and debris. Use a shovel to roughly level the ground. While the bed frame will sit on the surface, removing large mounds of dirt ensures the frame rests evenly, preventing the walls from bowing outward once the heavy soil is added.
Step 2: Assembling the Frame
Lay two of the 8-foot boards parallel to each other on a flat surface like a driveway or patio. Place the remaining board at a perpendicular angle to form a corner. To prevent the wood from splitting, always pre-drill your holes. Measure one inch from the top and bottom edges of the perpendicular board and drill two pilot holes through it and into the end grain of the parallel board. Drive the 3-inch exterior screws into the pilot holes. Repeat this process for all four corners. Stand the assembled rectangular frame upright and move it to your prepared garden site.
Step 3: Leveling and Securing
Place your 4-foot level along the long sides and the short ends of the frame. If the ground is uneven, use a shovel to scrape away soil from the high side rather than adding loose dirt under the low side, which can cause the bed to sink over time. Once the frame is perfectly level on all sides, use a rubber mallet to tap the bottom edges firmly into the soil, creating a slight anchor.
Step 4: Pest and Weed Protection
With the frame leveled, staple the 1/2-inch hardware cloth to the bottom edges of the frame, allowing it to extend slightly up the inside walls. This is a critical step if you live in an area with burrowing rodents. Overlap the hardware cloth with the permeable landscape fabric, securing it with landscape staples. The fabric will block weeds while allowing excess water to drain freely into the native soil below.
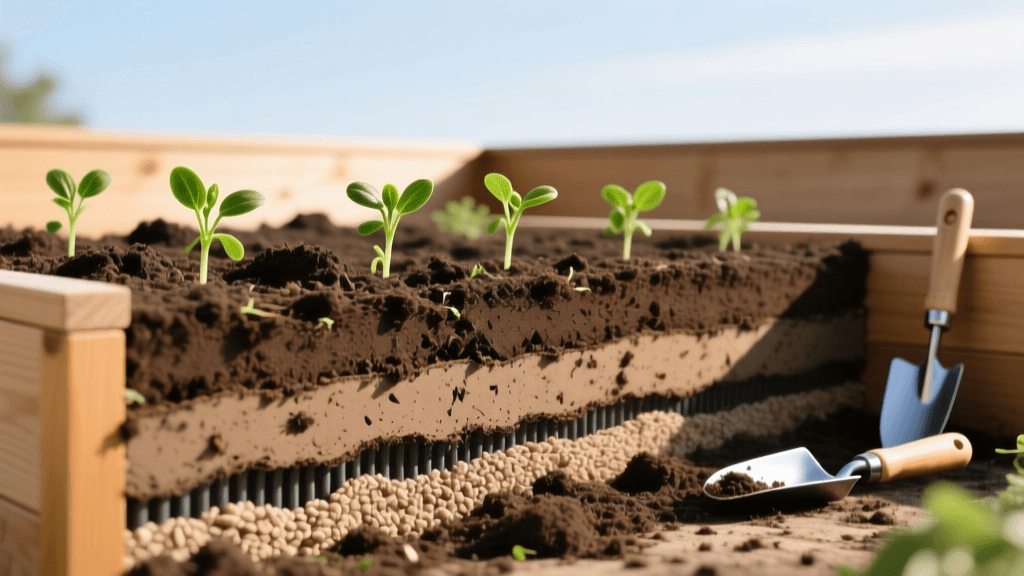
The Science of Raised Bed Soil
The most common mistake beginner gardeners make is filling a raised bed with native topsoil dug up from their yard. Native soil is too dense and will compact severely in a confined raised bed environment, suffocating plant roots and causing waterlogging. According to extension specialists at the University of Maryland, a premium raised bed mix must prioritize aeration, moisture retention, and slow-release organic nutrients.
Below is a comparison of the three most popular soil recipes for a 4x8 raised bed. Note that a 4x8 bed with a depth of 9.25 inches (the actual height of a 2x10 board) requires approximately 24 cubic feet of soil. Always purchase an extra 10 percent to account for initial settling.
| Soil Recipe | Ingredients by Volume | Pros | Cons | Est. Cost (26 cu ft) |
|---|---|---|---|---|
| The Extension Blend | 50% high-quality topsoil, 30% organic compost, 20% coarse sand or perlite | Excellent drainage, mimics natural soil profile, cost-effective | Heavy to move, requires annual compost top-dressing | $110 - $140 |
| Mel's Mix (Square Foot) | 33% peat moss or coco coir, 33% coarse vermiculite, 33% blended compost | Incredibly light, superior moisture retention, no tilling required | Expensive, dries out faster in extreme heat, lacks mineral depth | $180 - $230 |
| The Budget Bulk Blend | 60% screened topsoil, 40% mushroom or dairy compost | Very affordable, easy to source in bulk from local yards | Can compact over time, may contain weed seeds if not heat-treated | $70 - $95 |
Filling and Settling the Bed
When filling your 4x8 raised bed, do not simply dump all the soil in at once. Add the soil mix in three distinct layers, watering each layer thoroughly with a garden hose before adding the next. This process, known as 'watering in,' eliminates large air pockets and ensures the soil settles evenly. If you skip this step, you will find that after the first heavy rain, your soil level will drop by two or three inches, exposing the roots of your newly planted vegetables. Leave about one inch of space between the top of the soil and the rim of the wooden frame to prevent mulch and soil from washing over the edges during heavy watering.
Companion Planting Layout for a 4x8 Bed
Maximizing the yield of your new raised bed requires strategic planting. Companion planting leverages the natural synergies between different plant species to deter pests and enhance growth. For a 4x8 vegetable bed, consider dividing the space into a grid system.
Along the northernmost edge of the bed, plant indeterminate tomatoes supported by heavy-duty trellises. This prevents them from shading out the rest of the garden. At the base of the tomatoes, plant sweet basil and French marigolds. Basil is known to improve the flavor profile of tomatoes, while marigolds secrete compounds from their roots that repel harmful root-knot nematodes. In the center of the bed, plant bush beans and leafy greens like Swiss chard. Along the southern edge, where the sun hits first, plant root vegetables like carrots and radishes, interspersed with pungent alliums like onions or garlic to deter carrot rust flies.
Seasonal Maintenance Tips
A well-built raised bed requires minimal structural maintenance but demands consistent soil care. At the end of every growing season, remove all spent plant debris to prevent the overwintering of fungal diseases. Never pull plants out by the roots if they are healthy; instead, cut them at the soil line with pruning shears, allowing the roots to decompose and feed the soil microbiome. Each spring, top-dress your 4x8 bed with a two-inch layer of fresh organic compost and a balanced organic granular fertilizer. This practice replenishes the micronutrients depleted by the previous year's heavy feeders, ensuring your raised garden bed remains a highly productive ecosystem for years to come.