
Landscaping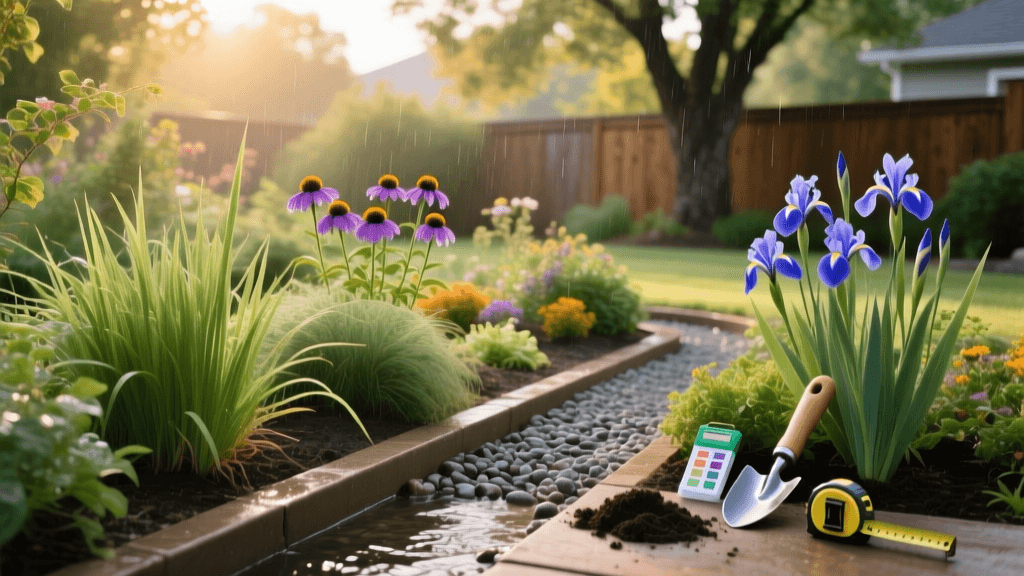
How to Design a Backyard Rain Garden: Layout & Plants
What is a Rain Garden and Why Build One?
Modern landscaping is no longer just about curb appeal; it is increasingly about ecological function, sustainable water management, and creating resilient outdoor living spaces. One of the most effective and beautiful ways to merge these concepts is by designing a backyard rain garden. A rain garden is a shallow, strategically planted depression in your landscape designed to capture, filter, and slowly absorb stormwater runoff from impervious surfaces like roofs, driveways, and patios.
According to the Environmental Protection Agency (EPA), green infrastructure solutions like rain gardens are vital for reducing the burden on municipal storm sewers, preventing localized flooding, and filtering out pollutants such as fertilizers, oils, and heavy metals before they reach local waterways. Beyond the environmental benefits, a well-planned rain garden adds a stunning, naturalized focal point to your yard, attracts essential pollinators, and can solve persistent drainage issues in soggy areas of your property.
Step 1: Site Selection and Layout Planning
The success of a rain garden hinges entirely on proper placement. You are essentially creating a functional drainage basin, so gravity and soil composition must work in your favor.
- Distance from Structures: Always locate your rain garden at least 10 feet away from your home's foundation to prevent water seepage into your basement or crawlspace.
- Avoid Utilities and Septic: Never build a rain garden directly over a septic system, drain field, or underground utility lines. Always call 811 before you dig to have your local utility companies mark underground lines.
- Slope Considerations: Ideal locations have a gentle slope of 1% to 12%. If the slope is too steep, water will flow too quickly, causing erosion. If the yard is perfectly flat, you will need to excavate a larger, shallower basin and potentially create a berm to hold water.
- Capture Point: Position the garden in the natural path of water runoff. You can use a swale (a shallow, grassy ditch) or a buried downspout extension pipe to direct roof water directly into the garden basin.
Step 2: The Percolation Test and Sizing
Before finalizing your layout, you must determine how quickly your native soil drains. This is done via a simple percolation test. Dig a test hole about 8 inches deep and 6 inches wide in the proposed location. Fill it with water and let it drain completely to saturate the soil. Then, fill it a second time. Measure the water level drop after 4 hours. Multiply that number by 6 to get your infiltration rate in inches per hour.
As a general rule of thumb, a rain garden should be sized to capture about 20% to 30% of the total impervious roof or driveway area that drains into it. Experts at Rutgers University recommend adjusting the depth and base size of the garden based on your specific soil type to ensure water drains within 24 to 48 hours, which is critical for preventing mosquito breeding.
| Soil Type | Infiltration Rate (in/hr) | Recommended Depth | Base Size Multiplier |
|---|---|---|---|
| Sandy | Greater than 2.0 | 6 - 8 inches | 1.0x (Standard) |
| Loamy | 0.5 - 2.0 | 8 - 12 inches | 1.5x |
| Heavy Clay | Less than 0.5 | 12 - 18 inches | 2.5x + underdrain |
Step 3: Soil Amendment and Drainage Layers
If your native soil is heavy clay, simply digging a hole and filling it with water will create a stagnant pond, not a rain garden. To ensure rapid infiltration, you must excavate the basin and replace the native soil with a specialized 'bioretention' soil mix. This engineered soil provides the perfect balance of drainage, moisture retention, and nutrient availability for deep-rooted native plants.
The ideal rain garden soil mix consists of:
- 50% Coarse Washed Sand: Creates large pore spaces for rapid water infiltration and prevents compaction.
- 30% High-Quality Compost: Provides essential organic matter, retains moisture during dry spells, and introduces beneficial microbes that break down stormwater pollutants.
- 20% Topsoil: Adds structure and essential minerals to anchor plant roots.
Mix these components thoroughly before backfilling the excavated basin. Mound the excess excavated soil on the downhill side of the garden to create a 'berm.' This berm acts as a dam, temporarily holding water in the basin during heavy rain events until it can percolate through the amended soil.
Step 4: Plant Selection and Zoning Strategy
Plant selection is where the art of landscape design truly shines. A rain garden is divided into three distinct hydrological zones, each requiring plants with specific moisture tolerances. To support local ecosystems and ensure plant survival, always opt for native species. You can identify the best plants for your specific zip code using the National Wildlife Federation's Native Plant Finder.
Zone 1: The Basin (Wet Zone)
The bottom center of the rain garden holds water the longest. Plants here must tolerate 'wet feet' and occasional standing water for up to 48 hours, followed by dry periods in the summer.
- Blue Flag Iris (Iris versicolor): Features striking purple-blue blooms and sword-like foliage that thrives in saturated soils.
- Swamp Milkweed (Asclepias incarnata): A crucial host plant for Monarch butterfly caterpillars that loves moist conditions and produces fragrant pink flowers.
- Cardinal Flower (Lobelia cardinalis): Produces brilliant, towering red spikes that are an absolute magnet for hummingbirds.
Zone 2: The Slopes (Moist Zone)
The sides of the rain garden experience fluctuating moisture levels. They get wet during storms but drain relatively quickly. Plants here need to be highly adaptable.
- Joe-Pye Weed (Eutrochium purpureum): A tall, architectural native that provides late-summer nectar and thrives in transitional moisture zones.
- New England Aster (Symphyotrichum novae-angliae): Offers vibrant purple fall blooms and handles both temporary flooding and summer droughts with ease.
- Switchgrass (Panicum virgatum): A deep-rooted ornamental grass that stabilizes the slopes, prevents erosion, and provides winter interest.
Zone 3: The Berm (Dry Zone)
The outer edges and the top of the berm drain the fastest and are the driest parts of the landscape. Choose drought-tolerant upland natives for these borders.
- Black-Eyed Susan (Rudbeckia hirta): Cheerful, golden-yellow flowers that are incredibly drought-tolerant and reseed easily.
- Purple Coneflower (Echinacea purpurea): A landscape staple with daisy-like flowers that provide seeds for finches in the winter.
- Little Bluestem (Schizachyrium scoparium): A compact native grass that turns a stunning bronze-red in the autumn.
Step 5: Mulching and Maintenance Planning
Once planted, the entire basin must be mulched to retain moisture, suppress weeds, and protect the soil surface from the erosive impact of heavy rainfall. Use 2 to 3 inches of double-shredded hardwood mulch. Avoid pine bark or wood chips, as these are lightweight and will float away during the first heavy rainstorm, potentially clogging your overflow outlet.
For the first two years, maintenance is critical. You will need to water the plants deeply during dry spells until their root systems are fully established and penetrate deep into the bioretention soil. Regularly inspect the inlet and overflow areas for sediment buildup or debris, and remove any invasive weeds that try to take hold. After year three, a well-designed rain garden becomes largely self-sustaining, requiring only an annual cutback of dead perennial foliage in early spring.
Budgeting: DIY vs. Professional Costs
Planning your budget is a key part of the design phase. The cost of a rain garden varies wildly based on size, soil conditions, and whether you do the heavy lifting yourself.
- DIY Installation: If you have access to a rototiller, a wheelbarrow, and a strong back, you can build a rain garden for approximately $5 to $10 per square foot. This covers the cost of bulk sand, compost, native plugs, and hardwood mulch.
- Professional Installation: Hiring a landscape contractor to handle the excavation, soil engineering, and planting typically costs between $15 and $35 per square foot. For a standard 150-square-foot rain garden, expect professional quotes to range from $2,250 to $5,250.
Many local municipalities and soil conservation districts offer rebates or grant programs for homeowners who install green infrastructure. Check with your local water authority before breaking ground, as you may be able to offset a significant portion of your material costs while dramatically improving your property's drainage and ecological footprint.
