
Landscaping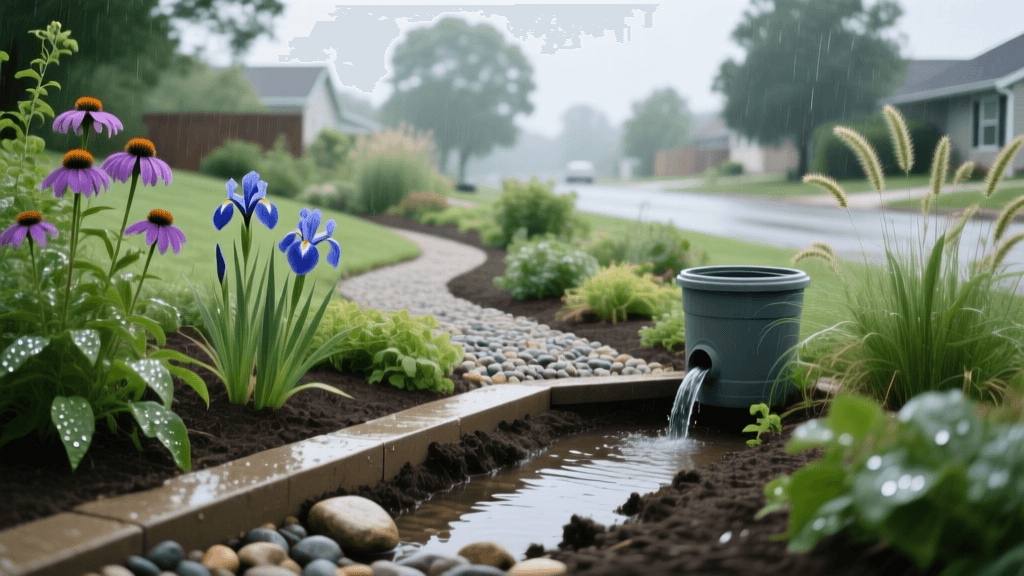
Eco-Friendly Rain Gardens: Sustainable Yard Drainage
Transforming Yard Drainage with Eco-Friendly Rain Gardens
Water management is one of the most critical challenges in modern landscaping. When heavy rains hit, impervious surfaces like roofs, driveways, and compacted lawns generate massive amounts of stormwater runoff. This runoff not only causes localized flooding and soil erosion but also sweeps pollutants directly into municipal storm drains and local waterways. For homeowners seeking sustainable landscaping solutions, the eco-friendly rain garden offers a beautiful, functional, and ecologically responsible answer to yard drainage problems.
A rain garden is a shallow, strategically placed depression planted with deep-rooted native vegetation. It is designed to capture, temporarily hold, and slowly filter stormwater back into the groundwater table. By mimicking the natural hydrological cycle, rain gardens reduce the burden on municipal sewer systems, filter out heavy metals and excess nutrients, and create vital micro-habitats for local pollinators and wildlife.
The Hidden Cost of Stormwater Runoff
Traditional landscaping often relies on extensive turfgrass lawns and concrete hardscaping. While a pristine lawn might look neat, its shallow root system—typically only two to three inches deep—does very little to absorb heavy rainfall. According to the Environmental Protection Agency (EPA), stormwater runoff is a leading cause of water quality issues in urban and suburban areas. As water flows over impervious surfaces, it picks up oil, grease, pesticides, pet waste, and sediment.
By integrating green infrastructure like rain gardens into your property, you actively participate in nonpoint source pollution reduction. A well-designed rain garden can absorb up to 30% more water than a conventional lawn of the same size, trapping sediments and breaking down pollutants through natural biological processes occurring in the soil and plant roots.
Site Selection: Where Should Your Rain Garden Go?
Proper placement is the most crucial step in designing a sustainable drainage solution. You want to intercept water where it naturally flows, but you must also protect your home's structural integrity and existing utilities.
- The 10-Foot Rule: Never place a rain garden closer than 10 feet from your home's foundation to prevent water seepage into basements or crawl spaces.
- Slope and Flow: Look for natural low spots or areas where downspouts discharge. The ideal location has a gentle slope (between 2% and 10%) to allow water to flow into the garden naturally or via a shallow swale.
- Sun Exposure: Most native rain garden plants thrive in full sun to partial shade. Aim for a spot that receives at least six hours of direct sunlight daily.
- Utility Lines: Before digging any depression deeper than six inches, always call your local utility locating service (such as 811 in the United States) to mark underground gas, water, and electrical lines.
- Sepic Systems: Do not place a rain garden over or immediately adjacent to a septic drain field, as the added water volume can overwhelm the system.
Sizing and Soil Percolation Testing
The size of your rain garden depends on the square footage of the impervious surfaces draining into it (like your roof and driveway) and the percolation rate of your native soil. A general rule of thumb is to size the rain garden at 20% to 30% of the total impervious drainage area. For example, if 500 square feet of roof drains to one downspout, your rain garden should be approximately 100 to 150 square feet.
Before finalizing your design, you must conduct a percolation test to ensure your soil can drain adequately. The University of Minnesota Extension recommends the following method:
- Dig a test hole about 8 inches deep and 6 inches wide in the proposed location.
- Fill the hole with water and let it drain completely to saturate the soil.
- Refill the hole with water and measure the water level.
- Wait 24 hours and measure the water level again. If the water drops by at least 2 inches, your soil has adequate drainage. If the water remains after 24 hours, you have heavy clay soil and will need to heavily amend the soil or install an underdrain system.
The Perfect Sustainable Soil Amendment Mix
Native soil, especially heavy clay, often drains too slowly for a functional rain garden. To create an eco-friendly, highly porous growing medium that retains moisture while allowing rapid infiltration, you should excavate the existing soil to a depth of 12 to 18 inches and replace it with a specialized bioretention soil mix. The ideal sustainable ratio is:
- 50% to 60% Coarse Sand: Provides structural porosity and ensures rapid drainage, preventing the garden from becoming a stagnant mosquito breeding ground.
- 20% to 30% Topsoil: Adds essential minerals and provides a stable base for root establishment.
- 20% to 30% Organic Compost: Introduces beneficial soil microbes, improves moisture retention during dry spells, and naturally filters heavy metals and hydrocarbons from the runoff.
Avoid using peat moss, as its harvesting is ecologically destructive and it can alter the soil pH too drastically. High-quality, locally sourced organic compost is a far more sustainable alternative.
Selecting Native Plants for Maximum Filtration
The engine of a rain garden is its plant life. Native plants are essential for sustainable drainage because their root systems can plunge 4 to 8 feet deep, creating natural channels in the soil that drastically increase water infiltration rates. Furthermore, native species are adapted to your local climate, meaning they require zero synthetic fertilizers and minimal supplemental watering once established. According to the National Wildlife Federation, rain gardens planted with native species also serve as critical habitat corridors for birds, bees, and butterflies.
When designing your planting plan, divide the garden into three hydrological zones: the wet bottom (center), the moist slopes, and the dry edges. Below is a comparison chart of excellent native rain garden plants suitable for many North American temperate zones:
| Common Name | Botanical Name | Garden Zone | Ecological Benefit |
|---|---|---|---|
| Swamp Milkweed | Asclepias incarnata | Wet Center | Essential host plant for Monarch butterfly caterpillars. |
| Blue Flag Iris | Iris versicolor | Wet Center | Dense rhizomes stabilize soil; provides early-season nectar. |
| Joe-Pye Weed | Eutrochium purpureum | Moist Slopes | Tall structural element; massive late-summer butterfly magnet. |
| New England Aster | Symphyotrichum novae-angliae | Moist to Dry | Crucial late-fall food source for migrating pollinators. |
| Switchgrass | Panicum virgatum | Dry Edges | Deep, fibrous roots break up clay; provides winter bird cover. |
Step-by-Step Construction Guide
Building a rain garden is a rewarding weekend hardscaping and planting project. Follow these steps to ensure long-term sustainability and functionality:
1. Mark and Excavate: Use a garden hose to outline the shape of your rain garden, favoring organic, kidney-bean shapes that blend naturally into the landscape. Dig the basin to a depth of 6 to 8 inches, ensuring the bottom is relatively level. Use the excavated soil to build a berm on the downhill side.
2. Amend or Replace Soil: If your percolation test was poor, remove the native soil to a depth of 18 inches and replace it with the sand-topsoil-compost mix outlined above. If your soil drains well, simply till the top 12 inches and incorporate 3 inches of compost.
3. Create an Inlet and Overflow: Dig a shallow, rock-lined swale to guide water from your downspout into the garden. On the opposite side of the inlet, create a level overflow spillway lined with river rock to allow excess water to safely exit the garden during torrential downpours without eroding the berm.
4. Plant and Mulch: Plant your native species according to their moisture tolerances. Apply a 2-to-3-inch layer of double-shredded hardwood mulch. Eco-Friendly Tip: Avoid pine bark or lightweight cedar mulches, as they will float away during the first heavy rainstorm. Hardwood mulch knits together and breaks down slowly, feeding the soil biology.
Eco-Friendly Maintenance Practices
One of the greatest advantages of a sustainable rain garden is its low long-term maintenance. However, the first year is critical for root establishment. You will need to provide supplemental watering during dry spells in the first 12 months. Weed regularly by hand to prevent invasive species from outcompeting your young natives.
Because the primary function of the rain garden is to filter water that eventually reaches the groundwater table, never use synthetic fertilizers, herbicides, or chemical pesticides in or around the basin. The compost in your soil mix will provide all the slow-release nutrients your plants need. In early spring, leave the dead stalks of plants like Joe-Pye Weed and Switchgrass standing until temperatures consistently reach 50°F (10°C) to allow overwintering native bees and beneficial insects to emerge safely.
Conclusion
Transitioning from a traditional, water-wasting lawn to an eco-friendly rain garden is a powerful step toward sustainable landscaping. By capturing stormwater, filtering pollutants, and supporting local biodiversity, you transform a problematic, soggy area of your yard into a thriving, resilient ecosystem. Not only will you solve your drainage issues naturally, but you will also enjoy a dynamic, ever-changing landscape that gives back to the environment every time it rains.
