
Landscaping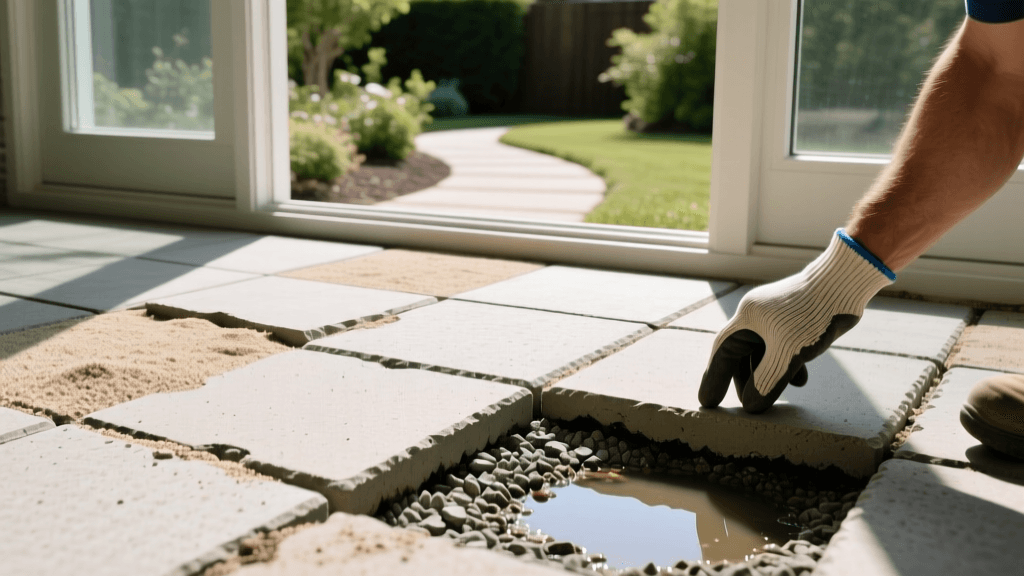
Diagnose and Fix Sinking and Heaving Paver Patios
The Hidden Dangers of Uneven Paver Patios
A beautifully installed paver patio can transform your outdoor living space, providing a durable and aesthetically pleasing area for entertainment and relaxation. However, when pavers begin to sink, heave, or shift, they create more than just an eyesore. Uneven hardscaping introduces severe tripping hazards, promotes water pooling against your home's foundation, and creates breeding grounds for mosquitoes. Troubleshooting and repairing a failing paver patio requires a systematic approach to identify the root cause—whether it is subgrade erosion, frost heave, or tree root intrusion—before attempting a superficial fix. In this comprehensive guide, we will diagnose the most common hardscaping failures and provide a step-by-step repair protocol to restore your patio to its original, level glory.
Diagnosing the Root Cause of Paver Failure
Before you start pulling up stones, you must understand why the failure occurred. Applying a band-aid solution to a structural base issue will only result in repeated failures within a single season. Here are the primary culprits behind sinking and heaving pavers:
1. Subgrade Erosion and Poor Drainage
Water is the ultimate enemy of hardscaping. If your yard lacks proper grading or if downspouts discharge directly onto the patio edge, water will wash away the fine aggregates in your base layer. This creates subterranean voids. When the heavy pavers are subjected to foot traffic or patio furniture weight, they collapse into these voids, resulting in localized sinking. According to the University of Minnesota Extension, improper yard grading and lack of comprehensive drainage solutions are the primary culprits behind landscape erosion and hardscape failure. Ensuring water flows away from the patio at a minimum slope of 1/8 inch per foot is critical.
2. Frost Heave in Cold Climates
In regions with freezing winter temperatures, moisture trapped in the soil beneath the patio base freezes and expands. This expansion exerts immense upward hydrostatic pressure, literally pushing the pavers toward the surface—a phenomenon known as frost heave. When the ice melts in the spring, the soil settles, but the pavers rarely return to their original position, leaving a jagged, heaved surface. To combat this, the base must extend below the frost line, or a capillary break must be installed to prevent water from wicking up into the base material.
3. Tree Root Intrusion
If your patio is installed near mature trees, aggressive root systems may seek out the moisture trapped beneath the impermeable paver surface. As roots thicken over the years, they act like hydraulic jacks, lifting entire sections of the patio. Diagnosing root heave is usually straightforward: the heaving will follow a linear or radiating pattern pointing toward the nearest tree.
4. Failed Edge Restraints
Pavers are not mortared together; they rely on friction and interlocking tension. If the perimeter edge restraints (plastic, aluminum, or concrete curbs) fail, bend, or pull away from their spikes, the pavers will spread outward. This lateral movement breaks the sand joints, causing the perimeter pavers to sink and tilt.
Essential Tools and Materials for Paver Repair
Successfully troubleshooting and repairing a paver patio requires specialized landscaping tools. Do not attempt to compact base materials with a hand tamper; you will not achieve the necessary load-bearing density.
- Paver Extractor Tool: A specialized lifting tool that grips the sides of the pavers to pull them out without chipping the edges.
- Vibratory Plate Compactor: Essential for achieving 90% Proctor density in the gravel base. Rent a 150-lb to 200-lb plate compactor from a local equipment rental center.
- Geotextile Fabric: A permeable landscape fabric that separates the native subgrade soil from the aggregate base, preventing the gravel from sinking into clay soils.
- 3/4-Inch Crushed Angular Gravel: Also known as crushed stone #57 or DOT-approved road base. Angular edges lock together when compacted, unlike smooth river gravel which rolls and shifts.
- Coarse Bedding Sand: ASTM C33 standard concrete sand. Never use masonry sand or play sand, as the fine particles will wash away and retain too much moisture.
- Polymeric Sand: A specialized jointing sand mixed with binding polymers that hardens when activated with water, preventing weed growth and ant infiltration.
Base Material Comparison Chart
Choosing the correct base material is the most critical step in preventing future sinking or heaving. The Interlocking Concrete Pavement Institute (ICPI) provides strict technical specifications for base aggregates to ensure proper load distribution and drainage. Below is a comparison of common base materials used in landscaping:
| Material Type | Particle Size & Shape | Drainage Rate | Compaction Ability | Best Use Case |
|---|---|---|---|---|
| Crushed Angular Gravel (#57) | 3/4-inch, jagged edges | Excellent | Superior (Interlocks tightly) | Primary base layer for all patios and driveways |
| Pea Gravel / River Rock | 3/8 to 1/2-inch, smooth | Excellent | Poor (Rolls under pressure) | Decorative borders only; never use under pavers |
| Crusher Run / Dense-Grade | Mixed sizes with stone dust | Moderate | Excellent (Forms a concrete-like slab) | Driveways or heavy-load commercial patios |
| Masonry Sand | Fine, uniform particles | Poor (Retains water) | Poor (Shifts easily) | Never use as a base; only for mortar mixes |
| Coarse Concrete Sand | Coarse, varied grain size | Good | Moderate | Bedding layer (1 inch max) directly under pavers |
Step-by-Step Troubleshooting and Repair Guide
Once you have diagnosed the issue and gathered your materials, follow this systematic repair process to fix a 50-square-foot section of sunken or heaved pavers.
Step 1: Extract the Affected Pavers
Use your paver extractor or two flathead screwdrivers to carefully pry up the sunken or heaved pavers. Work from the outside of the damaged area inward. Stack the pavers on a tarp, keeping them in the order they were removed to maintain the original pattern and color blend. Sweep away the old, contaminated jointing sand.
Step 2: Excavate and Inspect the Subgrade
Dig out the existing failed base material until you reach the native subgrade soil (usually 6 to 10 inches deep). Inspect the soil. If it is saturated clay or shows signs of water pooling, you must address the drainage issue. For areas with heavy clay soils or poor percolation, integrating a French drain system using products recommended by NDS Landscape Drainage can alleviate hydrostatic pressure and redirect water away from the hardscape.
Step 3: Install Geotextile Fabric and Rebuild the Base
Lay down a heavy-duty, non-woven geotextile fabric over the native soil. This acts as a stabilization layer. Next, add your 3/4-inch crushed angular gravel in 2-inch increments (lifts). After each 2-inch lift, run the vibratory plate compactor over the gravel. Wetting the gravel slightly with a garden hose during compaction helps the stone dust bind the aggregate together. Build the base up to 1.5 inches below your desired final patio height to allow room for the bedding sand and paver thickness.
Step 4: Screed the Bedding Sand
Pour a 1-inch layer of coarse concrete sand over the compacted gravel base. Use two 1-inch PVC pipes as rails and a 2x4 wooden board as a screed to drag across the sand, creating a perfectly level surface. Do not compact the bedding sand; it should remain loose so the pavers can embed themselves slightly when vibrated.
Step 5: Reset and Compact the Pavers
Carefully lay the pavers back into their original pattern, dropping them straight down onto the sand without dragging them. Leave a 1/8-inch gap between each stone. Once all pavers are laid, sweep a thin layer of dry polymeric sand over the surface to fill the joints. Run the plate compactor over the entire repaired section, using a polyurethane pad on the base of the compactor to prevent scratching the paver surfaces. The vibration will force the pavers down into the bedding sand and settle the polymeric sand deep into the joints.
Step 6: Activate the Polymeric Sand
Use a leaf blower to remove all excess polymeric sand from the surface of the pavers. If left on the surface, it will create a hazy, permanent film when wet. Activate the polymers using a garden hose with a gentle shower nozzle. Mist the area for about one minute, wait five minutes, and mist again. The sand will harden within 24 to 48 hours, locking the pavers in place and creating a flexible, water-resistant seal.
Cost and Time Estimates for Paver Repair
Understanding the financial and temporal investment is crucial for homeowners deciding between DIY troubleshooting and hiring a professional hardscape contractor.
- DIY Repair Costs: For a 50-square-foot repair, expect to spend approximately $150 to $250 on materials (gravel, sand, geotextile fabric, polymeric sand). Renting a plate compactor typically costs $75 to $120 per day. Total DIY cost: $225 - $370.
- Professional Repair Costs: Hardscape contractors generally charge a minimum service fee or a premium per-square-foot rate for small repairs. Expect to pay between $15 and $30 per square foot for professional diagnosis, excavation, base reconstruction, and resetting. Total Pro cost: $750 - $1,500 for a 50-square-foot area.
- Time Required: A DIYer working with a helper can expect to spend 8 to 12 hours completing the repair from excavation to final compaction. Professionals can typically complete the same scope of work in 4 to 6 hours using commercial-grade equipment.
Long-Term Preventative Landscaping Strategies
To ensure your repaired patio does not succumb to the same issues, implement these preventative landscaping strategies. First, verify that your roof gutter downspouts are fitted with solid PVC extensions that discharge at least 10 feet away from the patio edge. Second, inspect your edge restraints annually; replace any bent plastic edging with heavy-duty aluminum or poured concrete curbs secured with 10-inch galvanized spikes. Finally, apply a high-quality, breathable siloxane-based paver sealer every two to three years. This will protect the stones from UV fading, prevent water infiltration into the base during freeze-thaw cycles, and make future maintenance significantly easier. By combining proper diagnosis with rigorous base preparation, your outdoor living space will remain level, safe, and beautiful for decades.
