
Good Ideas 50-Gallon Rain Barrel Pot Garden Guide 2026
The Container Gardening Water Challenge in 2026
Container and pot gardening has seen a massive resurgence in 2026, driven by urbanization, smaller yard spaces, and the desire for mobile, flexible landscaping. However, growing plants in pots, raised planters, and hanging baskets presents a unique challenge: they dry out significantly faster than in-ground garden beds. During the peak heat of summer, a standard 15-gallon fabric pot or terracotta planter may require watering once or even twice a day. Relying solely on municipal water to keep your patio pots hydrated is not only expensive—especially with 2026 water rates climbing nationwide—but it also strains local resources.
According to the EPA WaterSense program, outdoor water use accounts for nearly 30% of total household water consumption, and in arid regions, that number can exceed 50%. For container gardeners, capturing and reusing rainwater is the most sustainable and cost-effective solution. This is where the Good Ideas 50-gallon rain barrel with a built-in spigot becomes an essential piece of equipment for your patio or deck setup.
Why the Good Ideas 50-Gallon Rain Barrel?
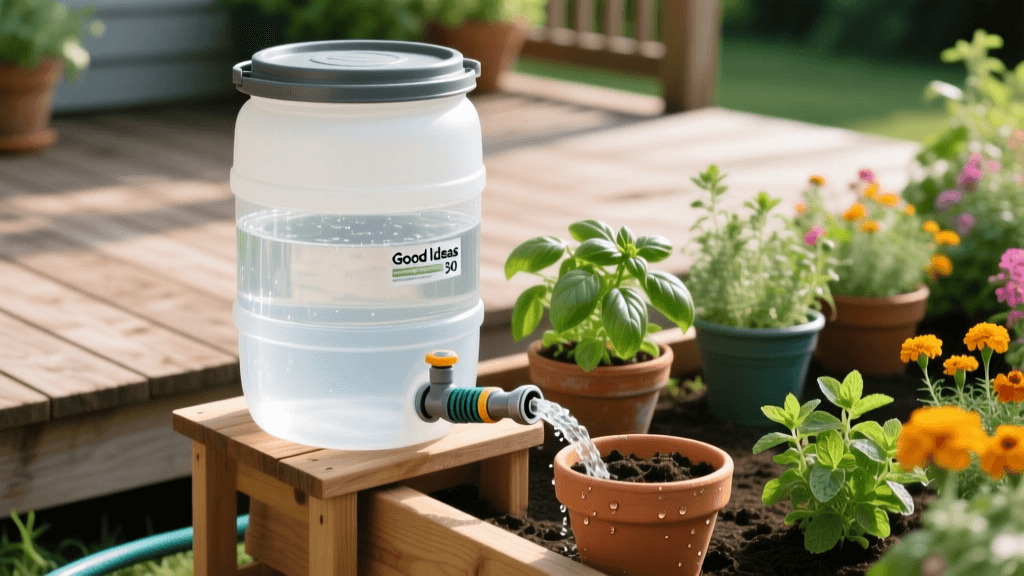
The Good Ideas 50-gallon oak-textured rain barrel is a staple in the home and garden market for several reasons. First, its flat-back design allows it to sit flush against the exterior wall of your home, saving valuable patio space where container gardens are typically arranged. Second, it is constructed from BPA-free, UV-resistant polyethylene resin, meaning it will not degrade under the harsh summer sun or leach harmful chemicals into the water you use on your edible patio crops like tomatoes, peppers, and herbs.
Most importantly for pot gardeners, it comes pre-fitted with a high-quality brass spigot and an overflow valve. The brass spigot is crucial because it allows you to easily attach a standard garden hose or a specialized container drip-irrigation system, delivering precise, low-volume watering directly to the base of your potted plants without disturbing the soil or washing away fertilizer.
Preparing Your Base for Gravity-Fed Pot Watering
When watering container gardens, elevation is everything. Unlike in-ground gardens where you can simply let water flow onto the soil surface, pots are often elevated on plant stands, deck railings, or retaining walls. To use a gravity-fed system effectively, the water level in your barrel must be higher than the highest pot you intend to water.
Water is incredibly heavy, weighing approximately 8.34 pounds per gallon. A fully filled 50-gallon barrel will weigh over 415 pounds, plus the 20-pound weight of the barrel itself. As noted by the University of Minnesota Extension, a stable, level, and heavily reinforced base is mandatory to prevent catastrophic tipping, which can cause severe property damage or personal injury.
Building a 2026-Standard Container Base
- Materials Needed: Four solid concrete deck blocks (not hollow cinder blocks), two 4x4 pressure-treated timber beams (cut to 24 inches), and a spirit level.
- Height: This setup provides roughly 16 inches of elevation, which is ideal for clearing the rims of standard patio pots and allowing enough gravitational pressure (PSI) to push water through a drip line.
- Leveling: Ensure the ground is compacted and perfectly level. If your patio is slightly sloped for drainage, use composite shims beneath the concrete blocks to ensure the barrel sits perfectly plumb.
Step-by-Step Installation Guide
Installing the Good Ideas barrel to service your container garden takes about two hours with basic tools. Here is the step-by-step process for a seamless setup.
Step 1: Downspout Measurement and Cutting
Place the empty barrel on its newly constructed base. Measure the height of the barrel's top inlet. Using a hacksaw or reciprocating saw, cut your aluminum or vinyl downspout at the appropriate height to accommodate the diverter kit included with the barrel. Ensure you wear safety glasses and gloves during this step.
Step 2: Installing the Diverter Kit
The diverter kit is designed to route water into the barrel until it is full, at which point it automatically bypasses the barrel and continues down the original downspout. This prevents overfilling and protects your home's foundation. Insert the diverter into the cut downspout, securing it with the provided sheet metal screws. Attach the flexible corrugated hose from the diverter to the inlet hole on the top of the Good Ideas barrel.
Step 3: Spigot Assembly
The brass spigot on the Good Ideas barrel requires a watertight seal. Wrap the threads of the spigot with 3 to 4 layers of PTFE (Teflon) plumber's tape in a clockwise direction. Screw the spigot into the pre-drilled lower fitting by hand, then use an adjustable wrench to give it a final quarter-turn. Do not overtighten, as cracking the polyethylene resin will ruin the barrel.
Step 4: Routing the Overflow
When your 50-gallon capacity is reached during a heavy storm, excess water will exit through the overflow fitting near the top. Attach a standard hose to this fitting and route it away from your home's foundation. For container gardeners, a brilliant 2026 trend is to route the overflow hose into a secondary, smaller decorative rain chain that feeds directly into a moisture-loving bog garden or a large, half-whiskey-barrel planter filled with water-tolerant plants like cannas and horsetail reed.
Connecting Your Barrel to Container Drip Irrigation
Hand-watering pots with a watering can is time-consuming. By leveraging the barrel's brass spigot, you can automate your container garden. Screw a standard hose timer (set to water early in the morning to reduce evaporation) directly onto the spigot. From the timer, connect a mainline tubing that runs along your patio or deck.
Using 1/4-inch micro-tubing and adjustable drip emitters, you can create a custom network that delivers water directly to the soil line of each individual pot. This is especially useful for hanging baskets and tiered plant stands, ensuring every container receives the exact amount of moisture it needs without manual labor.
Gravity vs. Pump: Which is Best for Your Patio?
Depending on the layout of your container garden, gravity alone might not provide enough pressure to push water through long drip lines or up to high hanging baskets. Below is a comparison to help you decide if you need to add a supplementary pump to your 2026 setup.
| Feature | Gravity-Fed System | Inline Transfer Pump |
|---|---|---|
| Setup Cost | Low (Base materials only) | Medium ($60 - $120 for a 1/2 HP pump) |
| Pressure (PSI) | Low (approx. 0.43 PSI per foot of elevation) | High (40+ PSI, easily mimics municipal water) |
| Best For | Ground-level pots, short drip lines, soaker hoses | Multi-tiered stands, hanging baskets, long hose runs |
| Power Requirement | None (100% off-grid) | Requires outdoor GFCI outlet or solar battery |
| Maintenance | Very Low (clean spigot filter occasionally) | Moderate (winterize pump, check impeller) |
2026 Cost Breakdown and ROI
Investing in a rain barrel system is a financial decision as much as an environmental one. With municipal water and sewer rates continuing their upward trajectory in 2026, the return on investment (ROI) for container gardeners is faster than ever.
| Item | Estimated 2026 Cost |
|---|---|
| Good Ideas 50-Gallon Rain Barrel | $145.00 |
| Concrete Blocks & 4x4 Timber Base | $45.00 |
| Container Drip Irrigation Kit | $35.00 |
| Basic Hose Timer | $25.00 |
| Total Initial Investment | $250.00 |
Assuming an average summer rainfall and a heavy container watering schedule, a 50-gallon barrel can cycle through its entire volume 2 to 3 times a week. Over a 20-week growing season, you can save upwards of 1,500 to 2,500 gallons of municipal water. Depending on your local utility rates, the system typically pays for itself within two to three growing seasons, leaving you with essentially free, chlorine-free water for your plants thereafter.
Seasonal Maintenance and Winterization
To ensure your Good Ideas barrel lasts for years and continues to provide clean water for your edible and ornamental pots, seasonal maintenance is required.
- Spring Cleaning: Before the first heavy rains, disconnect the barrel and scrub the interior with a mixture of white vinegar and water to remove any algae buildup. Rinse the debris screen on the top inlet to ensure maximum water capture.
- Mosquito Prevention: Standing water is a breeding ground for mosquitoes. The factory-included mesh screen usually prevents access, but if water pools on the lid, use a Mosquito Dunk (Bti) inside the barrel. Bti is completely safe for plants, pets, and humans, making it ideal for water used on edible patio vegetables.
- Winterizing: In late autumn, before the first hard freeze, completely drain the barrel. Leave the brass spigot in the open position to prevent trapped water from freezing and cracking the valve. Disconnect the diverter hose and store it in a shed or garage to prevent UV and frost degradation over the winter months.
By integrating the Good Ideas 50-gallon rain barrel into your container gardening routine, you bridge the gap between sustainable home maintenance and thriving, vibrant patio plants. The initial setup requires a weekend of effort, but the reward of a lush, hydrated, and self-sustaining pot garden makes it an indispensable project for the modern gardener.

