
Landscaping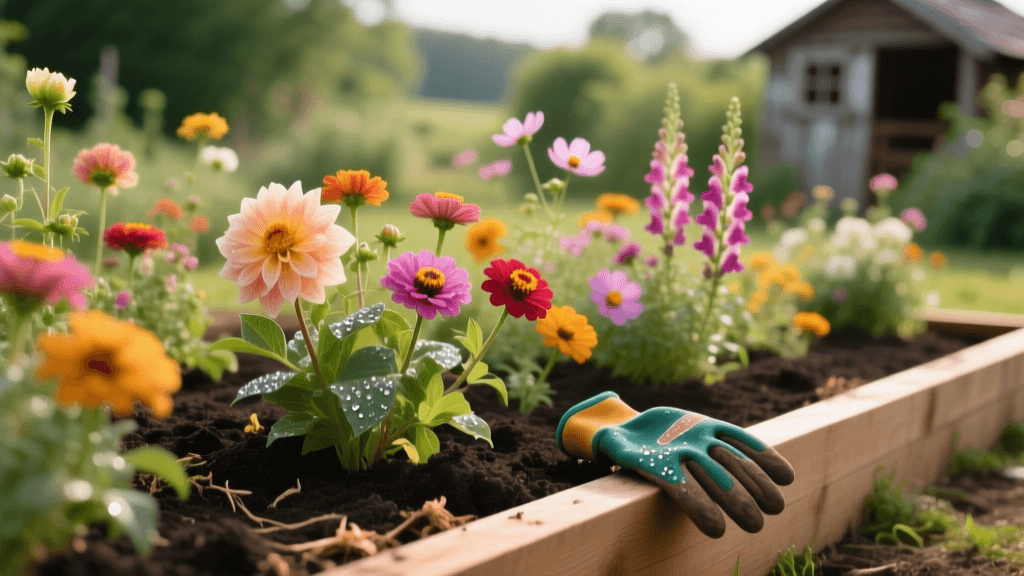
Beginner's Guide to Growing a Cut Flower Garden Bed
Why Start a Cut Flower Garden?
Transforming a bare patch of your landscape into a vibrant, productive cut flower garden is one of the most rewarding projects a beginner can undertake. Unlike traditional ornamental beds that are strictly for visual curb appeal, a cut flower garden is designed for utility and continuous harvest. By growing your own blooms, you not only enhance your outdoor living space but also save hundreds of dollars on floral arrangements. For beginners, starting with a dedicated, manageable 4-foot by 8-foot raised bed or an in-ground plot is the perfect entry point into sustainable landscaping and garden bed planning.
Step 1: Site Selection and Sunlight Mapping
The success of your cut flower garden hinges on proper site selection. Most high-yielding cut flowers require full sun, which is defined as a minimum of six to eight hours of direct, unfiltered sunlight per day. Before breaking ground, spend a weekend observing your yard. Track the sun's movement to identify areas that aren't shaded by your home, fences, or mature trees. Avoid low-lying areas where water pools after heavy rainfall, as poor drainage will quickly lead to root rot in vulnerable annuals. If your yard lacks adequate drainage, consider integrating a French drain or building a raised bed at least 12 inches high to elevate the root zone above the water table.
Step 2: Soil Preparation and Bed Building
Flowers are heavy feeders, and preparing a nutrient-rich foundation is non-negotiable. According to the University of Minnesota Extension, testing your soil pH and nutrient levels is a critical first step. Most cut flowers thrive in slightly acidic to neutral soil, with a pH between 6.0 and 7.0.
For a beginner-friendly 4x8-foot bed, you will need approximately 32 cubic feet of soil. A highly recommended, cost-effective mix consists of one-third blended compost, one-third peat moss or coco coir, and one-third coarse vermiculite. If you are amending existing in-ground clay or sandy soil, till the top 8 inches and incorporate a 3-inch layer of premium organic compost, such as Coast of Maine Bumper Crop. To boost early root development and bloom production, mix in an organic granular fertilizer like Jobe's Organics Bone Meal (2-14-0) at a rate of 1 cup per 10 square feet.
Step 3: Selecting Beginner-Friendly Flowers
When designing your garden bed, focus on high-yield, easy-to-grow varieties that produce multiple stems per plant. Research from UMass Amherst Extension highlights that succession planting and choosing a mix of early, mid, and late-season bloomers ensures a continuous harvest from spring through the first frost.
| Flower Name | Type | Days to Maturity | Spacing | Bloom Period |
|---|---|---|---|---|
| Zinnia (Benary's Giant) | Annual | 60-70 days | 12 inches | Summer to Fall |
| Cosmos (Sensation Mix) | Annual | 50-60 days | 12 inches | Summer to Fall |
| Sunflower (ProCut Series) | Annual | 55-65 days | 6 inches | Mid-Summer |
| Peony (Sarah Bernhardt) | Perennial | Year 2+ | 36 inches | Late Spring |
| Snapdragon (Rocket Series) | Tender Perennial | 70-80 days | 6 inches | Spring and Fall |
Step 4: Planting Techniques for Maximum Yield
To maximize yield in a small footprint, professional flower farmers use a grid planting method combined with landscape fabric. Weed pressure is the number one reason beginner gardens fail. Lay down a heavy-duty woven landscape fabric over your prepared bed and cut 4-inch circular holes in a 12-inch by 12-inch grid pattern. This suppresses weeds, retains soil moisture, and eliminates the need for back-breaking hand weeding.
When transplanting plugs or seedlings, ensure the crown of the plant sits exactly at the soil line. Water immediately with a gentle shower nozzle to settle the soil around the roots. Installing a simple drip irrigation system, such as the Rain Bird Drip Irrigation Kit, directly under the landscape fabric will deliver water straight to the root zone, keeping foliage dry and preventing fungal diseases like powdery mildew.
Step 5: The Art of the Harvest
Knowing exactly when and how to cut your flowers is what separates a fleeting bouquet from a long-lasting arrangement. As noted by Penn State Extension, harvesting at the correct stage of maturity is vital for vase life. For flowers like zinnias and cosmos, use the 'wiggle test': grab the stem about 8 inches below the flower head and gently wiggle it. If the stem bends and flops over like a cooked noodle, it is too immature to cut. If it remains stiff and snaps back into place, it is ready for harvest.
Pro Tip: Always harvest in the early morning or late evening when the plant's cells are fully turgid and hydrated. Bring a clean bucket filled with 4 inches of cool water mixed with a commercial floral preservative. Strip all foliage that will fall below the water line to prevent bacterial growth.
Allow your harvested blooms to rest in a cool, dark room for at least four hours before arranging them; this process, known as conditioning, significantly extends their vase life.
Step 6: Integrated Pest Management
A thriving cut flower garden will inevitably attract pests. Aphids, spider mites, and Japanese beetles are common culprits that can ruin a perfect bloom overnight. Instead of reaching for harsh synthetic chemicals that harm the pollinators you are trying to attract, adopt an Integrated Pest Management (IPM) approach. Regularly inspect the undersides of leaves during your morning harvest. If you spot aphids, a strong blast of water from your garden hose is often enough to dislodge them. For more persistent infestations, apply a cold-pressed neem oil spray, such as Bonide Neem Oil, in the late evening when bees are no longer foraging. Introducing beneficial insects like ladybugs and lacewings can also provide natural, long-term pest control for your landscape.
Essential Tools for the Beginner Flower Farmer
- Floral Snips: Invest in a high-quality pair of bypass pruners, like the Felco 2 or ARS HP-VS8Z, to ensure clean cuts that don't crush the plant's vascular system.
- Harvest Bucket: A food-grade 5-gallon bucket with a lid is essential for transporting blooms without spilling your conditioning solution.
- Landscape Fabric Pins: Galvanized steel staples to secure your weed barrier against heavy winds.
- Soil Thermometer: Crucial for knowing when the soil has warmed enough (usually above 60°F) to safely transplant heat-loving annuals like zinnias and celosia.
Estimated Startup Costs for a 4x8 Bed
- Cedar Raised Bed Kit (4x8x12 inches): $120 - $180
- Organic Soil and Compost (32 cubic feet): $80 - $120
- Heavy-Duty Landscape Fabric & Staples: $35 - $50
- Seeds and Starter Plugs: $40 - $60
- Drip Irrigation Kit: $40 - $70
- Floral Snips and Harvest Bucket: $25 - $40
- Total Estimated Investment: $340 - $520
Conclusion
Designing and planting a cut flower garden bed is a highly accessible landscaping project that yields immediate, tangible rewards. By focusing on proper site selection, investing in soil health, utilizing landscape fabric for weed control, and mastering the timing of your harvest, you will set yourself up for a season of abundant blooms. Not only will your garden become a focal point of your outdoor living space, but it will also support local pollinators and provide you with a sustainable, homegrown source of fresh flowers for months to come.
