
Landscaping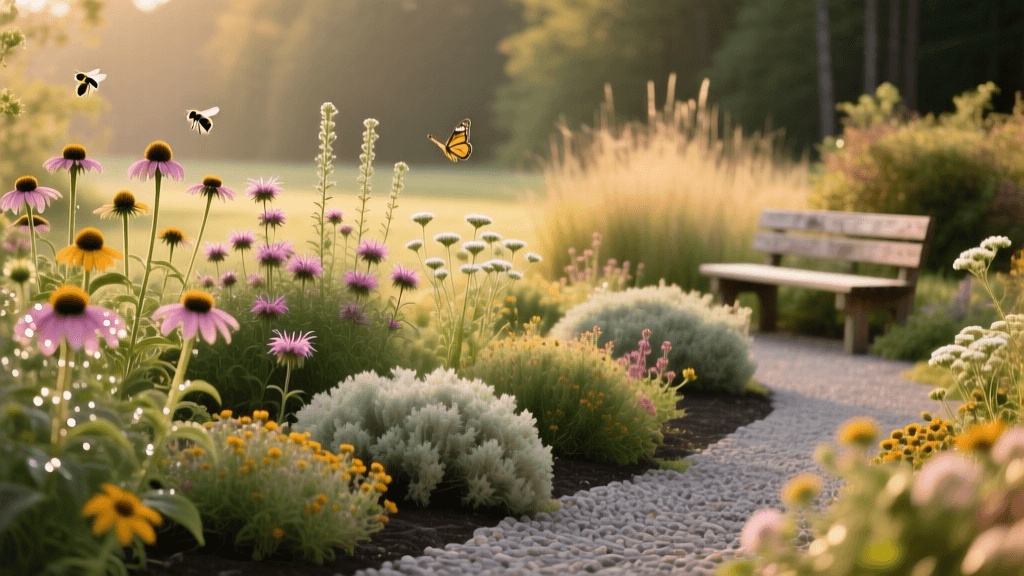
Beginner Guide to Planning a Native Perennial Garden Bed
Introduction to Native Perennial Landscaping
Landscaping with native perennials is one of the most rewarding, sustainable, and visually striking projects a beginner can tackle. Unlike traditional turf lawns that demand constant mowing, fertilizing, and watering, a well-planned native garden bed works in harmony with your local ecosystem. For homeowners looking to boost curb appeal while supporting local wildlife, transitioning a section of your yard into a native perennial garden bed is the perfect entry point into sustainable landscaping.
According to the National Wildlife Federation, native plants provide essential food and shelter for local birds, bees, and butterflies, forming the very foundation of a healthy backyard habitat. This beginner-friendly guide will walk you through planning, prepping, and planting a 10x10 foot native perennial garden bed from scratch.
Step 1: Site Selection and Turf Removal
The first step in any garden bed planning project is choosing the right location. Most native flowering perennials thrive in full sun, which means the area should receive at least six to eight hours of direct sunlight daily. Observe your yard over a couple of days to track the sun's movement and avoid areas heavily shaded by large trees or your home's roofline.
Once you have selected your site, you must remove the existing grass. Tilling is generally discouraged because it brings dormant weed seeds to the surface and disrupts the soil microbiome. Instead, use a method called sheet mulching or solarization. Mow the grass as short as possible, lay down overlapping layers of plain brown cardboard (removing all tape and staples), and wet it thoroughly. This blocks sunlight and effectively smothers the turf over a period of four to six weeks, leaving you with a blank, weed-free canvas.
Step 2: Soil Amendment and Bed Preparation
Native plants are famously adaptable and often prefer the native soil already present in your yard. However, compacted soil from years of foot traffic or construction debris can hinder root establishment. Before planting, conduct a basic percolation test: dig a hole 12 inches deep and fill it with water. If it drains within 24 hours, your drainage is adequate.
If the soil is heavily compacted or clay-heavy, amend the top 6 inches with organic matter. A 50/50 mix of existing topsoil and high-quality organic compost is ideal. Avoid using synthetic fertilizers or rich potting mixes, as too much nitrogen will cause native perennials to produce excessive, floppy foliage at the expense of sturdy stems and vibrant blooms. As noted by Penn State Extension, over-amending soil can actually reduce the drought tolerance that makes native plants so valuable in landscaping.
Step 3: Selecting Your Native Plant Palette
When designing your landscape bed, aim for a succession of blooms from early spring through late fall. This ensures continuous curb appeal and provides a steady nectar source for pollinators. The Xerces Society emphasizes that planting in clusters of at least three to five of the same species makes it easier for pollinators to locate the flowers.
Below is a beginner-friendly plant palette suitable for a sunny, well-draining garden bed in many temperate regions of North America:
| Plant Name | Botanical Name | Height | Bloom Time | Pollinator Benefit |
|---|---|---|---|---|
| Purple Coneflower | Echinacea purpurea | 2-4 ft | Summer | Attracts butterflies; seeds feed goldfinches |
| Black-Eyed Susan | Rudbeckia hirta | 1-3 ft | Mid-Summer | Excellent nectar source for native bees |
| Wild Bergamot | Monarda fistulosa | 2-4 ft | Mid-Summer | Highly attractive to hummingbirds and moths |
| New England Aster | Symphyotrichum novae-angliae | 3-5 ft | Late Fall | Critical late-season energy for migrating monarchs |
| Butterfly Weed | Asclepias tuberosa | 1-2 ft | Early Summer | Essential host plant for monarch caterpillars |
Step 4: Planting Techniques and Spacing
Proper spacing is crucial in landscape design to prevent overcrowding and fungal diseases. Arrange your potted plants on the soil surface before digging to visualize the final layout. Place taller species like New England Aster at the back or center of the bed, and shorter plants like Butterfly Weed toward the edges.
When digging the planting holes, make them twice as wide as the nursery pot but no deeper than the root ball. Planting too deeply can cause the crown of the plant to rot. Gently tease out any circling roots at the bottom of the root ball to encourage outward growth. Backfill the hole with the native soil you removed, tamping it down gently to eliminate large air pockets, and water deeply immediately after planting.
Step 5: Mulching and First-Year Maintenance
Mulch is a vital component of hardscaping and garden bed planning, as it retains moisture, regulates soil temperature, and suppresses weeds. Apply a 2 to 3-inch layer of natural hardwood bark mulch or shredded leaves around the base of your plants. Keep the mulch a few inches away from the main stems to prevent rot and rodent damage.
"A well-mulched native garden bed mimics the natural forest floor or prairie ecosystem, slowly breaking down to feed the soil biology while protecting young perennial roots from extreme temperature fluctuations."
During the first year, your primary maintenance task is watering. While established native perennials are incredibly drought-tolerant, their root systems need the first 12 to 18 months to deeply anchor into the soil. Provide roughly one inch of water per week, either through rainfall or deep, infrequent manual watering using a soaker hose. Avoid frequent, shallow sprinkling, which encourages weak surface roots.
Winterizing and Long-Term Care
One of the most common mistakes beginners make in landscape maintenance is cutting back perennials too early. Leave the dried seed heads of coneflowers and the hollow stems of asters standing throughout the winter. These provide crucial overwintering habitat for native bees and a vital food source for birds during the lean winter months. Wait until early spring, when daytime temperatures consistently stay above 50°F, to cut back the dead foliage. This single practice drastically improves the survival rate of beneficial insects in your landscape.
Estimated Cost Breakdown for a 10x10 Foot Bed
Budgeting is a key part of any landscaping project. Here is an estimated cost breakdown for installing a 100-square-foot native perennial bed using plug plants and basic organic amendments. Prices may vary based on your local nursery and region.
| Material | Quantity Needed | Estimated Cost |
|---|---|---|
| Cardboard (for turf removal) | 10-15 large boxes (free) | $0.00 |
| Organic Compost | 1 cubic yard | $40.00 - $60.00 |
| Native Perennial Plugs (3-inch pots) | 25 plants | $125.00 - $175.00 |
| Hardwood Mulch | 1.5 cubic yards | $50.00 - $75.00 |
| Steel Landscape Edging (optional) | 40 linear feet | $80.00 - $120.00 |
| Total Estimated Cost | $295.00 - $430.00 |
By investing time and a modest budget into a native perennial garden bed, you are not just improving your home's exterior aesthetics; you are actively participating in sustainable landscaping and local ecological conservation. With proper planning and patience, your beginner garden will mature into a thriving, low-maintenance landscape feature that brings joy and wildlife to your yard for decades to come.
