
2026 Solar Outdoor Shower & Landscape Drainage Pipe Guide
The 2026 Solar-Heated Outdoor Shower Revolution
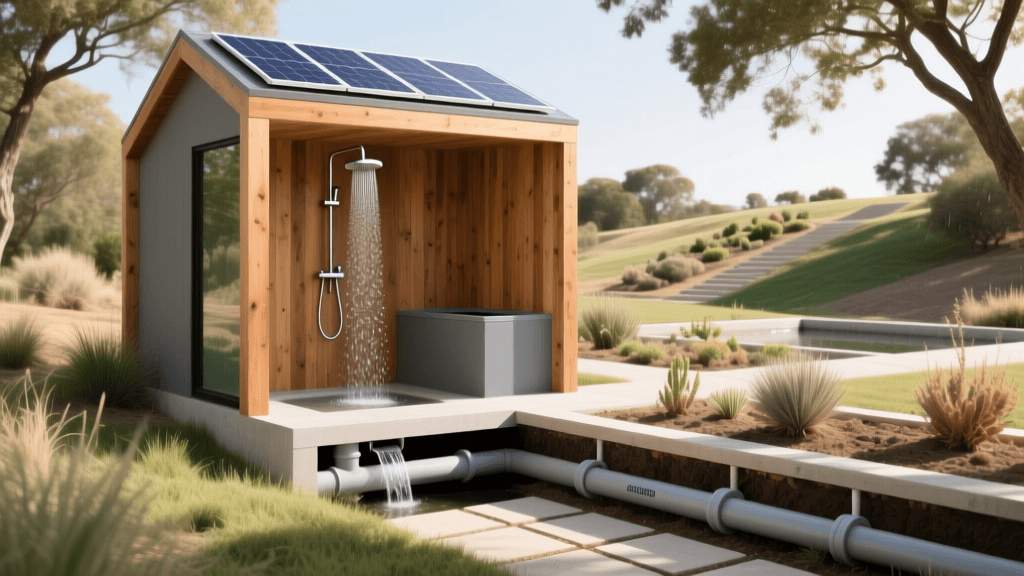
As we navigate 2026, the boundary between indoor luxury and outdoor living continues to dissolve. One of the most sought-after backyard upgrades this year is the solar-heated outdoor shower enclosure. Modern designs utilize advanced polycarbonate privacy walls that double as passive solar collectors, paired with roof-mounted flat-plate thermal panels to deliver piping hot water without spiking your utility bill. However, while homeowners often obsess over the aesthetic of the cedar surrounds or the efficiency of the solar thermal array, the most critical component of the entire system lies hidden beneath the soil: the landscape drainage pipe.
Without a meticulously planned drainage system, your luxurious outdoor oasis will quickly degrade into a soggy, mosquito-breeding mud pit. Properly routing greywater away from your home’s foundation and dispersing it safely into your yard requires a deep understanding of landscape drainage pipes, soil percolation, and modern eco-friendly practices. This comprehensive guide will walk you through designing, installing, and maintaining the perfect drainage infrastructure for your solar outdoor shower in 2026.
Why Landscape Drainage Pipes Make or Break Your Project
An average outdoor shower uses between 15 to 20 gallons of water per use. For a family of four showering daily during the summer months, that equates to thousands of gallons of greywater introduced to a single, concentrated area of your yard. If you rely solely on surface runoff or a shallow gravel pit, the soil will quickly become saturated, leading to anaerobic conditions, foul odors, and potential foundation damage.
A dedicated landscape drainage pipe system captures this water at the source and transports it to a designated dispersal zone, such as a dry well or a bio-retention rain garden. In 2026, integrating smart flow sensors into your drainage line is also becoming standard practice, allowing you to monitor greywater output directly from your smartphone and ensure your dispersal zone is not being overwhelmed.
Conducting a Percolation Test
Before you purchase a single foot of drainage pipe, you must understand your soil’s absorption rate. Dig a test hole 12 inches deep and 6 inches wide near your proposed dispersal area. Fill it with water and let it drain completely to prime the soil. Refill it to the top and measure how long it takes for the water level to drop by one inch. Sandy soils may drain in under five minutes, while heavy clay soils can take over an hour. If your soil drains slower than one inch per 30 minutes, you will need to extend your landscape drainage pipe further from the shower or install a larger, engineered dry well system.
Step-by-Step: Routing the Landscape Drainage Pipe
Installing the drainage infrastructure requires precision, the right materials, and adherence to proper grading principles. Here is your step-by-step roadmap for 2026.
Step 1: Excavation and Slope Calculation
The golden rule of drainage is gravity. Your trench must maintain a consistent downward slope of at least 1/4 inch per linear foot. For a 40-foot run from your shower to the dry well, the pipe must drop a minimum of 10 inches. Use a laser level or a string line with a line level to mark your grade stakes before you begin digging. The trench should be approximately 12 to 18 inches deep and 10 inches wide to allow room for a gravel base and backfill.
Step 2: Laying the Foundation and Pipe Assembly
Never lay a landscape drainage pipe directly on bare dirt, as soil shifting and root intrusion will compromise the system over time. Line the trench with a high-quality, non-woven geotextile landscape fabric. Add a 2-inch base layer of washed 3/4-inch crushed stone. This base provides structural support and prevents the pipe from sagging under the weight of the backfill.
For the main transport line, use solid-core Schedule 40 PVC. While flexible corrugated pipes are popular for general yard drainage, they are prone to sagging and trapping soap scum and hair, which leads to clogs. PVC provides a smooth interior wall that keeps greywater flowing freely. Secure the joints with PVC primer and cement, ensuring a watertight seal that prevents leaks near your home’s foundation.
Step 3: Transitioning to the Dispersal Zone
Once the solid PVC pipe reaches the dispersal zone, transition to a perforated landscape drainage pipe to allow the water to leach into the surrounding soil. Wrap the perforated pipe in a specialized drainage sock or fold the geotextile fabric over it to prevent soil and fine roots from clogging the perforations. Cover the pipe with another 4 inches of crushed stone, fold the landscape fabric over the top to create a "gravel burrito," and backfill with native topsoil.
2026 Drainage Pipe Material Comparison
Choosing the correct pipe material is vital for longevity and performance. Below is a comparison of the top landscape drainage pipe materials available on the market in 2026.
| Pipe Material | Best Use Case | Avg. Cost per Foot (2026) | Durability & Notes |
|---|---|---|---|
| Schedule 40 PVC | Main solid transport line from shower | $1.80 - $2.50 | Extremely high; smooth interior prevents soap buildup. |
| Corrugated HDPE | French drain dispersal and yard runoff | $0.90 - $1.30 | Medium; flexible but ridges can trap greywater debris. |
| ABS Plastic | Cold climate main lines and exposed fittings | $2.10 - $2.80 | High; superior impact resistance in freezing temperatures. |
| SDR 35 PVC | Long-distance, deep-burial gravity mains | $3.50 - $4.50 | Very high; used for heavy-duty commercial or deep trenching. |
Connecting to a Dry Well or Rain Garden
Where does the water go once it exits the landscape drainage pipe? In 2026, environmental stewardship is a priority for most homeowners, and simply dumping greywater into the woods is neither legal nor ecological.
The Modern Dry Well
A dry well is an underground chamber that temporarily stores greywater and allows it to slowly percolate into the surrounding soil. Modern dry wells utilize lightweight, high-capacity plastic crates wrapped in geotextile fabric, replacing the outdated method of filling a hole with gravel. A standard 50-gallon plastic dry well crate can handle the surge volume of multiple back-to-back showers, giving the soil ample time to absorb the effluent. Connect your perforated landscape drainage pipe directly to the inlet port of the crate.
The Bio-Retention Rain Garden
If your soil percolation rate is excellent, you may opt to daylight the drainage pipe into a rain garden. By directing the greywater into a shallow depression planted with deep-rooted, water-tolerant native species, you create a natural filtration system. According to the Arbor Day Foundation, planting native shrubs and sedges not only manages water runoff but also supports local pollinator populations, turning your drainage solution into a vibrant ecological feature.
Navigating 2026 Greywater Codes and Eco-Practices
Before breaking ground, always consult your local municipal building department. The International Code Council (ICC) provides baseline guidelines for greywater reuse and drainage, but local amendments vary wildly. Some municipalities require a dedicated P-trap and a vented air admittance valve on the shower drain before it connects to the exterior landscape drainage pipe to prevent sewer gases from migrating back into the enclosure.
Furthermore, the soap you use in your solar shower directly impacts the health of your yard. Greywater contains salts, phosphates, and organic matter. To protect your soil microbiome and the plants surrounding your drainage dispersal zone, you must use 100% biodegradable, sodium-free, and phosphate-free body washes. The EPA WaterSense program also recommends installing a low-flow showerhead (1.5 GPM or less) to reduce the total volume of greywater your drainage pipe system must handle, conserving both water and soil integrity.
Pro Tip for 2026: Install a simple mesh hair and debris catcher at the shower drain grate, and add a secondary inline filter where the solid PVC transitions to the perforated landscape drainage pipe. This two-stage filtration will drastically reduce the maintenance required to keep your underground pipes flowing freely.
Winterizing Your Pipes and Solar Enclosure
If you live in a climate that experiences hard freezes, winterizing your outdoor shower and its drainage infrastructure is non-negotiable. Water left inside the solar thermal panels or the P-trap will expand and crack the fittings. In late autumn, shut off the water supply to the shower and open the drain valves. Use a wet/dry shop vac or an air compressor to blow out any remaining water from the shower pan and the first few feet of the landscape drainage pipe. While the underground dispersal pipes are generally safe from freezing due to the earth's thermal mass, ensuring the above-ground connections are completely dry will guarantee your system is ready to go the moment the sun returns in spring.
By pairing a state-of-the-art solar-heated enclosure with a robust, meticulously graded landscape drainage pipe system, you ensure that your outdoor shower remains a luxurious, eco-friendly, and structurally sound addition to your property for decades to come.

