
Landscaping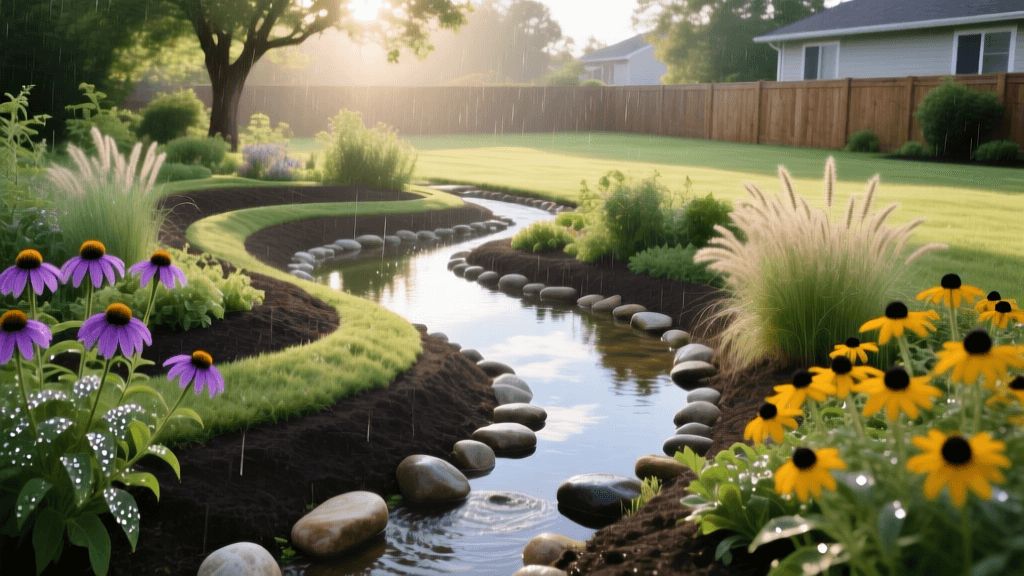
How to Build a Rain Garden for Sustainable Yard Drainage
Transforming Yard Drainage with Eco-Friendly Rain Gardens
When heavy rains hit, impervious surfaces like driveways, roofs, and compacted lawns generate massive amounts of stormwater runoff. This runoff picks up oil, fertilizers, pesticides, and sediment, carrying them directly into local storm drains and eventually into our rivers and lakes. For homeowners dealing with soggy yards or erosion, traditional hardscaping solutions like concrete French drains or extensive PVC piping networks often merely shift the water problem to a neighbor's property or the municipal sewer system. Fortunately, there is a highly effective, eco-friendly landscaping alternative: the rain garden.
A rain garden is a shallow, planted depression designed to capture, filter, and slowly absorb stormwater runoff back into the ground. By mimicking natural hydrology, rain gardens reduce the burden on municipal sewer systems, recharge local groundwater aquifers, and create vital micro-habitats for pollinators and beneficial insects. According to the Environmental Protection Agency (EPA), green infrastructure techniques like rain gardens can reduce stormwater runoff volume by up to 99%, significantly decreasing the pollutant load entering our local waterways while beautifying your landscape.
Step 1: Site Selection and Safety Precautions
The success of a sustainable rain garden relies heavily on proper placement. You want to intercept water where it naturally flows, but you must also protect your home's structural integrity. Follow these critical site selection rules:
- Distance from Structures: Always locate your rain garden at least 10 feet away from your home’s foundation to prevent water from seeping into your basement or crawlspace.
- Avoid Utilities and Septic: Never build a rain garden over a septic tank, drain field, or shallow underground utilities. Always call your local utility marking service (like 811 in the US) before digging.
- Sunlight and Slope: Choose a spot that receives at least 6 hours of direct sunlight daily, which is necessary for most water-loving native plants. The ideal location is on a gentle slope (between 2% and 10% grade) where downspouts or surface runoff naturally collect.
The Percolation Test
Before committing to a location, you must ensure your soil can actually absorb water. Clay-heavy soils drain poorly and may require extensive amendment or a different drainage strategy. To test your soil, dig a hole about 12 inches deep and 12 inches wide in your proposed location. Fill it with water and let it drain completely to saturate the soil. Then, fill it a second time and measure how many inches the water level drops per hour. According to Penn State Extension, a drop rate of at least 0.5 inches per hour is required for a functional rain garden. If your soil drains slower than this, you will need to excavate deeper and replace a larger volume of native soil with a specialized rain garden soil mix.
Step 2: Sizing, Excavation, and Berm Construction
The size of your rain garden depends on the square footage of the impervious surface draining into it (such as a roof section or driveway) and your soil's infiltration rate. For an average residential downspout draining 500 square feet of roof into moderately draining soil, a rain garden measuring roughly 100 to 150 square feet is usually sufficient.
When excavating, aim for a shallow, saucer-like shape rather than a steep bowl. The center of the garden should be the lowest point, typically 4 to 8 inches below the surrounding grade. This shallow depth ensures that water will pool temporarily but will drain completely within 24 to 48 hours, which is crucial for preventing mosquito breeding. Mosquitoes require 72 hours of standing water to complete their life cycle, so a properly designed rain garden is inherently mosquito-free.
Use the soil you excavate to build a berm (a small raised ridge) on the downhill side of the garden. The berm acts as a dam, holding the water in the depression so it can slowly infiltrate the soil. Compact the berm firmly and ensure it is roughly 6 inches high and 12 to 18 inches wide at its base to prevent it from washing out during heavy storms.
Step 3: The Eco-Friendly Soil Amendment Mix
Native soil, especially if it is heavy in clay or heavily compacted from construction, is rarely ideal for a rain garden. To ensure rapid drainage while providing enough moisture retention and nutrients for your plants, you should replace the top 12 to 18 inches of soil in the excavated area with a specialized bioretention soil mix. The National Audubon Society recommends a specific ratio that balances drainage with plant health.
| Component | Volume Percentage | Ecological Purpose |
|---|---|---|
| Coarse Washed Sand | 50% | Creates large pore spaces for rapid water infiltration and prevents soil compaction. |
| Native Topsoil | 25% | Provides essential mineral content, structure, and a familiar microbial base for native plants. |
| Organic Compost | 25% | Adds vital nutrients, improves moisture retention during dry spells, and supports beneficial soil fungi. |
Mix these components thoroughly before backfilling the excavated area. Do not use peat moss, as its harvesting is ecologically destructive to peat bogs; high-quality, locally sourced leaf mold or mushroom compost are excellent sustainable alternatives to traditional peat.
Step 4: Selecting Native Plants for Rain Garden Zones
A rain garden is not a monolith; it features distinct microclimates based on moisture levels. The center holds water the longest, the slopes experience fluctuating moisture, and the upper edges remain relatively dry. Utilizing native plants is a cornerstone of sustainable landscaping, as they possess deep, extensive root systems (some reaching 10 feet deep) that act as natural biological filters and require no chemical fertilizers once established.
| Garden Zone | Moisture Level | Recommended Native Plants |
|---|---|---|
| Center (Bottom) | Wet / Saturated | Blue Flag Iris (Iris versicolor), Swamp Milkweed (Asclepias incarnata), Joe-Pye Weed (Eutrochium purpureum) |
| Slopes (Sides) | Moist / Fluctuating | Cardinal Flower (Lobelia cardinalis), New England Aster (Symphyotrichum novae-angliae), Ostrich Fern (Matteuccia struthiopteris) |
| Edges (Berm) | Dry / Well-Drained | Black-Eyed Susan (Rudbeckia hirta), Purple Coneflower (Echinacea purpurea), Little Bluestem Grass (Schizachyrium scoparium) |
When planting, space your specimens slightly closer together than you would in a traditional garden bed. This dense planting strategy helps shade the soil, suppressing weeds naturally and reducing the need for manual weeding or harmful chemical herbicides.
Step 5: Sustainable Mulching and Eco-Friendly Maintenance
Mulch is essential for retaining moisture and suppressing weeds, but the type of mulch you choose matters immensely in a rain garden. Avoid pine bark nuggets or dyed mulches; bark nuggets will float away during the first heavy rain, and dyed mulches can leach synthetic chemicals into the groundwater. Instead, use 2 to 3 inches of shredded hardwood mulch or aged arborist wood chips. The interlocking fibers of shredded hardwood hold together beautifully against flowing water while slowly breaking down to feed the soil ecosystem.
Maintenance Checklist for the First Year
While rain gardens are notoriously low-maintenance once established, the first 12 months require some hands-on care to ensure deep root development:
- Strategic Watering: Provide roughly 1 inch of water per week during the first growing season. Use a rain barrel connected to your downspout to harvest roof water for irrigation, closing the loop on your sustainable drainage system.
- Manual Weed Control: Hand-pull invasive weeds before they go to seed. Avoid all pre-emergent herbicides, as these chemicals will wash into the rain garden and defeat its purpose as an ecological filter.
- Sediment Removal: After heavy storms, check the inlet point of your garden. If sediment or debris from the roof has accumulated, gently rake it away to prevent the soil pores from clogging.
- Berm Inspection: Ensure the downhill berm remains intact. If you notice water overtopping or eroding the berm, add more soil and pack it down firmly.
Cost Breakdown: DIY vs. Professional Installation
One of the most attractive aspects of a rain garden is its cost-effectiveness compared to traditional hardscaping drainage solutions. Installing a French drain or dry well often requires heavy machinery, extensive trenching, and expensive PVC materials, frequently costing upwards of $30 to $50 per linear foot.
In contrast, a DIY rain garden typically costs between $3.00 and $8.00 per square foot, depending on the cost of native plants and soil amendments in your region. For a 150-square-foot garden, expect to spend roughly $600 to $1,200 on materials, including the soil mix, hardwood mulch, and 30 to 50 native plugs or 1-gallon plants. If you prefer to hire a sustainable landscaping professional, costs generally range from $15.00 to $25.00 per square foot, which includes design, excavation, soil engineering, and mature plant installation.
Conclusion
Building a rain garden is one of the most impactful eco-friendly landscaping projects a homeowner can undertake. It transforms a persistent drainage nuisance into a vibrant, thriving ecosystem that protects local waterways, supports endangered pollinators, and enhances your property's curb appeal. By carefully selecting your site, engineering a high-permeability soil mix, and planting deep-rooted native species, you create a sustainable landscape feature that works in harmony with nature for decades to come.
