When to Install and Program a Smart Sprinkler Controller
Why Timing Matters for Smart Irrigation
Bridging the gap between beautiful landscaping and energy-efficient home management often starts with water conservation. Upgrading to a smart sprinkler system is one of the most impactful DIY garden projects you can undertake, but simply buying the hardware is only half the battle. The true secret to maximizing water savings and maintaining a lush, disease-free lawn lies in precise timing. From the exact month you should install the device to the daily golden hours for watering, understanding the 'when' is just as critical as the 'how'.
According to the EPA WaterSense program, smart irrigation controllers can save the average home nearly 7,600 gallons of water annually. However, these savings are only realized when the system is calibrated to local microclimates, seasonal shifts, and optimal daily watering windows. In this comprehensive timing guide, we will break down exactly when to install, schedule, adjust, and winterize your smart sprinkler controller to ensure peak efficiency year-round.
When to Buy and Install Your Smart Controller
The best time to purchase and install a smart sprinkler controller is in early to mid-spring, roughly two to three weeks before your region's historical last frost date and just as your soil temperatures consistently reach 55°F. This timing allows the system to establish a baseline watering schedule right as your grass exits winter dormancy and begins its active spring growth phase.
Installing in early spring gives you a crucial window to test the Wi-Fi connectivity, map out your irrigation zones, and calibrate the soil moisture sensors before the high-stress heat of summer arrives. If you wait until the peak of July to install your system, you risk underwatering your lawn while you troubleshoot zone configurations, or overwatering while the controller learns your local evapotranspiration (ET) rates.
Choosing the Right Controller: Weather-Based vs. Soil Moisture-Based
When selecting your device, timing also dictates which technology will serve you best based on your local climate patterns:
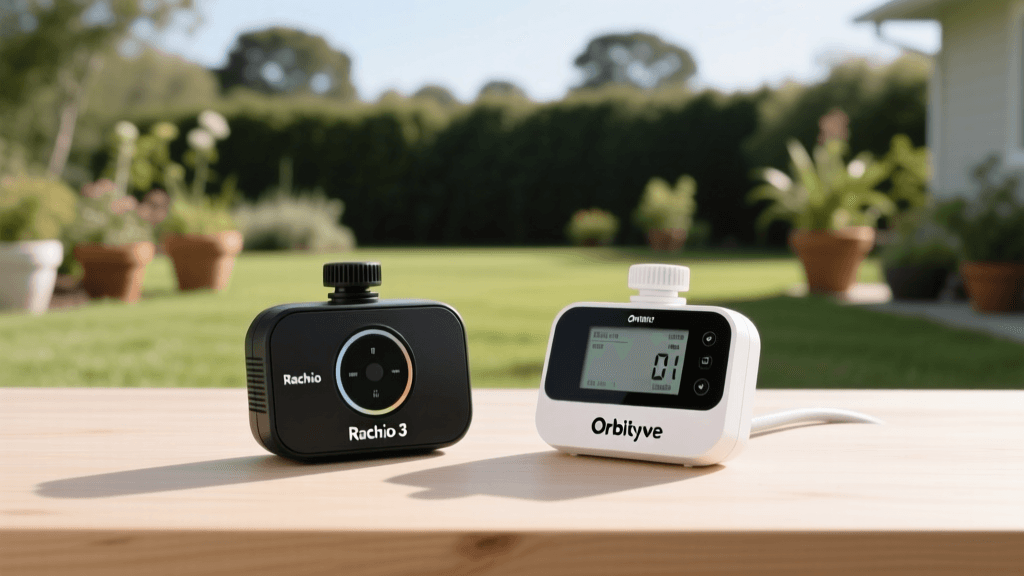
- Weather-Based (ET) Controllers: These use local weather station data (temperature, humidity, solar radiation, wind) to adjust watering schedules. They are ideal for regions with highly variable daily weather patterns and are best installed where reliable Wi-Fi or cellular signals can reach the outdoor signal wire.
- Soil Moisture Sensor Controllers: These rely on physical probes buried in the root zone (typically 4 to 6 inches deep for turfgrass). They are highly recommended for areas with frequent microclimate variations, heavy clay soils that drain slowly, or regions prone to sudden summer downpours.
When to Schedule Watering: The Golden Hours
Once your smart controller is installed and connected to your local weather network, you must set the foundational 'watering window.' While smart controllers adjust the duration of your watering based on weather data, you must dictate the start time. The absolute best time to schedule your irrigation cycles is between 4:00 AM and 8:00 AM.
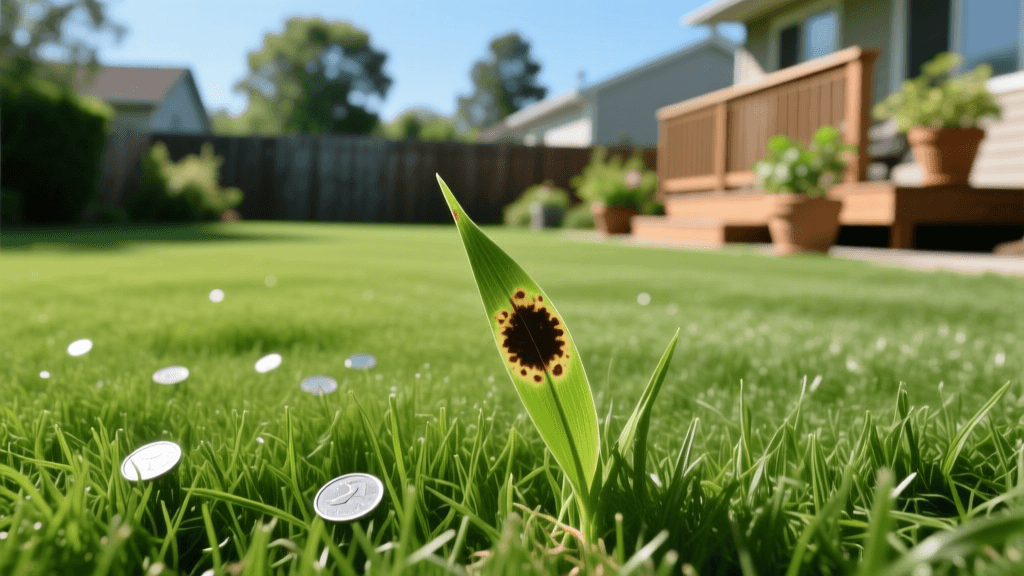
According to turfgrass experts at Penn State Extension, watering in the early morning minimizes water loss due to evaporation and wind drift, which are at their lowest points just before sunrise. Furthermore, watering early allows the grass blades to dry out as the sun rises, significantly reducing the risk of fungal diseases like brown patch and dollar spot, which thrive in prolonged moisture.
Daily Watering Window Comparison
| Time of Day | Evaporation Rate | Wind Interference | Fungal Disease Risk | Overall Verdict |
|---|---|---|---|---|
| 4:00 AM - 8:00 AM | Very Low | Minimal | Low (blades dry quickly) | Optimal |
| 12:00 PM - 4:00 PM | Very High | High | Low | Poor (wastes water) |
| 6:00 PM - 10:00 PM | Low | Low | Very High (blades stay wet overnight) | Risky (disease prone) |
Pro Tip: Program your smart controller to use 'Cycle and Soak' features during this morning window. Instead of running a zone for 30 straight minutes (which leads to runoff on compacted soils), program three 10-minute cycles spaced an hour apart. This allows water to penetrate deeply into the root zone.
Seasonal Timing: When to Adjust Your Watering Schedule
A common misconception is that smart controllers require zero seasonal oversight. While they automatically scale daily run times up or down based on real-time weather, you must manually adjust the seasonal baseline targets and zone-specific output rates as the seasons change.
Spring Ramp-Up (March to May)
In early spring, grass roots are shallow, and evaporation rates are low. Your smart controller should be programmed for frequent, short watering sessions to encourage deep root growth without waterlogging the soil. Aim for a baseline of 0.5 to 1 inch of water per week, split across two days.
Summer Peak (June to August)
As temperatures soar, cool-season grasses may enter summer dormancy, while warm-season grasses hit peak growth. Adjust your smart controller's seasonal percentage to 100% or higher. Deep, infrequent watering (1.5 to 2 inches per week, split across two or three days) forces roots to grow deeper in search of moisture, creating a more drought-resistant lawn.
Fall Tapering (September to November)
Do not shut off your system too early. Fall is when cool-season grasses store energy for the winter. Gradually reduce the watering baseline in your smart app by 10% each week as daylight hours shorten and temperatures drop, eventually reaching 0.5 inches per week before winterization.
Seasonal Baseline Guide by Grass Type
| Season | Cool-Season Grass (Fescue, Kentucky Bluegrass) | Warm-Season Grass (Bermuda, Zoysia) |
|---|---|---|
| Spring | 1 inch / week (2 days) | 0.5 inch / week (1-2 days) |
| Summer | 1.5 - 2 inches / week (2-3 days) | 1 - 1.5 inches / week (2 days) |
| Fall | 1 inch / week (2 days) | 0.5 inch / week (1 day) |
| Winter | System Winterized / Dormant | 0.25 inch / week (if no rain) |
When to Integrate Rain Sensors and Soil Probes
If your smart controller supports add-on hardware, the best time to integrate wireless rain sensors or soil moisture probes is simultaneously with the initial installation. However, if you are retrofitting an existing system, add these sensors in late spring just before your region's heavy summer thunderstorm season begins.
A wireless rain sensor should be mounted in an unobstructed area (like the edge of a roofline or on a fence post) where it receives direct rainfall. Set the sensor's interruption threshold to 1/8 inch of rain. When the sensor detects this amount, it overrides the smart controller's schedule, preventing the system from watering during or immediately after a storm. This redundancy ensures that even if your controller's Wi-Fi connection drops and it misses the local weather forecast update, your lawn will not be overwatered.
When to Winterize Your Smart Irrigation System
Knowing when to winterize your system is critical to preventing cracked PVC pipes and destroyed smart valves. The timing for winterization depends entirely on your local climate, but the universal rule is to blow out the system with compressed air before the first hard freeze (when temperatures drop below 28°F for more than four hours).
For most northern and midwestern climates, this falls between mid-October and early November. For transitional zones, it may be late November. Do not wait until the ground is frozen. Once you have completed the physical blow-out, log into your smart controller app and use the 'System Off' or 'Winterize' software toggle. This suspends all automated schedules without erasing your carefully calibrated zone data, ensuring your system is ready to reactivate with a single tap the following spring.
Frequently Asked Questions About Smart Irrigation Timing
How long does it take for a smart controller to learn my yard's microclimates?
Most modern weather-based smart controllers take about 14 to 21 days to fully calibrate to your specific ZIP code's evapotranspiration rates. During this initial three-week period, monitor your lawn closely. If you notice dry spots, you may need to manually adjust the 'crop coefficient' or 'sprinkler head type' settings in the app to account for poor water distribution or heavy shade.
Should I pause my smart controller during a drought?
Ironically, a smart controller is most valuable during a drought. Instead of pausing it, use the app to set a 'water budget' or 'seasonal adjust' percentage to comply with local municipal watering restrictions (e.g., setting the budget to 60% of normal). The controller will automatically redistribute the limited allowed water to the most critical early morning hours, prioritizing deep root hydration over superficial soil moisture.
When should I replace the batteries in my smart controller and sensors?
While the main controller is hardwired to your 24V AC transformer, wireless soil sensors and rain sensors often run on AA or CR123A lithium batteries. Set a calendar reminder to check and replace these batteries in early March every year. A dead sensor battery in July could result in your system ignoring a massive rainstorm and flooding your garden beds.