
Landscaping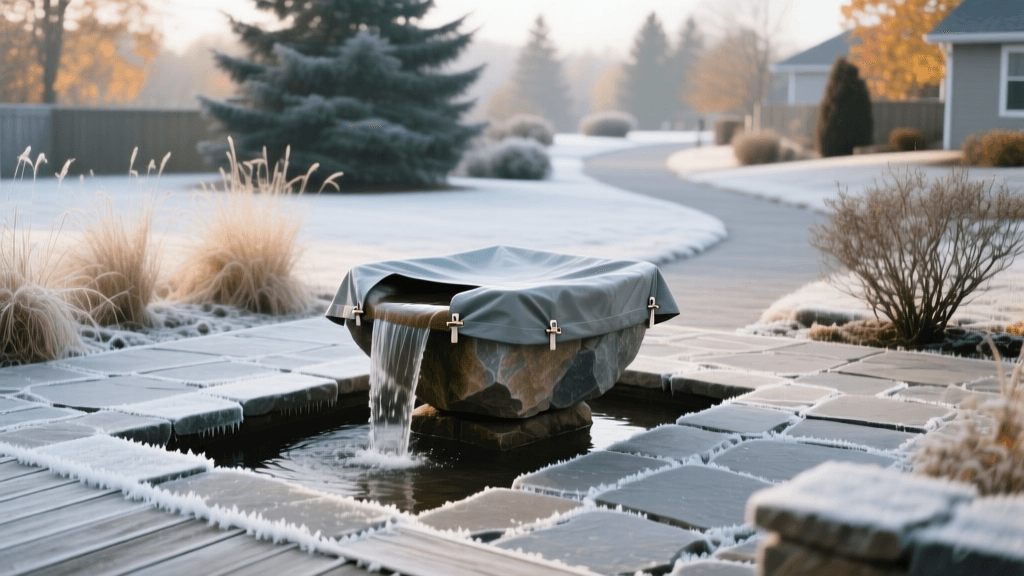
How to Winterize Hardscapes, Patios, and Water Features
The Importance of Seasonal Landscape Winterization
As autumn leaves fall and temperatures begin their inevitable descent, landscaping maintenance must shift its focus from active growth to rigorous preservation. Winter can be exceptionally brutal on outdoor living spaces. The primary culprit is the freeze-thaw cycle, a natural phenomenon that can cause concrete to spall, pavers to heave, and water feature pumps to crack. According to the National Park Service Preservation Brief 40, proper seasonal maintenance of hardscapes is critical to preventing irreversible moisture damage and structural degradation. By taking proactive steps in late fall, homeowners can save thousands of dollars in springtime repairs and ensure their outdoor spaces remain pristine for decades.
The Science of Freeze-Thaw Damage
Before diving into the practical steps of winterization, it is essential to understand why hardscapes fail in the winter. Materials like concrete, natural stone, and clay brick are inherently porous. When rain or melting snow enters these microscopic pores and the temperature drops below 32°F (0°C), the water freezes and expands by approximately 9%. This expansion creates immense internal pressure. When the ice thaws, the water penetrates deeper into the newly formed micro-fissures. Repeated cycles of freezing and thawing eventually cause the surface to flake, pop, or crack—a process known as spalling. Preventing water intrusion is the cornerstone of all hardscape winterization.
Step 1: Deep Cleaning Hardscapes and Patios
Before applying any protective sealers, your pavers, concrete, and natural stone must be completely free of dirt, organic matter, and stains. Trapped organic material holds moisture against the surface and can foster the growth of algae and mildew beneath the sealer.
Power Washing Best Practices
Use a pressure washer equipped with a 25-degree (green) or 40-degree (white) nozzle tip. Keep the pressure between 1,500 and 2,000 PSI. Exceeding 2,500 PSI on interlocking concrete pavers can blow out the jointing sand, compromising the structural integrity of the patio. For stubborn stains like tannins from fallen leaves or oil drips from outdoor kitchens, use an oxygenated cleaner like Simple Green Oxy Solve Concrete and Driveway Cleaner. Apply the solution, let it dwell for 10 to 15 minutes without drying, and rinse thoroughly. Allow the hardscape to dry completely for at least 48 to 72 hours before proceeding to the sealing stage.
Step 2: Sealing and Joint Stabilization
Once the hardscape is bone-dry, applying a high-quality sealer is your best defense against winter moisture.
Choosing the Right Sealer
Avoid film-forming acrylic sealers for regions with heavy freeze-thaw cycles, as they can trap moisture inside the paver and peel or turn white (efflorescence). Instead, opt for a penetrating silane/siloxane-based sealer, such as Eagle Armor Seal 5 or RadonSeal. These sealers penetrate up to a quarter-inch into the substrate and line the pores with a water-repellent resin, allowing the material to breathe while blocking liquid water. Penetrating sealers typically cost between $35 and $60 per gallon and cover roughly 150 square feet per gallon. Apply using a low-pressure pump sprayer in two coats, applied wet-on-wet, when daytime temperatures are consistently between 50°F and 80°F.
Replenishing Polymeric Sand
Inspect the joints between your pavers. If the sand has washed out, refill them with polymeric sand. This specialized sand contains binding agents that harden when misted with water, locking the pavers in place and preventing weed growth and water infiltration. Sweep the sand into the joints, compact it with a plate compactor, and mist it lightly according to the manufacturer's instructions.
Step 3: Winterizing Fountains and Spitters
Standalone water features like birdbaths, bubbling urns, and tiered fountains are highly susceptible to cracking if water is left inside to freeze.
- Drain Completely: Use a wet/dry shop vacuum to remove every last drop of water from the basin and the internal plumbing lines.
- Pump Removal: Disconnect the submersible pump. Clean the impeller and housing, and store it indoors in a bucket of distilled water to keep the seals from drying out and cracking.
- Covering: If the fountain is too heavy to move into a garage or shed, cover it with a breathable, waterproof fountain cover. Secure the cover tightly with bungee cords to prevent wind from tearing it and to keep snow accumulation off the tiers. Never use plastic tarps directly on the stone, as they trap condensation.
Step 4: Managing Biological Ponds and Waterfalls
Ecosystem ponds require a different approach, as they house living plants and potentially fish. The goal is to maintain water quality and prevent toxic gas buildup under the ice.
Debris Management and Plant Care
Before the leaves fall, stretch a heavy-duty pond net over the surface to catch autumn debris. Decaying leaves at the bottom of the pond release ammonia and hydrogen sulfide, which can be lethal to overwintering fish. Trim back hardy aquatic plants and remove tropical marginals to indoor aquariums. For water lilies, lower the pots to the deepest part of the pond where the water will not freeze solid.
Aeration and De-Icing
If your pond contains fish, you must keep a hole open in the ice to allow toxic gases to escape and oxygen to enter. Do not use a hammer to break the ice, as the shockwaves can harm the fish. Instead, install a pond de-icer (such as the Aquascape 300W Stainless Steel De-Icer) or an outdoor aeration kit. The EPA WaterSense guidelines also remind homeowners that winterizing any connected water lines, including pond auto-fill valves and irrigation systems, is crucial to prevent burst pipes and massive water waste. Blow out auto-fill lines with an air compressor and shut off the exterior water supply.
Step 5: Fire Pits and Outdoor Kitchens
Outdoor kitchens and fire pits are major landscape investments that require specific seasonal care.
- Fire Pit Ash Removal: Wood ash contains potash. When mixed with winter snow and rain, it creates lye, a highly caustic substance that will rapidly corrode steel fire rings and stain natural stone hearths. Vacuum out all ash and cover the pit with a heavy-duty, fitted steel or canvas cover.
- Gas Line Blowouts: For gas-powered fire pits and outdoor grills, shut off the main gas valve. Disconnect flexible hoses and store them indoors to prevent the rubber from dry-rotting and cracking in freezing temperatures.
- Stainless Steel Care: Wipe down all stainless steel appliances with a specialized cleaner and apply a light coat of mineral oil to prevent winter oxidation and rust.
Seasonal Winterization Material and Cost Guide
Proper budgeting and timing are essential for effective landscape maintenance. The following table outlines the core materials needed for a comprehensive winterization project.
| Material / Tool | Purpose | Estimated Cost | Application Rate / Timing |
|---|---|---|---|
| Siloxane Penetrating Sealer | Protects concrete and pavers from moisture intrusion | $35 - $60 per gallon | 1 gal per 150 sq ft; Apply in early Fall |
| Polymeric Jointing Sand | Locks pavers together and prevents water infiltration | $25 - $40 per 50lb bag | 1 bag per 100-150 sq ft; Apply when dry |
| Pond De-Icer (300W) | Keeps a hole open in pond ice for gas exchange | $45 - $75 per unit | 1 per 1,000 gallons; Deploy before first freeze |
| Oxygenated Hardscape Cleaner | Removes organic stains and prepares surface for sealing | $15 - $25 per gallon | Dilute 1:10; Apply 48 hours before sealing |
| Custom Fountain Cover | Prevents snow accumulation and ice damage to tiers | $50 - $150 per cover | Install after pump removal in late Fall |
Conclusion
Winterizing your hardscapes, patios, and water features is not merely a chore; it is a vital investment in the longevity and beauty of your landscape. By understanding the destructive power of the freeze-thaw cycle and taking methodical steps to clean, seal, and drain your outdoor elements, you protect your property from costly structural damage. As noted by experts at Penn State Extension, proactive seasonal maintenance drastically reduces the need for springtime replacements and repairs. Take the time this autumn to prepare your landscape, and you will be rewarded with a flawless outdoor living space ready to be enjoyed the moment spring arrives.
