
Landscaping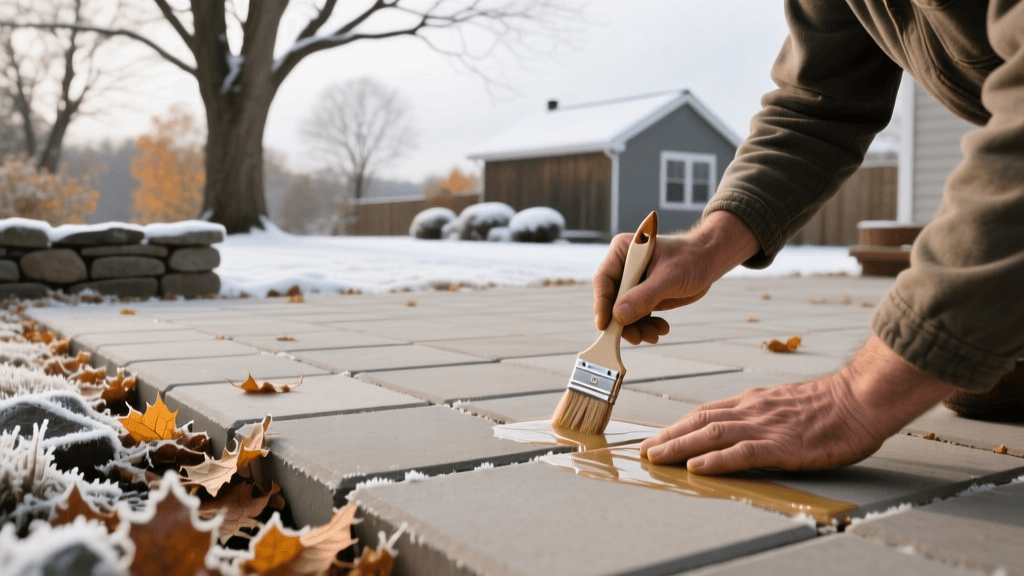
Winterizing Hardscapes: Protecting Patios from Freeze-Thaw Damage
Introduction to Fall Hardscape Maintenance
As the vibrant colors of autumn begin to fade and daily temperatures steadily drop, landscape maintenance priorities must shift from summer irrigation and mowing to critical winterization protocols. While many homeowners focus heavily on lawn aeration, leaf removal, and garden bed mulching, hardscape elements often get overlooked until the spring thaw reveals costly damage. Patios, walkways, retaining walls, and outdoor kitchens are significant financial investments that require specific seasonal maintenance and care to survive harsh winter conditions. Neglecting these structures during the fall can lead to severe structural compromises, aesthetic degradation, and expensive repair bills by the time spring arrives. This comprehensive guide will walk you through the essential steps of winterizing hardscapes, protecting pavers from freeze-thaw cycles, and ensuring your outdoor living spaces remain pristine for years to come.
The Science of Freeze-Thaw Damage
Water is the primary enemy of almost all landscaping materials, and its destructive potential is magnified exponentially in freezing temperatures. The freeze-thaw cycle is a natural weathering process where moisture penetrates the microscopic pores of concrete, natural stone, and clay pavers. When the temperature drops below 32 degrees Fahrenheit, this trapped water freezes and expands by approximately nine percent in volume. This expansion exerts immense internal pressure on the hardscape material, leading to a variety of structural and cosmetic issues.
Spalling and Surface Degradation
When the internal pressure from freezing water exceeds the tensile strength of the paver or stone surface, the top layer can crack, flake, or pop off entirely. This phenomenon, known as spalling, is particularly common in porous natural stones like sandstone and limestone, as well as in lower-quality concrete pavers that were not properly sealed during installation. Once the protective surface layer is compromised, the underlying aggregate is exposed to further moisture intrusion, accelerating the deterioration process.
Base Heaving and Settling
According to guidelines published by the Interlocking Concrete Pavement Institute (ICPI), the integrity of a paved surface relies heavily on its compacted aggregate base and bedding sand. If surface water is allowed to pool and seep into the base layers due to poor drainage or degraded joint sand, the underlying soil and gravel can freeze and heave upward. When the ice eventually melts in the spring, the base material often settles unevenly, resulting in sunken pavers, tripping hazards, and compromised retaining wall structures.
Step 1: Deep Cleaning and Debris Removal
Before you can effectively assess, repair, or seal your hardscapes, they must be thoroughly cleaned. Fall leaf litter, pine needles, and organic debris trap moisture against the surface of pavers and stone, creating a damp microenvironment that encourages moss, algae, and efflorescence. Begin by using a stiff-bristled push broom to remove all loose debris from the surface and the joints. Avoid using metal rakes or wire brushes, as these can scratch the surface of sealed pavers and natural stone.
For a deeper clean, power washing is highly recommended, but it must be done with precision to avoid damaging the hardscape. Set your pressure washer to a maximum of 1200 PSI and use a 25-degree or 40-degree fan tip nozzle. Keep the wand at least 12 inches away from the surface and move in consistent, overlapping strokes. High-pressure streams directed too closely at the joints can easily blow out the crucial bedding sand that locks the pavers in place and provides lateral support. Allow the hardscape to dry completely for at least 48 hours before proceeding to the next steps, as applying sealers or polymeric sand to damp surfaces will result in product failure.
Step 2: Identifying and Treating Efflorescence
Efflorescence is a white, powdery deposit of water-soluble salts that frequently appears on the surface of concrete pavers, brick, and retaining wall blocks. While it is primarily a cosmetic issue rather than a structural one, it must be addressed before applying any fall sealers. Penn State Extension notes that efflorescence occurs when moisture moves through the masonry, dissolving internal salts and depositing them on the surface as the water evaporates. To remove mild efflorescence, a stiff brush and a specialized efflorescence cleaner containing a mild phosphoric acid solution are usually sufficient. Always test the cleaner on a small, inconspicuous area first, and rinse thoroughly with water. Never seal over active efflorescence, as the trapped salts will create a cloudy, white haze beneath the sealer that is nearly impossible to remove without stripping the entire surface.
Step 3: Joint Sand Stabilization and Weed Control
The jointing material between pavers and flagstones is the first line of defense against base erosion and weed intrusion. Over the course of a busy summer, foot traffic, heavy rains, and wind can deplete joint sand, leaving gaps that invite winter moisture and freeze-thaw damage. Inspect all hardscape joints and replenish any areas where the sand has settled more than a quarter-inch below the paver surface.
For optimal winter protection, upgrade standard masonry sand to a high-quality polymeric sand, such as Techniseal or SureBond. Polymeric sand contains special binding agents that, when activated with a light mist of water, harden to a flexible, mortar-like consistency. This creates a barrier that prevents water from penetrating the base layer, stops ants from tunneling, and inhibits weed germination. When applying polymeric sand, ensure the joints are filled to within one-eighth of an inch of the surface, and strictly follow the manufacturer's instructions regarding watering and curing times, which typically require 24 to 48 hours of dry weather above 50 degrees Fahrenheit.
Step 4: Selecting and Applying Hardscape Sealers
Applying a high-quality penetrating or film-forming sealer in the late fall is one of the most effective ways to protect your hardscape from winter damage. Sealers reduce the porosity of the pavers, preventing water absorption and minimizing the risk of spalling. They also protect against de-icing salts, which can cause severe chemical pitting on concrete and natural stone surfaces. When selecting a sealer, it is vital to choose a product specifically formulated for your hardscape material and local climate.
| Sealer Type | Best For | Pros | Cons | Reapplication Timeline |
|---|---|---|---|---|
| Penetrating Siloxane/Silane | Unglazed Brick, Natural Stone, Concrete | Does not alter surface traction; allows vapor transmission; invisible finish. | Does not enhance color; offers no UV protection for joint sand. | Every 3 to 5 years |
| Film-Forming Acrylic (Solvent-Based) | Tumbled Pavers, Stamped Concrete | Enhances color (wet look); locks in polymeric sand; high UV resistance. | Can become slippery when wet; may trap moisture if applied incorrectly. | Every 1 to 2 years |
| Water-Based Urethane | High-Traffic Patios, Pool Decks | Eco-friendly; low VOCs; durable matte or satin finish; non-yellowing. | Requires strict temperature controls during application; longer cure time. | Every 2 to 3 years |
When applying solvent-based acrylic sealers like Eagle Armor Hardscape Sealer, use a low-pressure pump sprayer with a solvent-resistant Viton seal. Apply the sealer at a rate of 150 to 200 square feet per gallon, working in manageable sections to avoid lap marks. The ideal application window is late October to mid-November, when daytime temperatures are consistently above 50 degrees Fahrenheit and no rain is forecasted for at least 48 hours. Avoid sealing in direct, hot sunlight, as this can cause the solvents to flash off too quickly, resulting in a hazy, uneven finish.
Step 5: Winterizing Outdoor Kitchens and Built-In Features
Modern landscapes frequently incorporate outdoor kitchens, fire features, and built-in seating, all of which require specialized winterization. The National Association of Landscape Professionals (NALP) emphasizes that failing to properly winterize outdoor plumbing and gas lines is a leading cause of catastrophic landscape failures. Begin by shutting off the main water supply to the outdoor kitchen and opening all drain valves. Use an air compressor to blow out any residual water from the pipes, as even a small amount of trapped water can freeze, expand, and burst copper or PEX lines hidden inside masonry islands.
Inspect the masonry veneer of your outdoor kitchen and retaining walls for any hairline cracks or gaps where the countertop meets the stone. Fill these gaps with a high-quality, weather-resistant polyurethane sealant like Sika Flex 11 FC. This sealant remains flexible in sub-zero temperatures, accommodating the natural expansion and contraction of the materials without losing its waterproof seal. Finally, cover stainless steel appliances, grills, and sink basins with heavy-duty, breathable, UV-resistant canvas covers to protect them from ice accumulation and corrosive de-icing salts that may be tracked in from nearby driveways.
Fall Hardscape Maintenance Cost Breakdown
Deciding whether to tackle hardscape winterization as a DIY project or to hire a professional landscaping contractor depends on the scale of your property, the condition of your hardscapes, and your budget. Below is a comparative cost analysis for a standard 400-square-foot paver patio, including cleaning, joint sand replenishment, and sealing.
| Maintenance Task | DIY Estimated Cost | Professional Estimated Cost | Key Considerations |
|---|---|---|---|
| Deep Cleaning (Power Washing) | $0 - $50 (Equipment Rental) | $150 - $250 | Professionals use surface cleaners that prevent uneven etching. |
| Polymeric Sand Replenishment | $40 - $80 (Materials) | $200 - $400 | DIY requires careful water activation to avoid hazing on pavers. |
| Hardscape Sealer Application | $120 - $200 (Materials) | $400 - $800 | Pros ensure correct temperature application and even coverage. |
| Total Estimated Cost (400 sq ft) | $160 - $330 | $750 - $1,450 | Professional services often include a warranty on sealant adhesion. |
While the DIY route offers significant upfront savings, improper application of polymeric sand or acrylic sealers can lead to costly remediation. If your patio features complex patterns, significant settling, or extensive efflorescence, investing in a professional hardscape restoration service is highly recommended to ensure the longevity of your investment.
Conclusion
Winterizing your hardscapes is not merely an optional aesthetic upgrade; it is a critical component of comprehensive seasonal landscape maintenance. By understanding the destructive mechanics of the freeze-thaw cycle, meticulously cleaning and stabilizing joint sands, and applying the correct protective sealers, you can shield your patios, walkways, and outdoor kitchens from severe winter damage. Taking these proactive steps in the late fall ensures that when the snow finally melts and spring returns, your outdoor living spaces will be structurally sound, visually stunning, and ready for immediate enjoyment.
