Landscaping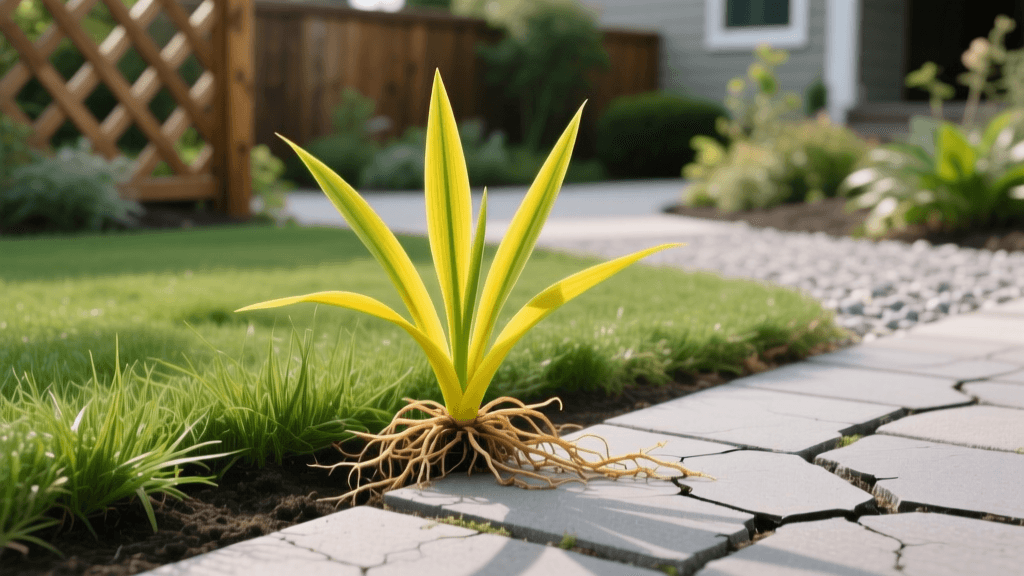
How to Identify and Remove Yellow Nutsedge in Landscape Beds
The Landscaper’s Nemesis: Understanding Yellow Nutsedge
When designing and maintaining pristine landscape beds, hardscapes, and paver patios, few invaders are as frustrating and destructive as yellow nutsedge (Cyperus esculentus). Often mistaken for a common grass, this aggressive perennial sedge can quickly ruin the clean lines of a newly installed garden bed, push through expensive weed barrier fabrics, and compromise the structural integrity of paver joints. According to the USDA Plants Database, yellow nutsedge is widespread across the United States and thrives in moist, poorly drained soils, making irrigated landscape beds an ideal breeding ground.
Unlike annual weeds that complete their lifecycle in one season and rely solely on seeds for reproduction, yellow nutsedge is a perennial powerhouse. It spreads primarily through an extensive underground network of rhizomes and tubers, commonly referred to as 'nutlets.' Eradicating it requires a deep understanding of its biology, precise identification, and a multi-faceted approach combining cultural practices with targeted chemical controls.
Botanical Identification: Sedges Have Edges
Before you can effectively remove yellow nutsedge, you must accurately identify it. Landscaping professionals often use the mnemonic 'sedges have edges, rushes are round, and grasses have nodes' to differentiate between these common lookalikes. If you roll the stem of yellow nutsedge between your thumb and forefinger, you will feel a distinct, sharp triangular shape.
Key visual characteristics of yellow nutsedge include:
- Stem: Light green to yellowish, smooth, and distinctly triangular.
- Leaves: Thicker and stiffer than most turfgrasses, with a prominent midrib and a waxy, glossy appearance. They grow in sets of three (a classic sedge trait) at the base.
- Seed Heads: If left unmowed or untrimmed in garden beds, it produces a golden-brown, star-shaped inflorescence at the top of the stem.
- Growth Habit: It grows significantly faster than surrounding turf or ornamental plants, often poking up above the canopy of a mulched bed just days after maintenance.
Comparison Chart: Yellow Nutsedge vs. Purple Nutsedge vs. Turfgrass
| Feature | Yellow Nutsedge | Purple Nutsedge | Common Turfgrass |
|---|---|---|---|
| Stem Shape | Triangular | Triangular | Round / Hollow |
| Leaf Color | Light green / Yellowish | Dark green | Varies (usually medium green) |
| Seed Head Color | Golden / Straw-colored | Dark purple / Reddish-brown | Varies |
| Tuber Appearance | Smooth, round, single at rhizome tip | Wrinkled, oblong, in chains | N/A (Fibrous roots) |
The Tuber Chain Reaction: Why Pulling Fails
The most critical mistake homeowners and novice landscapers make is attempting to hand-pull yellow nutsedge. When you grab the base of the plant and pull, the brittle rhizome snaps off just below the soil surface. While the visible plant is removed, the mother tuber and a network of dormant tubers remain safely underground.
Worse, pulling the plant triggers a biological survival mechanism. The removal of the apical dominance (the main growing point) stimulates the dormant tubers on the rhizome chain to sprout. Consequently, pulling one nutsedge plant often results in three or four new plants emerging in its place a few weeks later. A single tuber can produce hundreds of new shoots and thousands of new tubers in a single growing season, rapidly colonizing your landscape beds.
Why Nutsedge Destroys Hardscapes and Garden Beds
In the context of landscaping and hardscaping, yellow nutsedge is uniquely destructive due to its sheer mechanical force and adaptability.
Piercing Weed Barrier Fabrics
Many landscapers lay down woven polypropylene weed barrier fabrics to keep beds clean. However, the emerging shoot of a yellow nutsedge plant is encased in a sharp, hardened, needle-like sheath. This tip possesses enough upward hydraulic pressure to pierce directly through heavy-duty weed fabrics, rendering the barrier useless and making it nearly impossible to remove the weed without tearing the fabric further.
Compromising Paver Patios and Retaining Walls
In hardscape installations, nutsedge thrives in the damp, compacted base materials beneath patios. It will aggressively grow upward through the polymeric sand or stone dust joints of paver patios. The thick, fibrous root systems and expanding tubers can displace jointing sand, leading to uneven pavers, water pooling, and the eventual failure of the patio base. It is also notorious for clogging the weep holes of retaining walls, disrupting vital drainage pathways and causing hydrostatic pressure buildup behind the wall.
Cultural and Manual Control Strategies
Because mechanical removal is largely ineffective, cultural controls must focus on making the environment inhospitable to nutsedge.
1. Correcting Drainage Issues
Yellow nutsedge is a hydro-indicator; it thrives in over-irrigated or poorly drained soils. Inspect your landscape beds for low spots where water pools. Regrading the bed, installing French drains, or amending heavy clay soils with organic compost and expanded shale will improve percolation. If the soil dries out appropriately between irrigation cycles, nutsedge struggles to establish.
2. Strategic Mulching
Standard shredded hardwood mulch is entirely ineffective against nutsedge. The sharp shoots will easily penetrate 2 or 3 inches of standard mulch. To suppress nutsedge organically, you must use coarse arborist wood chips applied at a depth of at least 4 to 6 inches. The sheer weight and irregular structure of large wood chips can physically block the emerging shoots, causing them to exhaust their energy reserves before reaching the sunlight.
3. Drying Out Paver Joints
For paver patios, ensure that the surrounding landscape is graded away from the hardscape to prevent constant moisture accumulation in the joints. Using a high-quality, resin-based polymeric sand that hardens completely can deter (though not entirely prevent) the initial penetration of nutsedge shoots.
Chemical Eradication: Pre- and Post-Emergent Herbicides
When cultural controls are insufficient, targeted chemical interventions are necessary. The Environmental Protection Agency (EPA) provides strict guidelines on the safe application of herbicides, especially in landscape beds where ornamental plants and nearby water sources must be protected. Always read and follow the product label instructions regarding rates, personal protective equipment (PPE), and environmental hazards.
Post-Emergent Control (Active Growing Season)
Standard broadleaf weed killers (like 2,4-D) and non-selective herbicides (like standard glyphosate) are largely ineffective against nutsedge because it is a sedge, not a broadleaf weed or a true grass. You must use herbicides specifically formulated for sedges.
- Halosulfuron-methyl (e.g., SedgeHammer): This is the gold standard for post-emergent nutsedge control in both turf and many ornamental landscape beds. It is absorbed through the foliage and translocated down to the tubers, effectively halting growth and killing the root system. It is most effective when applied to young, actively growing nutsedge (3- to 8-leaf stage) before the plant begins forming new tubers in mid-summer.
- Sulfentrazone: Often found in commercial landscape bed herbicides, sulfentrazone provides rapid burn-down of the visible foliage and has some soil-residual activity to prevent immediate re-emergence.
Pre-Emergent Control (Spring Prevention)
Preventing tubers from sprouting in the spring is far easier than killing established plants. Pre-emergent herbicides create a chemical barrier in the top inch of the soil.
- S-metolachlor (e.g., Pennant Magnum): Highly effective in ornamental landscape beds for preventing nutsedge germination. It must be applied in early spring before soil temperatures consistently reach 55°F to 60°F, and it requires water or light incorporation to activate the barrier.
- Pendimethalin + Dimethenamid-P (e.g., Freehand): A popular granular pre-emergent used by professional landscapers in ornamental beds. It provides broad-spectrum weed control, including suppression of nutsedge, and is safe for use over the top of many established woody ornamentals and perennials.
Pro Landscaper Tip: Never use a string trimmer to cut nutsedge down to the soil line in a garden bed. The shock of being cut low to the ground signals the plant to immediately produce multiple new shoots and accelerate tuber production. Always use targeted chemical control or deep excavation.
Seasonal Management Calendar for Landscape Beds
Consistency is the key to winning the war against yellow nutsedge. Follow this seasonal timeline to keep your landscape beds and hardscapes pristine:
- Early Spring (March - April): Apply a sedge-specific pre-emergent herbicide (like Pennant Magnum) to landscape beds before soil temperatures hit 60°F. Ensure drainage systems are clear of winter debris.
- Late Spring (May - June): Monitor beds and paver joints closely. At the first sign of 3-leaf nutsedge shoots, apply a post-emergent halosulfuron-methyl treatment. Do not wait for the plant to mature.
- Mid-Summer (July - August): This is the peak tuber-formation period. Avoid pulling or string-trimming. Spot-treat any new escapes with post-emergent herbicides. Ensure irrigation systems are not over-watering the beds.
- Fall (September - October): Apply a final post-emergent treatment to any remaining foliage to allow the herbicide to translocate into the tubers before winter dormancy. Refresh mulch layers to a depth of 4 inches to prepare for the next spring.
Conclusion
Yellow nutsedge is a formidable opponent in any landscaping project, capable of ruining weed fabrics, displacing paver joints, and outcompeting expensive ornamental plantings. By understanding its unique biology—specifically its triangular stem and aggressive tuber network—you can abandon ineffective hand-pulling methods. Instead, rely on a combination of improved soil drainage, deep coarse mulching, and targeted sedge-specific herbicides. With patience and a strict seasonal management calendar, you can reclaim your landscape beds and hardscapes from this persistent invader.