
Tree Care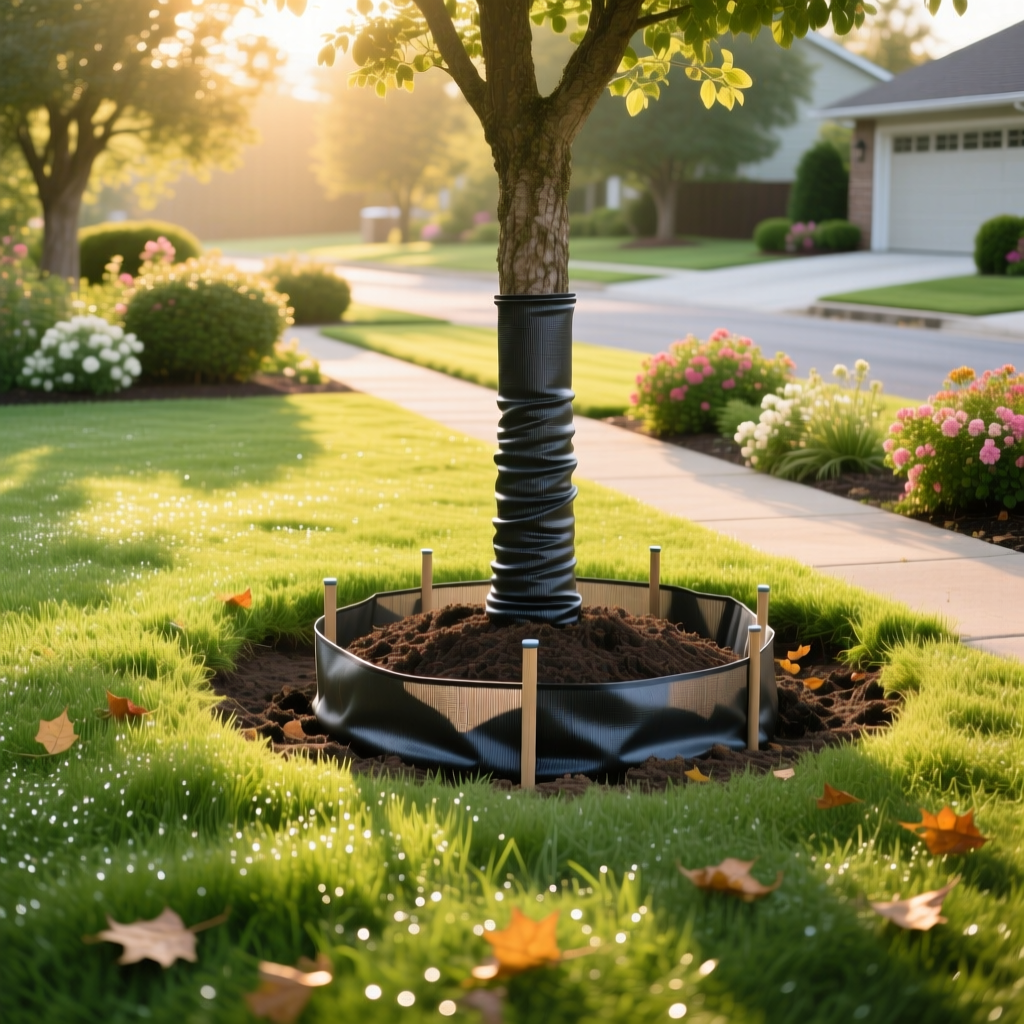
How to Install & Maintain Root Barriers for Invasive Tree Species
James MillerPublished
How to Install & Maintain Root Barriers for Invasive Tree Species
Trees are a stunning addition to any landscape, providing shade, beauty, and environmental benefits. However, certain tree species have aggressive root systems that can wreak havoc on your property. From cracking driveways and sidewalks to invading sewer lines and damaging foundations, invasive tree roots are a problem that many homeowners face. If you love the trees on your property but want to protect your lawn and landscape, installing a root barrier is one of the most effective solutions available.
A root barrier is a physical underground wall that redirects or blocks tree roots from growing into areas where they can cause damage. When properly installed and maintained, root barriers can save you thousands of dollars in repairs while allowing you to keep the trees you love. This comprehensive guide will walk you through everything you need to know about installing and maintaining root barriers for invasive tree species, from choosing the right materials to long-term care strategies.
Understanding Invasive Tree Species & Why Root Barriers Are Necessary
Before diving into installation, it is essential to understand what makes certain tree species invasive and why their root systems pose such a significant threat to your property. Invasive tree species are typically characterized by fast growth rates, aggressive spreading root systems, and a tendency to seek out moisture sources such as plumbing lines, irrigation systems, and poorly drained areas of your yard soil.
Common Invasive Tree Species
Several tree species are notorious for their destructive root behavior. Understanding which trees you are dealing with will help you plan your root barrier installation more effectively:
- Willow Trees (Salix spp.): Willows are among the most aggressive water-seekers. Their roots can extend far beyond the drip line and are infamous for invading sewer lines and drainage systems.
- Poplar Trees (Populus spp.): Poplars grow rapidly and produce extensive, shallow root systems that can lift sidewalks, driveways, and patios.
- Silver Maple (Acer saccharinum): Silver maples develop large surface roots that spread widely and can damage foundations and underground utilities.
- American Elm (Ulmus americana): Elms have vigorous root systems that seek moisture aggressively and can compromise septic systems.
- Oak Trees (Quercus spp.): While not always classified as invasive, many oak species develop massive root systems that can interfere with hardscaping and structures over time.
- Ficus Trees (Ficus spp.): In warmer climates, ficus roots are extremely aggressive and can destroy sidewalks, walls, and plumbing.
- Eucalyptus Trees (Eucalyptus spp.): Eucalyptus roots spread widely and can destabilize nearby structures while also depleting soil moisture in surrounding lawn areas.
How Tree Roots Cause Damage
Tree roots do not typically "attack" structures directly. Instead, they grow toward sources of water and nutrients. When roots encounter small cracks in foundations, pipes, or pavement, they exploit these openings and expand over time, applying tremendous pressure. A single root can exert enough force to crack concrete, shift pavers, and collapse underground pipes. The cost of repairing this damage often far exceeds the cost of installing a root barrier proactively.
Root damage is particularly problematic near:
- Home foundations and basement walls
- Driveways and garage aprons
- Sidewalks and walkways
- Sewer lines and septic systems
- Swimming pools and retaining walls
- Irrigation systems and underground utilities
- Garden beds and newly seeded lawn areas
Planning Your Root Barrier Installation
Proper planning is the foundation of a successful root barrier installation. Rushing into the project without careful consideration of materials, placement, and local conditions can lead to ineffective barriers that fail within a few seasons. Take the time to assess your situation thoroughly before breaking ground.
Choosing the Right Root Barrier Material
Several types of root barrier materials are available, each with distinct advantages and limitations:
High-Density Polyethylene (HDPE) Panels: These rigid plastic panels are the gold standard for root barriers. They are durable, resistant to degradation, and can last for decades underground. HDPE panels typically come in depths ranging from 18 to 36 inches and are installed in sections that interlock or overlap. The smooth surface prevents roots from gripping and climbing over the barrier.
Metal Root Barriers: Galvanized steel or aluminum barriers offer exceptional strength and longevity. They are particularly useful in areas with very large, powerful tree roots. Metal barriers are more expensive than plastic options but provide unmatched durability in challenging conditions.
Chemical Root Barriers: These barriers use herbicide-impregnated fabrics or soils to inhibit root growth. While effective in the short term, chemical barriers may degrade over time and can have environmental implications. They are best used as supplementary measures rather than primary barriers, especially near organically maintained lawns and garden beds.
Geotextile Fabric Barriers: Heavy-duty landscape fabrics can serve as root barriers in low-risk situations. However, aggressive roots from invasive species can eventually penetrate these fabrics, making them less suitable for long-term protection against the most problematic trees.
Determining Barrier Depth & Placement
The depth and placement of your root barrier are critical to its effectiveness. Most tree roots grow within the top 18 to 24 inches of soil, but some species send roots deeper. As a general rule:
- Minimum depth: 24 inches for moderate-risk species
- Recommended depth: 30 to 36 inches for highly invasive species like willows, poplars, and ficus
- Above-ground extension: The barrier should extend 1 to 2 inches above the soil surface to prevent roots from growing over the top
- Distance from tree trunk: Install the barrier at least 3 to 5 feet from the trunk for young trees, and farther for mature specimens to avoid damaging the structural root zone
- Distance from structures: Place the barrier between the tree and the structure you want to protect, ideally at least 2 feet from foundations
Assessing Your Soil & Site Conditions
Before installation, evaluate the soil type and drainage conditions at your site. Clay soils tend to be denser and may restrict root growth naturally, while sandy or loamy soils allow roots to spread more freely. Poor drainage can attract roots toward specific areas, making barrier placement even more critical. If your yard has drainage issues, address these concurrently with your root barrier installation for the best results.
Step-by-Step Root Barrier Installation Guide
Installing a root barrier is a significant landscaping project that requires careful execution. While some homeowners choose to tackle this as a DIY project, larger installations or those near critical structures may benefit from professional assistance. Here is a detailed step-by-step process for installing a root barrier around invasive tree species.
Step 1: Mark the Barrier Line
Use spray paint, string, or stakes to mark the exact line where your root barrier will be installed. Consider the full mature spread of the tree's root system, not just its current size. For linear installations along a property line or near a driveway, mark a straight line. For circular installations around a tree, mark a radius that provides adequate protection while preserving the tree's health.
Step 2: Dig the Trench
Excavate a trench along your marked line. The trench should be:
- Wide enough to accommodate the barrier material plus working room (typically 6 to 12 inches wide)
- Deep enough to accommodate the full depth of the barrier panel (24 to 36 inches)
- Clean and free of large rocks, debris, and existing roots that could damage the barrier
When you encounter tree roots during excavation, assess their size carefully. Roots smaller than 2 inches in diameter can generally be pruned cleanly with sharp tools. Larger roots should be evaluated by an arborist before cutting, as removing major structural roots can destabilize the tree and create safety hazards. For more information on maintaining tree health during landscaping projects, visit our tree pruning guide.
Step 3: Prepare the Barrier Panels
Cut your barrier panels to size if necessary. For HDPE panels, use a fine-toothed saw or heavy-duty utility knife. Ensure that each panel section is long enough to overlap with adjacent sections by at least 6 to 12 inches. This overlap prevents roots from finding gaps between panels and growing through.
Step 4: Install the Barrier Panels
Place the barrier panels vertically into the trench. The smooth side should face the tree, as this makes it harder for roots to grip the surface and grow upward. Key installation details include:
- Ensure panels are plumb (vertically straight) and at consistent depth
- Overlap adjacent panels by at least 6 inches and secure them with manufacturer-recommended connectors or heavy-duty outdoor tape
- For corner installations, use pre-formed corner pieces or carefully bend panels to maintain a continuous barrier
- The top edge of the barrier should extend 1 to 2 inches above the finished grade level
- If the barrier line is long, consider installing support stakes every 4 to 6 feet to keep panels aligned during backfilling
Step 5: Backfill & Compact the Trench
Once all panels are in place and properly aligned, begin backfilling the trench. Use the native soil you removed during excavation, or a mix of native soil and sand for improved drainage. Backfill in 6-inch layers, compacting each layer firmly to prevent future settling. Avoid using large rocks or debris in the backfill, as these can create voids that roots might exploit.
After backfilling, grade the soil surface so that it slopes slightly away from the barrier on both sides. This prevents water from pooling along the barrier line, which could attract roots to the area. If the installation disrupted your lawn, follow our lawn repair guide to restore the turf in the affected area.
Step 6: Apply Mulch or Ground Cover
Apply a 2 to 3-inch layer of mulch along the barrier line on the tree side. This helps retain soil moisture for the tree while making the barrier line visually distinct for future maintenance. Avoid piling mulch against the tree trunk, as this can promote rot and disease. On the protected side of the barrier, you can replant turf grass or install decorative ground cover as desired.
Long-Term Maintenance of Root Barriers
Installing a root barrier is not a "set it and forget it" solution. Regular maintenance is essential to ensure the barrier continues to function effectively over the years. Neglected barriers can develop gaps, become exposed, or be overtopped by roots that find alternative paths around the protection zone.
Seasonal Inspection Schedule
Inspect your root barriers at least twice per year, ideally in early spring and late fall. During each inspection, look for the following signs of potential problems:
- Soil settling: Over time, backfilled soil may settle, exposing the top of the trench and creating a low area where water collects. Add soil as needed to maintain proper grade.
- Barrier exposure or damage: Check that the top edge of the barrier remains 1 to 2 inches above grade. Frost heave in cold climates can push panels upward, while erosion can expose them. Adjust panels as necessary.
- Root growth over the top: Some aggressive species may attempt to grow roots over the top of the barrier. If you see roots crossing over the barrier, prune them immediately and consider adding a taller barrier section.
- Root growth around the ends: If your barrier is a linear installation rather than a full circle, roots may grow around the ends. Monitor the areas beyond the barrier endpoints and extend the barrier if necessary.
- Cracks or separations: Check panel joints for separation and repair any gaps with appropriate connectors or sealant.
Root Pruning Maintenance
Even with a properly installed barrier, some roots may find their way through small gaps or over the top edge. When you discover roots that have bypassed the barrier, prune them cleanly with sharp, sterilized tools. Make clean cuts rather than tearing or ripping roots, as damaged roots are more susceptible to disease and decay. After pruning, apply a root growth inhibitor to the cut ends if desired, following manufacturer instructions carefully.
For trees with particularly aggressive root systems, you may need to perform root pruning maintenance annually. This is especially true during the first three to five years after barrier installation, when the tree is actively responding to the changed root environment. Regular seasonal tree care will help you stay ahead of potential problems.
Managing Soil Moisture & Drainage
One of the most effective ways to reduce root pressure on your barrier is to manage soil moisture conditions. Tree roots grow toward water, so if the soil on the protected side of the barrier is consistently moist, roots will be more motivated to find ways around or over the barrier. Strategies include:
- Ensure that irrigation systems do not overwater areas near the barrier
- Fix any leaking faucets, hose bibs, or irrigation heads on the protected side
- Maintain proper drainage in the protected area to prevent standing water
- Consider installing a French drain or drainage system along the protected side of the barrier to keep soil drier
Monitoring Tree Health
While root barriers protect your property, it is important to ensure they do not harm the tree. A properly installed barrier should block roots from growing in one direction while leaving the rest of the root zone intact. However, if the barrier is too close to the trunk or encompasses too much of the root zone, the tree may suffer from reduced water and nutrient uptake.
Watch for signs of tree stress, including:
- Yellowing or wilting leaves
- Reduced growth rate or smaller-than-normal leaves
- Dieback in the canopy, particularly on the barrier side
- Increased susceptibility to pests and diseases
- Premature leaf drop
If you notice any of these symptoms, consult a certified arborist to evaluate whether the barrier is too restrictive. In some cases, adjusting the barrier placement or supplementing tree care with deep watering and proper fertilization can help the tree recover.
Seasonal Tips for Root Barrier & Tree Care
Each season presents unique challenges and opportunities for maintaining your root barriers and the trees they protect. Following a seasonal care routine will help you catch problems early and keep both your property and your trees in excellent condition.
Spring Care
Spring is the most critical time for root barrier maintenance. As soil temperatures warm, tree roots become highly active and begin their most vigorous growth period. During spring:
- Conduct a thorough inspection of all barrier sections after winter frost has left the ground
- Repair any frost heave damage by resetting displaced panels
- Refill any settled areas along the trench line with fresh soil
- Prune any roots that have grown over or around the barrier during the dormant season
- Apply a balanced, slow-release fertilizer to the tree to support healthy growth within the available root zone
- Check your spring lawn care routine to ensure irrigation patterns do not attract roots toward the barrier
Summer Care
Summer heat stresses both trees and root barriers. During the hottest months:
- Monitor tree canopy health closely for signs of water stress
- Water the tree deeply and infrequently to encourage deep root growth within the permitted root zone
- Check that mulch along the barrier line has not been displaced or decomposed significantly
- Watch for new root growth attempting to bypass the barrier, especially near the surface where soil is warmest
- Ensure irrigation systems are not creating overly moist conditions on the protected side of the barrier
Fall Care
Fall is an excellent time for major root barrier repairs or extensions, as trees are slowing their growth and preparing for dormancy:
- Conduct a second comprehensive inspection of the entire barrier system
- Extend barrier lines if you have noticed root activity beyond the current endpoints
- Perform any necessary root pruning before the tree enters dormancy
- Add fresh mulch along the barrier line to insulate roots before winter
- Remove fallen leaves and debris from the barrier line to prevent moisture buildup and pest harborage
- Prepare your fall lawn maintenance schedule to complement your tree care efforts
Winter Care
While trees are dormant in winter, the barrier itself still needs attention:
- Monitor for frost heave, especially in regions with freeze-thaw cycles
- Avoid piling snow or ice against the barrier, as the weight can damage panels
- Use this quiet season to plan any barrier extensions or upgrades for spring installation
- Review the past year's maintenance records and note any recurring problem areas
- Consult with an arborist about the overall health of protected trees and plan any winter tree protection measures
Frequently Asked Questions About Root Barriers for Invasive Trees
How long does a root barrier last?
The lifespan of a root barrier depends primarily on the material used. High-density polyethylene (HDPE) panels can last 30 years or more when properly installed, as they are resistant to UV degradation, chemical breakdown, and biological decay. Metal barriers made from galvanized steel or aluminum can last even longer, potentially exceeding 50 years. Chemical barriers and geotextile fabrics typically have shorter lifespans of 5 to 15 years, depending on soil conditions and root pressure. Regular maintenance and inspection will help you maximize the lifespan of any barrier system and identify when replacement is needed.
Will a root barrier kill my tree?
A properly designed and installed root barrier should not kill your tree. The key is to leave a sufficient portion of the root zone undisturbed so the tree can access adequate water and nutrients. As a general guideline, the barrier should not enclose more than 25 to 30 percent of the tree's total root zone. For linear barriers protecting a specific structure, the impact is usually minimal because the tree retains access to roots on all other sides. However, if the barrier is installed too close to the trunk or wraps around too much of the root zone, the tree may experience stress, decline, or instability. Consulting a certified arborist before installation is always recommended, especially for mature or valuable trees.
Can I install a root barrier near an existing mature tree?
Yes, root barriers can be installed near mature trees, but the process requires extra care and expertise. Mature trees have established root systems, and trenching through these roots can cause significant stress. When installing a barrier near a mature tree, it is important to excavate carefully using hand tools or air excavation equipment rather than mechanical trenchers, which can cause extensive root damage. Roots larger than 2 inches in diameter should generally not be cut without professional evaluation. The barrier should be installed at a distance that preserves the tree's critical root zone, which typically extends from the trunk to the drip line and beyond. In some cases, it may be more practical to install the barrier closer to the structure you want to protect rather than close to the tree.
How much does root barrier installation cost?
The cost of root barrier installation varies widely based on factors such as barrier length, depth, material choice, soil conditions, and whether you hire professionals or do the work yourself. For a DIY installation using HDPE panels, material costs typically range from $5 to $15 per linear foot. Professional installation generally costs between $15 and $40 per linear foot, depending on site complexity and local labor rates. For a typical residential project protecting a 50-foot section of driveway or foundation, total costs might range from $500 for a DIY project to $2,000 or more for professional installation. While the upfront cost may seem significant, it is almost always less expensive than repairing damage caused by invasive roots, which can cost tens of thousands of dollars for foundation or sewer line repairs.
What are the alternatives to root barriers for controlling invasive tree roots?
If a root barrier is not feasible for your situation, several alternative strategies can help manage invasive tree roots. Regular root pruning involves periodically cutting back roots that threaten structures, though this is a recurring maintenance task rather than a permanent solution. Chemical root growth inhibitors containing substances like trifluralin can be applied to soil near structures to discourage root growth, but these require periodic reapplication and may affect nearby plants. Copper sulfate treatments are sometimes used in sewer lines to prevent root intrusion, though environmental concerns limit their use in some areas. In extreme cases, removing the problematic tree and replacing it with a species that has a less aggressive root system may be the most practical long-term solution. For guidance on selecting trees that are less likely to cause root problems, explore our guide to choosing the right trees for your landscape. Combining multiple approaches often yields the best results, and a certified arborist can help you develop a customized management plan for your specific property and tree species.

