
Gardening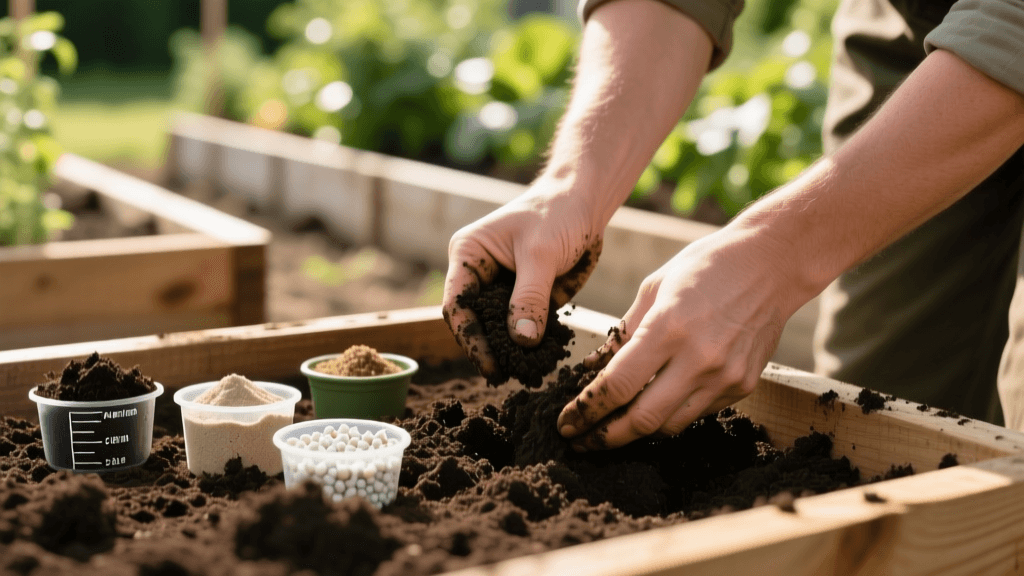
Step-by-Step Guide to Amending Heavy Clay Garden Soil
Understanding the Challenge of Clay Soil
Heavy clay soil is a common frustration for home gardeners, particularly those trying to establish a productive vegetable garden or a vibrant flower bed. Clay particles are microscopically small and flat, which causes them to pack tightly together like a deck of cards. This dense structure severely limits oxygen flow, restricts delicate root growth, and creates significant drainage issues that can drown plants during heavy spring rains. Furthermore, clay soils tend to warm up much slower in the spring, delaying planting schedules.
However, it is not all bad news. Clay soil is naturally rich in essential minerals and has an exceptional cation exchange capacity (CEC), meaning it can hold onto nutrients far better than sandy soils. The secret to successful gardening in these conditions is not to fight the clay, but to physically and biologically transform its structure. By amending it properly, you can create a highly productive, moisture-retentive, and nutrient-dense loamy soil.
Step 1: Test Your Soil Texture and Moisture
Before purchasing truckloads of amendments, you must confirm your soil texture and current moisture levels. Working clay soil when it is too wet is one of the most damaging things a gardener can do, as it destroys the fragile soil aggregates and creates hard, impenetrable clods that bake like brick in the summer sun.
The Ribbon Test
To confirm you have heavy clay, perform the ribbon test. Take a handful of moist soil and squeeze it into a ball. Slowly push the soil upward with your thumb to form a ribbon. If the ribbon extends longer than 2 inches before breaking, you have a high clay content. If it breaks before 1 inch, you likely have a clay-loam mixture, which is easier to manage.
The Squeeze Test for Moisture
Before you begin any physical amendment process, perform the squeeze test. Grab a handful of soil and squeeze it tightly in your fist. Open your hand and poke the ball of soil with your finger. If it crumbles easily, the moisture level is perfect for working. If it stays in a tight, muddy ball or water drips from it, the soil is too wet. Wait a few days for it to dry out before proceeding.
Step 2: Choose the Right Amendments (and Avoid the Sand Myth)
Many gardeners mistakenly believe that adding sand to heavy clay will improve drainage. This is a costly and labor-intensive error. According to the Penn State Extension, adding sand to clay soil without adding substantial organic matter will create a concrete-like substance. The smaller clay particles simply fill the voids between the larger sand particles, resulting in a harder, more compacted matrix.
Instead, your primary focus should be on adding bulky organic matter and specific inorganic aerators. Organic matter binds clay particles together into larger 'crumbs' or aggregates, creating pore spaces for air and water to move freely.
'Adding sand to clay soil is generally not recommended unless it is added in very large quantities (over 50% by volume) along with organic matter. For most home gardeners, focusing entirely on high-quality compost and organic amendments is the most practical and effective solution.' - Penn State Extension, Department of Horticulture.
Amendment Comparison Chart
Below is a structured comparison of the best amendments for heavy clay soil, including application rates and estimated costs for a standard 100-square-foot garden bed.
| Amendment Type | Application Rate | Est. Cost (per 100 sq ft) | Primary Benefit |
|---|---|---|---|
| Finished Compost | 2 to 3 inches | $15 - $30 | Adds organic matter, feeds microbes, improves aggregation |
| Leaf Mold | 2 to 3 inches | $5 - $15 (or Free) | Excellent water retention, fungal dominance, breaks up clay |
| Expanded Shale | 1 to 2 inches | $40 - $60 | Permanent physical aeration, lightweight, does not decompose |
| Gypsum | 40 lbs (approx) | $10 - $15 | Adds calcium, helps flocculate sodic (high sodium) clay soils |
| Pine Bark Fines | 1 to 2 inches | $10 - $20 | Long-lasting organic bulk, resists compaction over time |
Step 3: Calculate Quantities and Source Materials
To properly amend a garden bed, you need to apply a significant volume of organic matter. A general rule of thumb for initial clay reclamation is to add 2 to 3 inches of compost or leaf mold across the entire surface area of the bed. For a standard 4x8-foot raised bed or in-ground plot (32 square feet), 2 inches of compost equates to roughly 5.3 cubic feet, or about a fifth of a cubic yard. For a larger 10x10-foot in-ground garden (100 square feet), you will need approximately 0.62 cubic yards of compost.
Pro-Tip on Sourcing: Buying bagged compost from a big-box store is cost-prohibitive for large areas. Contact local landscape supply yards to order bulk compost by the cubic yard. A standard half-ton pickup truck can safely haul about 1 to 1.5 cubic yards of compost, saving you hundreds of dollars compared to bagged retail products.
Step 4: Incorporate Without Destroying Soil Structure
Once your materials are on-site and your soil has passed the moisture squeeze test, it is time to incorporate the amendments. Avoid using a motorized rototiller if possible. While rototillers quickly mix the soil, their high-speed tines pulverize soil aggregates, create a hardpan layer just beneath the tilling depth, and chop up beneficial earthworms and fungal networks.
The Broadfork Method
The most effective tool for amending clay soil is a broadfork (or U-bar digger). This manual tool allows you to fracture and aerate the deep clay without turning it upside down.
- Step 1: Spread your 2-3 inches of compost evenly over the surface of the garden bed.
- Step 2: Drive the tines of the broadfork into the soil using your foot, pushing it down to its full depth (usually 10-12 inches).
- Step 3: Pull the handles back toward your body gently. The goal is to 'crack' and lift the soil, not to flip it over. This creates deep fissures.
- Step 4: Step back 8 inches and repeat the process across the entire bed. The compost will naturally filter down into the cracks you have created, improving deep drainage and root penetration.
Step 5: The No-Till Sheet Mulching Alternative
If your clay soil is severely compacted, weedy, or you simply want to avoid the heavy labor of broadforking, the 'Lasagna Gardening' or sheet mulching method is a highly effective alternative. This method builds loamy soil from the top down, relying on earthworms and microbial action to incorporate the organic matter into the clay below.
- Mow the Area: Cut existing grass or weeds as short as possible.
- Lay the Barrier: Cover the entire area with overlapping sheets of plain brown corrugated cardboard. Remove all plastic tape and staples. Wet the cardboard thoroughly with a hose.
- Add Organic Mass: Pile 4 to 6 inches of mixed organic matter on top of the cardboard. A good mix includes compost, grass clippings, shredded leaves, and straw.
- Top Dress: Finish with a 2-inch layer of finished compost or topsoil to provide an immediate planting medium.
Over the course of 6 to 12 months, the cardboard will smother the weeds and decompose, while the earthworms will pull the organic matter down into the clay, naturally aggregating it.
Step 6: Long-Term Maintenance and Cover Cropping
Amending clay soil is not a one-time event; it is an ongoing management practice. Bare clay soil will quickly re-compact under the force of heavy rain. Always keep the soil covered with a 2-inch layer of organic mulch (like straw or shredded leaves) during the growing season to protect the soil structure and retain moisture.
Utilizing Biological Drills
In the late summer or early fall, plant a cover crop specifically designed to break up clay. Daikon radish (often sold as 'tillage radish') is a phenomenal tool for clay soils. The seed is inexpensive (roughly $15 per pound), and you only need about 10 pounds per acre, making a single packet more than enough for a home garden. Broadcast the seeds in September, and the radishes will drive deep, thick taproots into the hard clay. When winter freezes arrive, the radishes will die and rot in place, leaving behind large, organic-filled holes that dramatically improve spring drainage and aeration without any mechanical labor.
Conclusion
Transforming heavy clay soil into a fertile, workable loam requires patience, physical effort, and a reliance on biology rather than brute force. By avoiding the sand myth, utilizing deep-rooted cover crops, and consistently adding bulky organic matter through broadforking or sheet mulching, you will build a resilient garden ecosystem. Within two to three growing seasons, your heavy clay will become a dark, crumbly, and highly productive foundation for your vegetables and flowers.

