
Gardening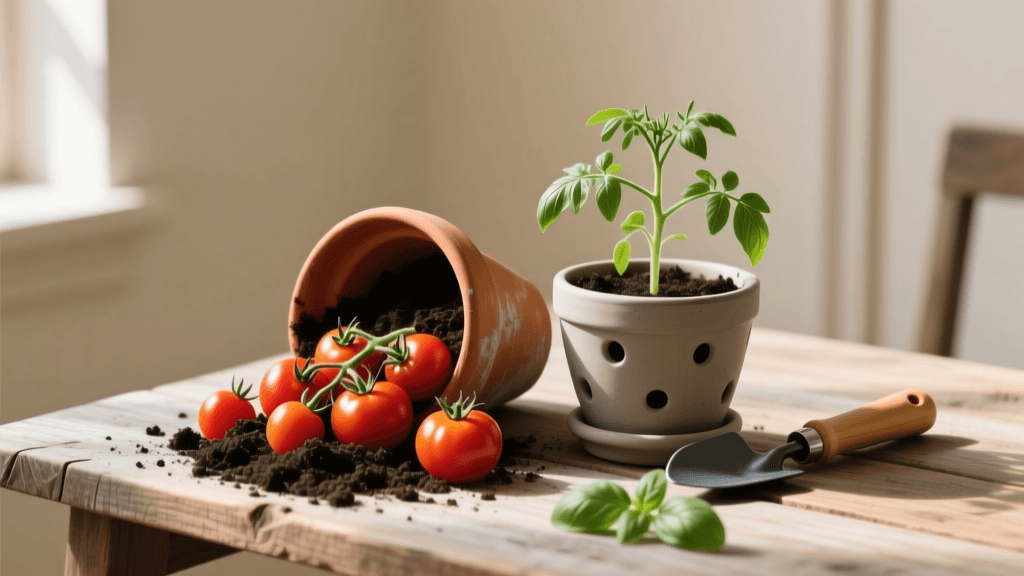
The Ultimate Beginner Guide to Growing Tomatoes in Containers
Why Grow Tomatoes in Containers?
For many aspiring gardeners, the sheer scale of traditional in-ground gardening can be intimidating. Between tilling soil, battling deep-rooted weeds, and managing unpredictable ground drainage, growing vegetables directly in the earth requires significant labor and space. Fortunately, there is a highly accessible alternative that yields spectacular results: container gardening. Growing tomatoes in pots is one of the most rewarding entry points into horticulture. It allows you to control the soil quality, easily move plants to chase the sun, and bypass many common soil-borne diseases that plague traditional garden beds.
Whether you have a sprawling suburban patio or a compact urban balcony, container tomatoes can thrive. With an initial investment of roughly $40 to $60 for high-quality pots, premium soil, and starter plants, you can harvest dozens of pounds of fresh, vine-ripened tomatoes right outside your back door. This comprehensive beginner guide will walk you through every step of the process, from selecting the right cultivars to mastering the art of container hydration.
Selecting the Right Tomato Varieties for Pots
Not all tomatoes are created equal, especially when it comes to confined spaces. The most crucial decision you will make is choosing between determinate and indeterminate varieties. Determinate tomatoes, often called 'bush' tomatoes, grow to a fixed height (usually 3 to 4 feet), produce their fruit over a concentrated period of a few weeks, and then stop growing. These are ideal for containers because they require minimal staking and pruning. Indeterminate tomatoes, on the other hand, are 'vining' plants that continue to grow and produce fruit until the first frost. While they yield more fruit over time, they can easily reach 8 to 10 feet tall and require heavy-duty trellising, making them challenging for beginners managing pots.
For your first container garden, we highly recommend sticking to determinate or dwarf varieties. They are manageable, resilient, and bred specifically for confined root systems.
Top 5 Beginner-Friendly Container Tomato Varieties
| Variety Name | Growth Habit | Days to Maturity | Minimum Pot Size | Flavor Profile |
|---|---|---|---|---|
| Patio Princess | Determinate | 60 Days | 3 Gallon | Sweet, tangy, classic |
| Tiny Tim | Dwarf | 45 Days | 2 Gallon | Mild, crisp cherry |
| Bush Goliath | Determinate | 65 Days | 5 Gallon | Rich, meaty, large |
| Tumbling Tom | Trailing | 70 Days | 3 Gallon | Sweet, high-yield cherry |
| Roma VF | Determinate | 75 Days | 5 Gallon | Dense, low-moisture paste |
Choosing the Perfect Container and Soil
Pot Size, Material, and Drainage
The biggest mistake beginners make is using pots that are too small. Tomatoes have aggressive, deep root systems. A pot that is too small will stunt growth, cause rapid moisture loss, and lead to nutrient deficiencies. For standard determinate tomatoes, you need a container that holds a minimum of 5 gallons of soil and is at least 12 inches deep. Dwarf varieties like Tiny Tim can survive in 2-gallon pots, but when in doubt, size up.
You will also need to choose between plastic, terracotta, and fabric pots. While terracotta looks beautiful, it is porous and wicks moisture away from the soil, requiring much more frequent watering. Standard plastic pots retain moisture well but can overheat in direct summer sun. For beginners, we highly recommend heavy-duty fabric grow bags (like Smart Pots). Fabric pots provide excellent 'air-pruning' for the roots, preventing the plant from becoming root-bound, and they offer superior drainage, virtually eliminating the risk of root rot. Expect to spend about $15 to $25 for a high-quality 5-gallon fabric pot.
Crucial Rule: Ensure your container has adequate drainage holes. If water pools at the top of the soil and drains slowly, your tomato roots will suffocate and rot within days.
The Ideal Potting Mix Recipe
Never use topsoil or garden soil from your yard in a container. Garden soil is too dense, compacts easily in pots, and may harbor pathogens or weed seeds. Instead, you need a light, fluffy, and nutrient-rich potting mix. You can buy pre-bagged mixes like FoxFarm Ocean Forest or Miracle-Gro Potting Mix, but making your own is cheaper and yields better results.
The Beginner's DIY Container Soil Recipe:
- 1 Part Coco Coir or Peat Moss: Provides moisture retention and a light texture.
- 1 Part Perlite or Pumice: Ensures aeration and drainage.
- 1 Part High-Quality Compost: Supplies a baseline of organic nutrients and beneficial microbes.
- 1/4 Cup Worm Castings per Gallon of Mix: Adds a gentle, slow-release nitrogen boost.
- 2 Tablespoons Granular Tomato Fertilizer (e.g., Espoma Tomato-tone 3-4-6): Mixed into the soil before planting to provide essential calcium and phosphorus.
Step-by-Step Planting Guide
Timing is everything. Tomatoes are highly sensitive to cold. Do not transplant your seedlings outdoors until at least two weeks after your region's last expected spring frost date, and only when nighttime temperatures consistently stay above 50°F (10°C).
When you are ready to plant, fill your container with your prepared soil mix, leaving about 3 inches of space at the top. Remove the lower leaves from your tomato seedling, leaving only the top cluster of foliage. Dig a deep hole and bury the plant's stem up to those remaining top leaves. Tomatoes possess the unique ability to sprout adventitious roots from any buried portion of their fuzzy stem. Burying the plant deeply creates a massive, robust root system that will anchor the plant and absorb maximum nutrients.
Water the plant immediately after transplanting with a gentle shower of room-temperature water, ideally mixed with a liquid seaweed extract to reduce transplant shock. Insert a sturdy wooden stake or a small tomato cage into the pot at the time of planting to avoid damaging the roots later.
Ongoing Care: Watering, Feeding, and Pruning
Mastering Container Hydration
Watering is the most critical daily task for a container gardener. Pots dry out significantly faster than the ground. During the peak heat of July and August, a mature tomato plant in a 5-gallon pot may require watering once or even twice a day. The golden rule of watering is to water deeply until you see moisture freely flowing out of the bottom drainage holes. This ensures the entire root ball is hydrated and flushes out excess salt buildup from fertilizers.
According to the University of Minnesota Extension, 'Containers dry out much faster than garden soil. On hot, windy days, you may need to water your tomato containers twice a day to prevent blossom drop and fruit cracking. Always check the soil moisture by inserting your finger one inch into the soil; if it feels dry, it is time to water.'
— University of Minnesota Extension, Container Vegetable Gardening Guidelines
To reduce your watering burden, apply a 2-inch layer of organic mulch, such as straw or shredded bark, over the top of the soil. This simple step locks in moisture, keeps the root zone cool, and prevents soil-borne fungal spores from splashing onto the lower leaves during heavy watering.
Fertilizer Schedule
Because frequent watering flushes nutrients out of the bottom of the pot, container tomatoes are heavy feeders. The initial fertilizer you mixed into the soil will sustain the plant for the first three to four weeks. After that, you must establish a feeding schedule. Apply a liquid organic fertilizer, such as fish emulsion or a liquid kelp blend, every 10 to 14 days. Alternatively, top-dress the soil with a granular organic fertilizer every three weeks, gently scratching it into the top inch of the soil before watering. Avoid high-nitrogen synthetic fertilizers; too much nitrogen will give you a massive, lush green bush with zero fruit.
Troubleshooting Common Container Tomato Problems
Even with the best care, beginners may encounter a few common hurdles. Here is how to identify and fix them quickly:
- Blossom End Rot: If the bottom of your green or ripening tomatoes turns black and leathery, your plant is suffering from a calcium deficiency, almost always triggered by uneven watering. Maintain a strict, consistent watering schedule and ensure your soil pH is between 6.2 and 6.8 so the plant can absorb available calcium.
- Yellowing Lower Leaves: This is often a sign of nitrogen deficiency or a natural aging process. If the plant is fruiting heavily, remove the yellowed bottom leaves to improve airflow and redirect the plant's energy to fruit production.
- Aphids and Whiteflies: These tiny sap-sucking insects love the tender new growth on tomato plants. Inspect the undersides of leaves weekly. If you spot them, spray the foliage with insecticidal soap or cold-pressed neem oil in the early evening when pollinators are not active.
Conclusion
Growing tomatoes in containers removes the barriers to entry for novice gardeners, offering a highly controlled, manageable, and deeply satisfying way to grow your own food. By selecting the right compact varieties, investing in appropriately sized pots with premium soil, and maintaining a disciplined watering routine, you will be rewarded with a summer-long harvest of sweet, sun-warmed tomatoes. Start small, observe your plants daily, and enjoy the incredible flavor that only comes from a homegrown harvest.

