
Gardening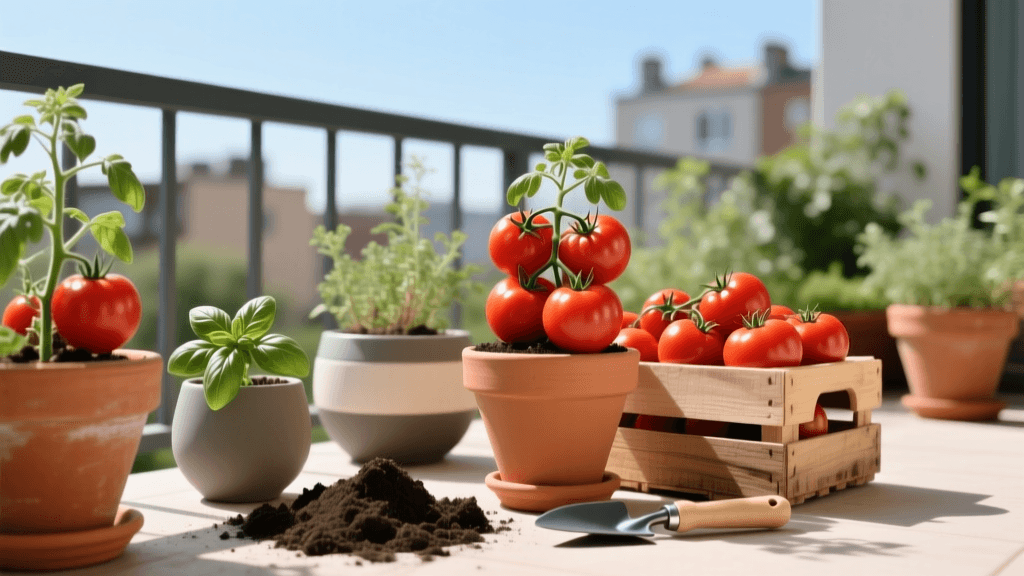
The Ultimate Beginner Guide to Growing Tomatoes in Containers
Introduction to Container Tomato Gardening
Growing your own food is a deeply rewarding endeavor, but traditional in-ground gardening can be intimidating for novices dealing with poor soil quality, invasive weeds, and limited backyard space. Enter container gardening. For beginners, growing tomatoes in containers is the perfect entry point into horticulture. It offers unparalleled control over the growing environment, eliminates the need for heavy tilling, and allows you to cultivate fresh, vine-ripened produce right on your patio, balcony, or driveway.
This comprehensive, beginner-friendly guide will walk you through every step of the process, from selecting the right pot and formulating the perfect soil mix to mastering a watering schedule that prevents common diseases. Whether you have a sprawling suburban deck or a tiny urban fire escape, you can achieve a bountiful tomato harvest by following these actionable, proven strategies.
Why Choose Containers for Tomatoes?
Container gardening solves many of the most frustrating problems beginners face. First, it bypasses the issue of poor native soil. If your yard is full of heavy clay or rocky debris, you would spend years amending it for in-ground tomatoes. With containers, you start with a pristine, optimized growing medium every single season. Second, containers are mobile. Tomatoes are heat-loving plants that require at least six to eight hours of direct sunlight daily. If a specific corner of your patio is too shady, you can simply move your pots to follow the sun. Finally, elevating your plants in containers can improve air circulation and reduce the risk of soil-borne pathogens splashing onto the lower leaves during heavy rains.
Selecting the Best Containers
The most common mistake beginners make is choosing a pot that is far too small. Tomato plants have vigorous, expansive root systems that require ample space to access water and nutrients.
Sizing Guidelines
- Cherry and Grape Tomatoes: Require a minimum of 5 gallons (approx. 12 inches deep and wide).
- Slicing and Paste Tomatoes: Require a minimum of 10 to 15 gallons (approx. 18 to 24 inches deep and wide).
Material Matters
While terracotta and ceramic pots look beautiful, they are incredibly heavy when filled with wet soil and tend to wick moisture away from the roots, requiring more frequent watering. For beginners, fabric grow bags (such as Smart Pots) or food-grade plastic resin containers are highly recommended. Fabric pots cost between $15 and $25 for a high-quality 10-gallon size and provide excellent drainage and air-pruning for the roots, which prevents the plant from becoming root-bound. Ensure that any plastic or ceramic pot you choose has at least four to six large drainage holes at the base. If it lacks holes, you must drill them yourself; tomatoes will quickly succumb to root rot in standing water.
Formulating the Ideal Potting Mix
Never use topsoil, garden soil, or dirt dug from your yard in a container. Garden soil is too dense, will compact in a pot, and often harbors weed seeds, nematodes, and fungal spores. You need a lightweight, well-draining, and nutrient-rich potting mix.
While you can buy pre-mixed bagged soils like FoxFarm Ocean Forest or Miracle-Gro Performance Organics for around $20 to $25 per bag, making your own mix is highly cost-effective and yields superior results. Here is a foolproof, beginner-friendly soil recipe:
- 1/3 Peat Moss or Coco Coir: Provides moisture retention and a light texture.
- 1/3 High-Quality Compost: Supplies a slow-release buffet of organic nutrients and beneficial microbes.
- 1/3 Coarse Perlite or Pumice: Ensures adequate drainage and prevents soil compaction.
- Amendments: Mix in 1 cup of granular organic fertilizer (like Espoma Tomato-tone 3-4-6) and 1 cup of worm castings per 5 gallons of soil mix to give your transplants a massive head start.
Choosing Beginner-Friendly Tomato Varieties
Tomatoes are generally categorized by their growth habits: determinate (bush) and indeterminate (vining). According to the Cornell University College of Agriculture and Life Sciences (CALS), determinate tomato varieties are genetically programmed to grow to a compact, predetermined height, set their fruit all at once, and stop growing. This makes them vastly superior for container confinement compared to indeterminate types, which can grow over eight feet tall and require massive, heavy-duty trellising systems that are difficult to manage in pots.
When shopping at your local nursery, look for tags that specify 'bush', 'patio', 'compact', or 'determinate'. Below is a comparison chart of the best container varieties for novices.
| Variety Type | Recommended Cultivar | Minimum Pot Size | Days to Maturity | Growth Habit |
|---|---|---|---|---|
| Cherry | Patio Princess | 5 Gallons | 55-65 Days | Determinate |
| Cherry | Tiny Tim | 3-5 Gallons | 45-55 Days | Dwarf/Determinate |
| Slicer | Bush Steak | 10 Gallons | 60-70 Days | Determinate |
| Slicer | Celebrity (Semi) | 10-15 Gallons | 70-80 Days | Semi-Determinate |
| Paste | Roma VF | 10 Gallons | 75-80 Days | Determinate |
Step-by-Step Planting Guide
Timing and Hardening Off
Tomatoes are highly sensitive to cold. Do not transplant your seedlings outdoors until at least two weeks after your region's last expected spring frost date, and only when nighttime temperatures consistently stay above 50°F (10°C). If you started seeds indoors or bought seedlings from a greenhouse, you must 'harden them off' first. Spend 7 to 10 days gradually acclimating the plants to outdoor sun and wind. Start by placing them in dappled shade for two hours on day one, gradually increasing their sun exposure and time outdoors each day. Skipping this step will result in severe transplant shock and sunscald.
The Deep Planting Technique
Unlike most plants, tomatoes have the unique ability to sprout adventitious roots all along their buried stems. To plant your tomato, dig a hole deep enough to bury at least two-thirds of the seedling's stem. Pinch off any lower leaves that will be submerged in the soil. This deep planting technique creates a massive, robust root system that will support the plant during heavy fruiting and help it access deeper moisture in the container.
Watering and Fertilizing Regimen
Mastering Container Hydration
Containers dry out much faster than in-ground garden beds. During the peak heat of mid-summer, you may need to water your tomato pots every single day, and occasionally twice a day for smaller 5-gallon pots. The goal is to provide 1 to 2 inches of water per week, keeping the soil consistently moist but never waterlogged. Always water at the base of the plant. Avoid overhead watering, as wet foliage encourages devastating fungal diseases like early blight and septoria leaf spot. A simple drip irrigation system or a soaker hose attached to a basic timer (costing around $30) is a worthwhile investment that removes the guesswork from daily watering.
Feeding for Maximum Yield
Because frequent watering flushes nutrients out of the bottom of the pot, container tomatoes are heavy feeders that require regular fertilization. Start with the slow-release granular fertilizer mixed into your soil at planting time. Once the plant begins to produce its first tiny yellow flowers, switch to a liquid organic fertilizer (such as fish emulsion or a liquid kelp blend) applied every two weeks. Follow the dilution rates on the product label strictly; over-fertilizing with high-nitrogen formulas will result in a massive, lush green bush with absolutely no fruit.
Pruning and Support
A common beginner mistake is aggressively pruning 'suckers' (the small shoots that grow in the V-shaped crotch between the main stem and a branch). While indeterminate, in-ground tomatoes require heavy sucker pruning, determinate container tomatoes should generally be left alone. Pruning a determinate bush removes the very branches that are programmed to produce your fruit. Simply provide a sturdy, short tomato cage (about 3 feet tall) at the time of planting to support the weight of the fruit-laden branches and keep them from snapping in high winds.
Troubleshooting Common Issues
- Blossom End Rot: This presents as a dark, sunken, leathery black spot on the bottom of the fruit. It is not a disease, but a calcium deficiency usually triggered by uneven watering. The calcium is in the soil, but the plant cannot absorb it if the soil fluctuates between bone-dry and soaking wet. Consistent watering is the cure.
- Tomato Hornworms: These massive, bright green caterpillars can strip a plant of its leaves overnight. They are easily managed by hand-picking them off the plant and dropping them into a bucket of soapy water.
- Aphids: Tiny sap-sucking insects that cluster on new growth. A strong blast from your garden hose or a spray of insecticidal soap will easily dislodge and eliminate them.
Harvesting Your Crop
Patience is the final virtue of the container gardener. Allow your tomatoes to ripen fully on the vine for the best flavor and highest sugar content. A ripe tomato will have a deep, uniform color and yield slightly to a gentle squeeze. If a heavy frost is threatened in the autumn, you can pick mature, green tomatoes and ripen them indoors in a paper bag with a banana, which emits ethylene gas to accelerate the ripening process.
By selecting the right compact varieties, utilizing spacious fabric containers, and maintaining a consistent watering and feeding schedule, even a first-time gardener can enjoy the unmatched taste of homegrown tomatoes. Container gardening removes the barriers of poor soil and limited space, proving that anyone, anywhere, can cultivate a thriving, delicious garden.

