
The Ultimate Budget-Friendly DIY Pallet Patio Sofa Guide
Outdoor living spaces bridge the gap between nature and home comfort, serving as the perfect backdrop for garden-to-table dining and evening relaxation. However, outfitting a patio with high-quality, weather-resistant furniture often comes with a staggering price tag. A standard retail outdoor sofa can easily cost anywhere from $800 to over $2,500. For budget-conscious homeowners looking to maximize their outdoor entertaining spaces without breaking the bank, upcycling wooden shipping pallets offers a brilliant, sustainable solution. In this comprehensive guide, we will walk you through building a durable, stylish, and budget-friendly DIY pallet patio sofa, freeing up your landscaping budget for smart home irrigation systems or energy-efficient garden lighting.
Why Choose Pallet Furniture for Your Outdoor Space?
The upcycling movement has transformed how we view construction waste. According to the Environmental Protection Agency (EPA), reusing wood and construction materials significantly reduces landfill waste and the carbon footprint associated with manufacturing new furniture. Pallets are incredibly sturdy, engineered to carry thousands of pounds of freight, making them more than capable of supporting outdoor seating and heavy cushions. Furthermore, the rustic, industrial-chic aesthetic of raw or stained wood seamlessly bridges indoor farmhouse decor with outdoor garden living, providing a customizable canvas for any design style.
Decoding Pallet Stamps: Safety First
Before you start building, you must understand pallet safety. Not all pallets are safe for residential use, especially for furniture where you will be sitting for extended periods. The National Wooden Pallet & Container Association (NWPCA) and various home improvement experts warn against using chemically treated wood for indoor or close-contact outdoor furniture. You need to look for the IPPC (International Plant Protection Convention) stamp on the side of the pallet to determine how the wood was treated.
| Stamp Code | Meaning | Safety for Furniture |
|---|---|---|
| HT | Heat Treated | SAFE. Heated to a minimum of 132°F to kill pests without chemicals. |
| KD | Kiln Dried | SAFE. Dried in a kiln to reduce moisture and prevent warping. |
| DB | Debarked | SAFE. Bark removed to comply with agricultural regulations. |
| MB | Methyl Bromide | DANGER. Treated with a toxic pesticide. Avoid entirely. |
| Unmarked | Unknown Origin | AVOID. Treatment and origin are unknown; not worth the risk. |
Expert sources like Bob Vila strongly advise avoiding MB-stamped pallets or any pallets that have visible chemical spills, strange odors, or signs of mold. Always source clean, dry, HT-stamped pallets from local hardware stores, garden centers, or small businesses that receive non-toxic goods like paper products or textiles.
Tools and Materials Required
To keep this project strictly budget-friendly and accessible to beginners, we are utilizing a "stacking" method rather than completely dismantling the pallets. This saves hours of labor and requires fewer specialized tools.
Materials List
- 3 Standard (48" x 40") HT-stamped wooden pallets
- 1 box of 2.5-inch exterior-grade wood screws or deck screws
- 1 quart of exterior spar urethane or water-based outdoor wood sealant
- Outdoor wood stain (optional, for color enhancement)
- 4 heavy-duty metal mending plates or L-brackets (for structural back support)
Tools List
- Random orbital sander
- Sandpaper discs (80-grit, 120-grit, and 220-grit)
- Cordless power drill with a Phillips head bit and a 1/8-inch drill bit for pilot holes
- Tape measure and carpenter’s square
- Paintbrushes or foam applicators for sealant
- Safety gear: N95 dust mask, safety goggles, and heavy-duty work gloves
Step-by-Step Construction Guide
Step 1: Sourcing and Prepping the Wood
Inspect your pallets thoroughly for protruding nails, staples, or loose boards. Use a hammer to countersink any raised nails and a pry bar to remove severely damaged slats. Clean the pallets with a stiff-bristle brush and a mild solution of water and dish soap to remove dirt, debris, and potential contaminants. Allow them to dry completely in direct sunlight for at least 24 hours before moving on to sanding.
Step 2: Sanding for Comfort and Safety
Raw pallets are notorious for splinters, which can ruin your outdoor lounging experience. Begin sanding with 80-grit sandpaper to remove rough edges, stamps, and surface grime. Follow up with 120-grit to smooth the wood fibers, and finish with a light pass of 220-grit for a furniture-grade feel. Always wear your N95 mask and goggles during this step to avoid inhaling fine wood dust. Pay special attention to the front edges and armrest areas where bare skin will frequently rest.
Step 3: Staining and Weatherproofing
To protect your sofa from rain, UV rays, and seasonal humidity, sealing is non-negotiable. If you desire a richer color, apply a coat of exterior wood stain first and let it penetrate for 15 minutes before wiping off the excess. Once dry, apply two generous coats of exterior spar urethane. Unlike standard indoor polyurethane, spar urethane is specifically formulated to expand and contract with temperature changes and contains UV blockers to prevent the wood from graying and cracking over time. Allow 24 hours of drying time between coats in a well-ventilated area.
Step 4: Assembly and Structural Support
Lay two pallets flat on the ground, side-by-side, to form your deep sofa base. Place the third pallet vertically against the back edge to serve as the backrest. Using your drill, create pilot holes every 8 inches to prevent the wood from splitting, then drive 2.5-inch exterior screws through the back pallet’s bottom runners directly into the top slats of the base pallets. For added rigidity, attach metal L-brackets at the interior corners where the seat meets the backrest. If you prefer a higher seat, you can attach 4x4 wooden posts to the bottom corners using structural brackets.
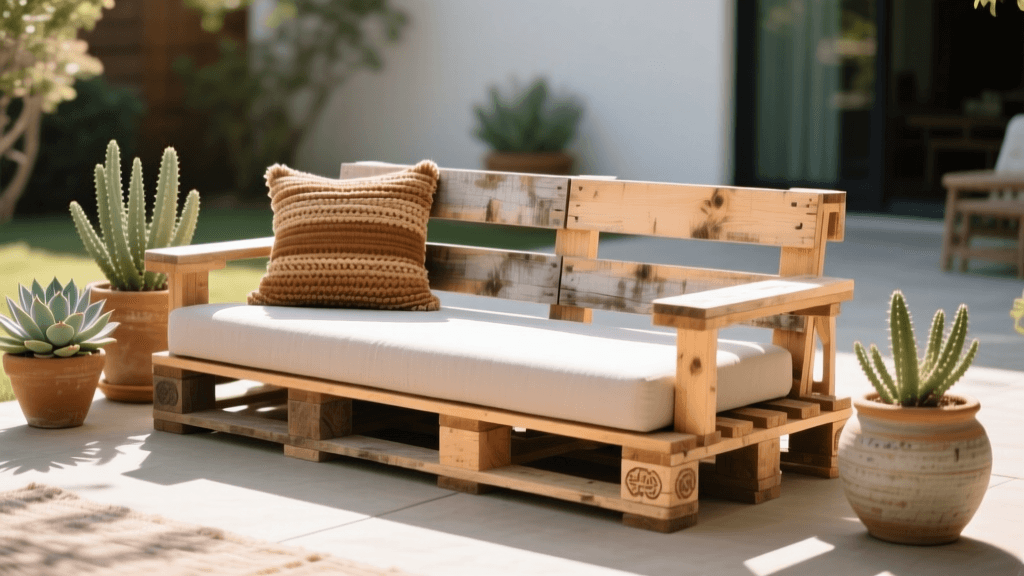
Step 5: Cushions and Styling
The comfort of your DIY sofa relies heavily on the cushions. Instead of buying expensive custom patio cushions, look for budget-friendly alternatives. Standard indoor futon mattresses fit the 48x80-inch footprint of two side-by-side pallets perfectly when covered with a waterproof outdoor slipcover. Alternatively, purchase high-density upholstery foam and wrap it in heavy-duty canvas drop cloths, sewing a simple envelope closure. Top with weather-resistant throw pillows to tie your outdoor decor to your indoor aesthetic, creating a cohesive living space.
Budget Comparison: DIY Pallet Sofa vs. Retail
Let us break down the financial impact of this DIY project compared to purchasing a comparable mid-tier retail piece. The savings can be reallocated toward smart garden technology or high-end outdoor cooking equipment.
| Item | DIY Pallet Sofa | Retail Patio Sofa |
|---|---|---|
| Frame / Base | $0 - $30 (Sourcing fees) | $400 - $800 |
| Hardware & Sealant | $45 | Included |
| Cushions | $80 - $150 (Upcycled/Budget) | $250 - $600 |
| Labor | Free (DIY Weekend Project) | N/A |
| Total Estimated Cost | $125 - $225 | $650 - $1,400+ |
As the table illustrates, the budget-friendly DIY approach saves you upwards of 80% compared to retail options, proving that high-end outdoor living does not require a high-end budget.
Seasonal Maintenance for Longevity
While spar urethane provides excellent protection, extreme weather will eventually take a toll on any wooden furniture. During heavy winter months or prolonged rainy seasons, cover your pallet sofa with a heavy-duty, breathable tarp or a custom-fitted outdoor furniture cover. If possible, move the sofa into a garage or shed to protect it from snow load and freezing rain. Every spring, inspect the wood for signs of wear or water spotting. A light sanding and a fresh topcoat of sealant every two years will ensure your budget-friendly masterpiece remains a staple of your outdoor living space for a decade.
Conclusion
Building a DIY pallet patio sofa is a highly rewarding weekend project that perfectly embodies the budget-friendly, sustainable ethos of modern home and garden living. By prioritizing safety with HT-stamped wood, properly weatherproofing the timber, and utilizing clever cushion hacks, you can create a stunning outdoor oasis that rivals high-end designer furniture. Not only will you enjoy a beautiful new space for relaxing and entertaining, but you will also take pride in knowing you built it yourself, sustainably and on a budget.

