
Build a Budget-Friendly DIY Rain Barrel System Today
The Financial and Environmental Case for Rainwater Harvesting
Gardening is a deeply rewarding endeavor that bridges the gap between indoor comfort and outdoor vitality. However, maintaining a lush garden-to-table vegetable patch or a vibrant flower bed during the peak of summer can cause your municipal water bill to skyrocket. According to the U.S. Environmental Protection Agency (EPA), the average American family uses 320 gallons of water per day at home, and about 30 percent is devoted to outdoor uses. More than half of that outdoor water is applied to lawns and gardens, much of which is lost to evaporation or runoff due to inefficient watering practices.
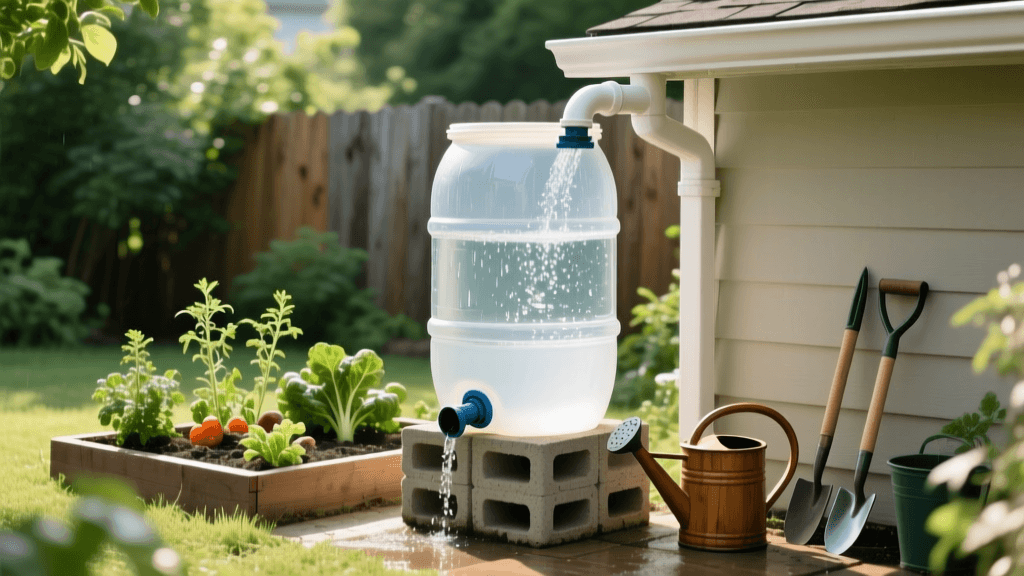
Harvesting rainwater is not just an eco-friendly landscaping trend; it is a highly effective, budget-conscious strategy for home and garden maintenance. By capturing the natural precipitation that falls on your roof, you can significantly reduce your reliance on treated municipal water. The United States Geological Survey (USGS) notes that rainwater harvesting reduces the strain on municipal water supplies, decreases stormwater runoff (which often carries pollutants into local waterways), and provides a free, sustainable water source for your landscape. In this guide, we will walk you through building a highly effective DIY rain barrel system for under $50, complete with gravity-fed pressure optimization and smart-home integration tips.
Sourcing Materials on a Budget
The most expensive component of any commercial rain barrel system is the tank itself, which can easily cost upwards of $150 at a garden center. To keep this project budget-friendly, we will source materials locally and repurpose food-grade containers. Here is your comprehensive shopping list:
- 55-Gallon Food-Grade HDPE Barrel ($15 - $25): Contact local craft breweries, soda bottlers, or food processing plants. They frequently sell used, food-grade High-Density Polyethylene (HDPE) barrels for a fraction of the retail cost. Warning: Never use a barrel that previously held chemicals, pesticides, or industrial solvents.
- 3/4-Inch Brass Spigot ($10): Brass is preferred over plastic for durability and resistance to UV degradation.
- 3/4-Inch Bulkhead Fitting with Rubber Gaskets ($8): This creates a watertight seal through the plastic wall of the barrel.
- Marine-Grade Silicone Sealant & Teflon Tape ($7): Essential for preventing slow leaks around the threading and gaskets.
- 1-Inch PVC Overflow Pipe and Elbow ($5): To direct excess water away from your home's foundation during heavy storms.
- Concrete Cinder Blocks ($4): You will need at least four blocks to elevate the barrel, creating gravity-fed water pressure.
Total Estimated Cost: $49 - $59
Step-by-Step Assembly Guide
Step 1: Prep and Drill the Spigot Hole
Clean the interior of your barrel thoroughly with a mild bleach solution (1 tablespoon per gallon of water) and rinse well. Using a 3/4-inch spade bit or hole saw, drill a hole approximately four inches from the bottom of the barrel. This specific height ensures you can access most of the water while leaving a small reservoir at the bottom where sediment and roof debris can settle without clogging your spigot.
Step 2: Install the Bulkhead and Spigot
Wrap the threads of your bulkhead fitting with Teflon tape. Insert the fitting through the hole from the outside, ensuring the rubber gasket sits flush against the exterior plastic. From the inside, thread the locking nut tightly. Because reaching inside a 55-gallon barrel can be difficult, you may need a helper or a specialized long-reach wrench. Apply a generous bead of marine-grade silicone around the exterior gasket and let it cure for 24 hours.
Step 3: Create the Overflow Valve
Drill a 1-inch hole about two inches from the top rim of the barrel. Insert a PVC bulkhead or a rubber grommet, and attach your 1-inch PVC elbow. Attach a length of flexible corrugated tubing to the elbow, routing it at least five feet away from your home's foundation to prevent soil erosion and basement flooding during torrential downpours.
Step 4: Elevate for Gravity-Fed Pressure
A rain barrel relies on gravity, not a pump. According to fluid dynamics, you need 2.31 feet of elevation to generate 1 PSI (Pound per Square Inch) of water pressure. Stack your concrete cinder blocks on a leveled, compacted gravel base. Placing the barrel roughly two to three feet off the ground will give you enough pressure to fill a watering can quickly and run a short soaker hose through your vegetable beds.
Cost and ROI Comparison: DIY Rain Barrel vs. Municipal Water
Understanding the return on investment (ROI) helps justify the initial weekend labor. Below is a comparison chart illustrating the long-term benefits of a DIY rain barrel system versus relying solely on municipal hose water.
| Feature | DIY Rain Barrel System | Municipal Hose Watering |
|---|---|---|
| Initial Setup Cost | $49 - $59 (One-time) | $30 - $45 (Hose + Nozzle) |
| Cost per 1,000 Gallons | $0.00 (Free precipitation) | $3.00 - $7.00 (Varies by city) |
| Chemical Additives | None (Pure, soft H2O) | Chlorine, Chloramines, Fluoride |
| Water Pressure | Gravity-fed (1-3 PSI) | High (40-60 PSI) |
| Environmental Impact | Reduces runoff and erosion | High treatment and transport footprint |
| Estimated Annual Savings | $100 - $250 (Summer months) | N/A |
As the table demonstrates, the DIY system pays for itself within the first few months of the summer watering season, especially in regions with high municipal water rates or tiered pricing structures that penalize heavy outdoor water use.
The Science of Plant Health: Why Rainwater is Superior
Beyond the financial savings, your garden will actively thrive on rainwater. The University of Minnesota Extension highlights that rainwater is naturally soft and slightly acidic, typically boasting a pH between 5.0 and 5.5. In contrast, municipal tap water is often treated to be alkaline (pH 7.5 or higher) to prevent the corrosion of city copper pipes. When you repeatedly water your garden with alkaline tap water, it can lock up essential micronutrients in the soil, leading to iron chlorosis (yellowing leaves) in acid-loving plants like tomatoes, blueberries, and azaleas. Rainwater flushes the soil of accumulated salts and provides nitrogen in the form of nitrates washed from the atmosphere, acting as a mild, natural fertilizer.
Seasonal Maintenance and Winterization
To ensure your budget-friendly system lasts for decades, seasonal maintenance is non-negotiable.
- Spring Cleaning: In early April, before the heavy rains begin, scrub the interior of the barrel with a stiff brush and a 50/50 white vinegar and water solution. This removes winter algae and biofilm.
- Summer Upkeep: Place a fine mesh screen over the top inlet where the downspout enters the barrel. This prevents mosquitoes from breeding and stops oak leaves or pine needles from decomposing inside the tank.
- Fall Winterization: This is the most critical step. In late November, or before your region's first hard freeze, completely drain the barrel by leaving the spigot open. Disconnect the overflow tubing and store it in a garage or shed. If water freezes inside the HDPE barrel, the expansion will crack the plastic and ruin your bulkhead seals.
Budget Smart-Home Integration
You do not need to spend hundreds of dollars on commercial smart-irrigation controllers to modernize your rain barrel. You can integrate this DIY setup into your smart home ecosystem on a micro-budget. Purchase a $15 Wi-Fi-enabled soil moisture sensor (such as those from Wyze or Sonoff) and place it in your primary vegetable bed. Using a free app like IFTTT (If This Then That), you can create a simple automation: if the soil moisture drops below 30% AND the local weather API forecasts no rain for the next 48 hours, the system sends a push notification to your smartphone reminding you to open the rain barrel spigot and deploy your soaker hoses. For advanced DIYers, a $12 smart plug can be wired to a 12V solenoid valve attached to the barrel's spigot, allowing you to trigger gravity-fed drip irrigation directly from your phone, bridging the gap between rustic sustainability and modern smart-home convenience.
Conclusion
Bridging the gap between indoor living and outdoor landscaping does not require a massive budget or professional contractors. By spending a single weekend and less than $60, you can construct a robust, eco-friendly rain barrel system that lowers your utility bills, protects your local watershed, and provides your garden with the pure, nutrient-rich water it needs to flourish. Whether you are cultivating a massive garden-to-table vegetable patch or simply keeping your patio containers alive during a July heatwave, this DIY solution proves that the best home and garden upgrades are often the ones you build yourself.

