
How to Build a Budget-Friendly DIY Rain Barrel System
Introduction to Sustainable Irrigation
Welcome to the intersection of sustainable landscaping and budget-friendly home improvement. As more homeowners embrace the garden-to-table lifestyle, the demand for reliable, cost-effective irrigation has never been higher. Watering a lush lawn, vibrant flower beds, and a productive vegetable garden can quickly inflate your monthly utility bills, especially during the peak heat of summer. Fortunately, nature provides a free, abundant resource that you can harvest right in your own backyard. Building a DIY rain barrel system is one of the most rewarding weekend projects you can undertake. Not only does it drastically reduce your reliance on municipal water, but it also provides your plants with untreated, chlorine-free water that promotes healthier root growth and better crop yields.
Why Harvest Rainwater?
According to the EPA WaterSense program, outdoor water use accounts for nearly 30 percent of total household water consumption, a figure that can climb to 60 percent in arid regions during the summer months. By capturing rainwater, you are actively participating in local water conservation efforts while insulating yourself against seasonal drought restrictions. Furthermore, the EPA's Soak Up the Rain initiative highlights that rain barrels help reduce stormwater runoff, which otherwise carries pollutants like fertilizers, pesticides, and motor oil directly into local waterways. From a financial perspective, a single 55-gallon barrel can capture hundreds of gallons of water over a rainy season, translating to tangible savings on your water bill. As noted by the USGS Water Science School, rainwater harvesting is a time-tested practice that enhances local water security and promotes sustainable residential landscaping.
Materials and Tools Required
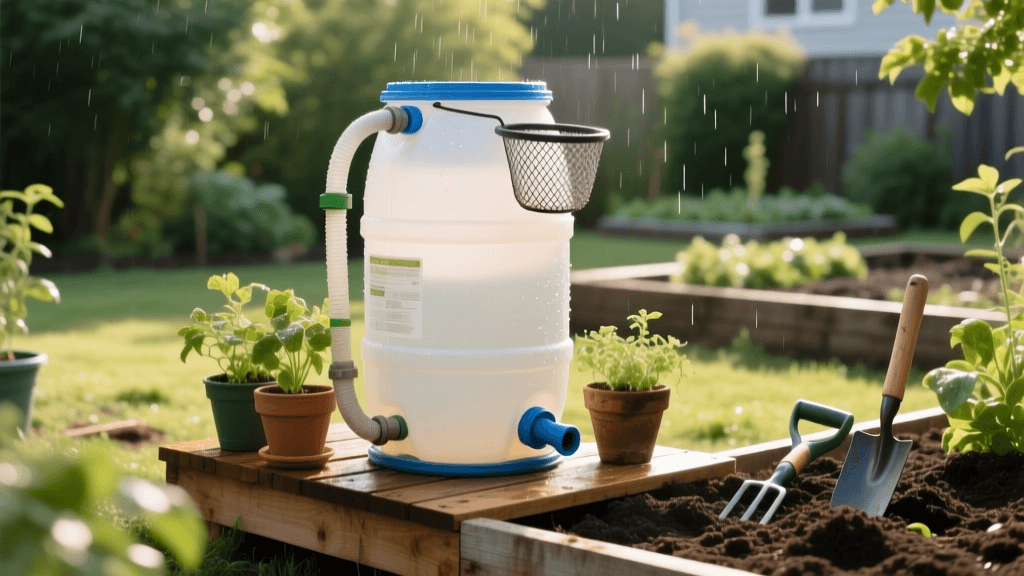
To keep this project strictly budget-friendly, we will be repurposing a food-grade plastic barrel rather than purchasing a premium, pre-fabricated rain barrel from a garden center. Here is the comprehensive list of materials and tools you will need. First, a 55-gallon food-grade plastic barrel, which can often be sourced for $20 to $30 from local beverage distributors, syrup suppliers, or online marketplaces. Avoid barrels that previously held toxic chemicals or industrial solvents. Next, you will need a 3/4-inch brass spigot with standard garden hose threads ($12), a 3/4-inch bulkhead fitting ($8), waterproof silicone sealant ($5), a fine fiberglass mesh screen to keep out debris and mosquitoes ($4), and four to six cinder blocks to create a sturdy, elevated base ($10). For tools, gather a power drill, a 3/4-inch hole saw bit, a utility knife, a measuring tape, and a wrench.
Step-by-Step Construction Guide
Step 1: Prep the Barrel
The first step is properly preparing your barrel. If you sourced a used food-grade barrel, it likely held fruit syrups or food-safe liquids. Rinse the interior thoroughly with a garden hose and a mild, eco-friendly dish soap to remove any sticky residue. Allow it to dry completely in the sun. Once clean, identify the front of the barrel where you want the spigot to face. Measure approximately three inches up from the bottom of the barrel. This specific height is crucial; it leaves enough space at the bottom for sediment and debris to settle without clogging your spigot, while still allowing you to drain the vast majority of the water. Mark this spot with a permanent marker.
Step 2: Install the Spigot
Next, you will install the spigot assembly. Using your power drill and the 3/4-inch hole saw bit, carefully drill a hole through the plastic at your marked spot. Apply a generous, continuous bead of waterproof silicone sealant around the outside edge of the bulkhead fitting. Insert the bulkhead fitting into the hole from the outside, and secure it from the inside using the provided locking nut. Tighten it firmly with a wrench to ensure a watertight seal, but be careful not to overtighten and crack the plastic. Once the bulkhead is secure, wrap the threads of your brass spigot with plumber's tape and screw it into the external threads of the bulkhead fitting. Allow the silicone sealant to cure for at least 24 hours before testing for leaks.
Step 3: Create the Inlet and Overflow
Now it is time to create the inlet and the overflow valve. Using your hole saw, cut a large hole in the top of the barrel to accommodate your downspout diverter or flexible downspout extender. Cover this opening with your fiberglass mesh screen, securing it tightly with a heavy-duty bungee cord or a specialized barrel lid ring. This screen is your primary defense against leaves, roof shingle grit, and, most importantly, egg-laying mosquitoes. About two inches from the very top rim of the barrel, drill a second hole for the overflow valve. Install a secondary bulkhead fitting and attach a short piece of hose. This overflow hose must be directed away from your home's foundation to prevent basement flooding or soil erosion during heavy downpours.
Step 4: Elevate and Connect
The final and perhaps most critical step is elevating the barrel. Rain barrels rely on gravity to create water pressure. For every foot of elevation, you gain approximately 0.43 PSI (pounds per square inch) of pressure. To achieve enough pressure to push water through a standard garden hose or a soaker hose network, your barrel needs to be elevated at least two to three feet off the ground. Build a stable, level base using your cinder blocks. Ensure the blocks are resting on compacted, level soil or a bed of crushed gravel to prevent shifting over time. Place the barrel on the blocks, connect your downspout diverter to the top inlet, and you are ready to catch your first storm.
Cost Comparison: DIY vs. Retail
Understanding the financial benefits of this project requires a direct comparison between a DIY build and purchasing a commercial unit. Retail rain barrels often come with aesthetic upgrades but carry a massive markup. Below is a cost breakdown comparing our budget-friendly DIY approach to standard retail options.
| Item / Feature | Budget DIY Build | Retail Commercial Barrel |
|---|---|---|
| 55-Gallon Barrel | $25 (Repurposed) | $120+ (Molded Plastic) |
| Hardware & Fittings | $30 | Included |
| Elevation Base | $12 (Cinder Blocks) | $45 (Plastic Stand) |
| Downspout Diverter | $15 | $20 |
| Total Estimated Cost | $82 | $185 - $250+ |
| Aesthetic Appeal | Utilitarian / Paintable | Decorative / Textured |
Essential Maintenance and Winterization
To ensure your system operates efficiently year-round, routine maintenance is essential. During the spring and summer, check the mesh screen weekly and brush off accumulated pollen, leaves, and roof debris. If you notice standing water on the screen, it will restrict water flow into the barrel. To combat mosquitoes, which can breed in as little as a capful of water, drop a Mosquito Dunk containing Bti (Bacillus thuringiensis israelensis) into the barrel every 30 days. Bti is a naturally occurring bacterium that is completely safe for plants, pets, and wildlife, but lethal to mosquito larvae. Additionally, once a year, flush the sediment from the bottom of the barrel by opening the spigot fully and letting the remaining water and sludge wash out into a designated garden bed.
If you live in a climate where temperatures drop below freezing, winterizing your rain barrel is non-negotiable. Water expands when it freezes, which will easily crack the plastic barrel and shatter your brass fittings. Before the first hard frost, disconnect the downspout diverter and reattach your standard downspout elbow to direct water away from your foundation. Open the spigot and drain the barrel completely. Leave the spigot open throughout the winter to prevent any residual moisture from freezing inside the valve. If possible, store the empty barrel in a garage or shed, or turn it upside down and secure it with bungee cords so it does not become a heavy, ice-filled hazard in your yard.
Maximizing Your Garden-to-Table Yield
Building a budget-friendly DIY rain barrel system is a quintessential home and garden project that bridges the gap between sustainable landscaping and practical home maintenance. By investing a single afternoon and less than a hundred dollars, you equip your property with a resilient, eco-friendly irrigation source. Your garden-to-table vegetables will thrive on the soft, untreated rainwater, your lawn will remain vibrant during dry spells, and your utility bills will reflect your conservation efforts. Embrace the power of rainwater harvesting and take a significant step toward a more self-sufficient, beautiful outdoor living space.

