
Gardening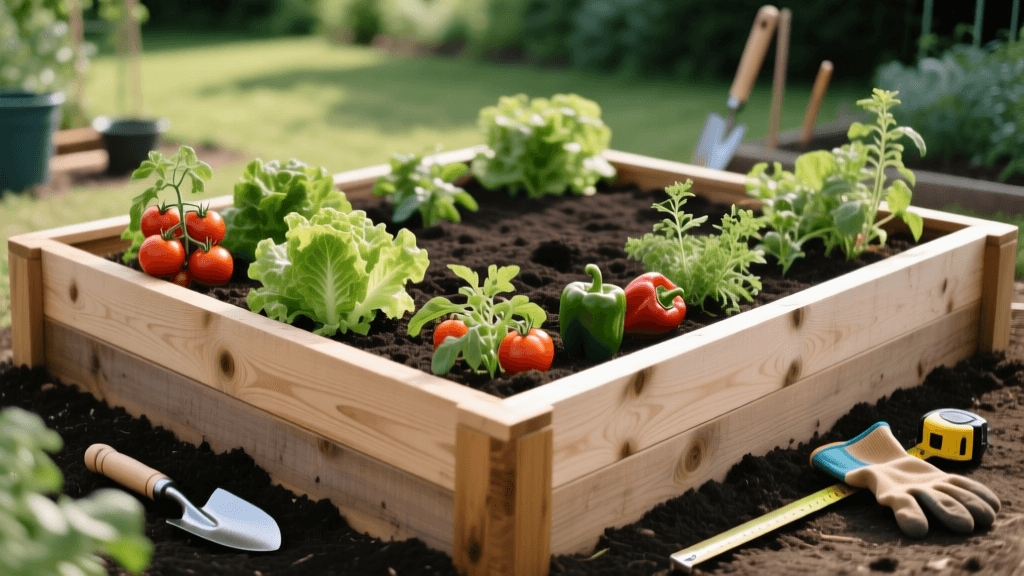
How to Build a 4x8 Cedar Raised Bed for Vegetables
Why Choose a 4x8 Cedar Raised Bed?
Building a raised garden bed is one of the most transformative projects you can undertake for your home garden. A 4x8-foot cedar raised bed offers the perfect balance of accessibility, yield, and durability. Cedar is naturally resistant to rot, decay, and insect damage, meaning it will last for a decade or more without the need for chemical treatments that could leach into your vegetable soil. The 4-foot width ensures you can easily reach the center of the bed from either side without stepping on and compacting your carefully prepared soil, while the 8-foot length provides 32 square feet of prime growing space.
In this comprehensive, practical guide, we will walk you through the exact steps, materials, and costs required to build a professional-grade cedar raised bed, prepare the site, and fill it with a scientifically backed soil mix for maximum vegetable yields.
Materials and Tools Required
Before heading to the lumber yard, gather the following materials and tools. The estimated costs are based on national averages and may vary slightly by region.
| Item | Quantity | Specifications | Estimated Cost |
|---|---|---|---|
| Cedar Boards | 4 | 2x10x8 foot rough-cut cedar | $110.00 |
| Cedar Corner Posts | 1 | 4x4x8 foot cedar (cut into blocks) | $18.00 |
| Exterior Screws | 1 Box | 2.5-inch Torx drive wood screws (e.g., GRK Fasteners) | $15.00 |
| Hardware Cloth | 1 Roll | 1/2-inch galvanized hardware cloth (4x10 ft) | $35.00 |
| Landscape Fabric | 1 Roll | Heavy-duty woven weed barrier | $15.00 |
| Bulk Soil Mix | 1 Cubic Yard | Topsoil, compost, and aeration blend | $120.00 |
| Galvanized Staples | 1 Box | 6-inch landscape staples | $10.00 |
Tools Needed: Circular saw or miter saw, power drill with Torx bit, 1/8-inch drill bit for pre-drilling, tape measure, carpenter square, 4-foot level, shovel, rake, and heavy-duty wire cutters.
Total Estimated Cost: $323.00
Step 1: Site Selection and Ground Preparation
Location is critical for a vegetable garden. Choose a site that receives a minimum of 6 to 8 hours of direct sunlight per day. Avoid areas under large trees, as their roots will compete for water and nutrients, and their canopy will block essential sunlight.
Once you have selected your site, mark out a 4x8-foot rectangle using stakes and string. Clear the area of any large rocks, debris, and existing weeds. If you are placing the bed directly over existing grass, you do not need to till the entire area. Instead, mow the grass inside the marked rectangle as short as possible. We will use a physical barrier in a later step to smother the grass and prevent weeds from infiltrating your new bed.
Step 2: Cutting the Lumber and Corner Blocks
A standard 2x10 board is actually 1.5 inches thick and 9.25 inches wide. To build a 4x8 bed, you need two 8-foot boards for the long sides, and two 4-foot boards for the short sides.
- Take two of your 8-foot cedar boards and measure exactly to the center (48 inches).
- Use a carpenter square to draw a straight cut line across the width of the boards.
- Cut these two boards in half using a circular saw or miter saw. You now have four 4-foot pieces and two 8-foot pieces.
- Take your 4x4 cedar post and cut it into four equal blocks, each measuring 9 inches in length. These will serve as the internal corner braces, providing immense structural integrity to the bed and preventing the long boards from bowing outward under the weight of wet soil.
Step 3: Assembling the Cedar Frame
Always pre-drill your holes to prevent the cedar from splitting, especially near the ends of the boards where the grain is most vulnerable.
- Lay one 8-foot board flat on the ground. Place a 9-inch 4x4 corner block at each end, flush with the bottom and outside edges of the board.
- Pre-drill three holes through the outside of the 8-foot board into the corner block. Space them evenly (top, middle, bottom).
- Drive three 2.5-inch Torx exterior screws through the board and into the corner block. The Torx drive system prevents cam-out (slipping), ensuring a tight, flush fit.
- Attach the 4-foot end boards to the corner blocks using the same pre-drilling and screwing method. Apply a bead of exterior-grade silicone caulk between the boards if you want to prevent soil from washing out through the corner seams during heavy rains.
- Finally, attach the second 8-foot board to complete the rectangular frame.
Step 4: Leveling and Securing the Bed
Move the assembled frame to your prepared site. A raised bed must be perfectly level. If it is tilted, water will pool at the lowest end, leading to waterlogged soil and root rot on that side, while the higher end dries out too quickly.
Place your 4-foot level along the top edge of all four sides. Use a shovel to dig out soil from the high side or add packed dirt to the low side until the frame sits perfectly level in all directions. Once level, drive 18-inch galvanized steel rebar stakes or wooden stakes into the ground on the outside of the bed, spaced every 2 feet, and screw them into the cedar frame to anchor it against frost heave and shifting.
Step 5: Installing Pest and Weed Barriers
Subterranean pests like gophers and moles can devastate a vegetable garden from below. To protect your root crops (like carrots, radishes, and potatoes), line the entire bottom of the bed with 1/2-inch galvanized hardware cloth. Cut the cloth to size using heavy-duty wire cutters, allowing it to extend slightly up the inside walls. Secure it to the bottom inner rim using galvanized staples or exterior screws with washers.
Over the hardware cloth, lay down a layer of heavy-duty woven landscape fabric. This allows water to drain freely while blocking the grass and weeds beneath from growing up into your pristine soil mix. Secure the fabric edges with 6-inch landscape staples.
Step 6: The Perfect Raised Bed Soil Mix
The most common mistake new gardeners make is filling a raised bed with native ground soil or cheap bagged topsoil. Native soil is too heavy and will compact severely in a raised bed environment, suffocating plant roots.
According to the Penn State Extension, a premium raised bed soil mix should be lightweight, well-draining, and rich in organic matter. They recommend avoiding pure compost or pure topsoil, advocating instead for a balanced blend that provides structure, nutrients, and aeration.
For a 4x8 bed that is roughly 10 inches deep, you will need approximately 1 cubic yard (27 cubic feet) of soil. We recommend the following 'Pro-Mix' recipe, which you can have delivered in bulk from a local landscape supply yard or mix yourself using bagged ingredients:
- 50% High-Quality Topsoil (13.5 cubic feet): Provides the mineral base and structural weight.
- 30% Organic Compost (8 cubic feet): Use a diverse blend, such as mushroom compost, cow manure compost, and homemade kitchen compost. This provides slow-release nutrients and beneficial microbes.
- 10% Coir or Peat Moss (2.7 cubic feet): Acts like a sponge, retaining moisture during hot summer days. Coir is a more sustainable alternative to peat moss.
- 10% Aeration Material (2.7 cubic feet): Use coarse perlite, pumice, or vermiculite. This ensures the soil remains fluffy and allows delicate root hairs to expand easily.
Mix the ingredients thoroughly in a wheelbarrow or directly in the bed using a broadfork or garden fork. Water the soil deeply as you fill the bed to help it settle and eliminate large air pockets. Leave about 2 inches of space at the top of the cedar frame to allow for mulch application later.
Step 7: First Season Planting and Companion Layout
With your bed built and filled, you are ready to plant. A 4x8 bed is ideal for implementing square-foot gardening techniques and companion planting. For a high-yield summer layout, consider the following arrangement:
- North Side (Trellis Zone): Plant indeterminate cherry tomatoes and pole beans. Trellising them on the north side prevents them from shading out the rest of the bed.
- Center Zone (Heavy Feeders): Plant bell peppers and bush cucumbers. Interplant with sweet basil, which is believed to improve the flavor of tomatoes and repel certain insect pests.
- South Edge (Low Growers): Plant bush beans, leafy greens like Swiss chard, and a border of French marigolds. Marigolds exude a compound from their roots that deters root-knot nematodes, protecting your entire bed.
Seasonal Maintenance and Soil Top-Offs
Cedar raised beds require minimal structural maintenance, but the soil inside will naturally compact and decompose over the course of the growing season. Expect the soil level to drop by 2 to 3 inches by late autumn.
At the end of every growing season, cut your spent vegetable plants at the soil line (leaving the roots in the ground to decompose and feed soil biology). Top off the bed with a 1-to-2-inch layer of fresh organic compost. This annual top-dressing replenishes the organic matter consumed by your heavy-feeding vegetables, ensures your soil structure remains optimal, and prepares the bed for immediate spring planting without the need for heavy tilling or synthetic fertilizers.

