Lawn Care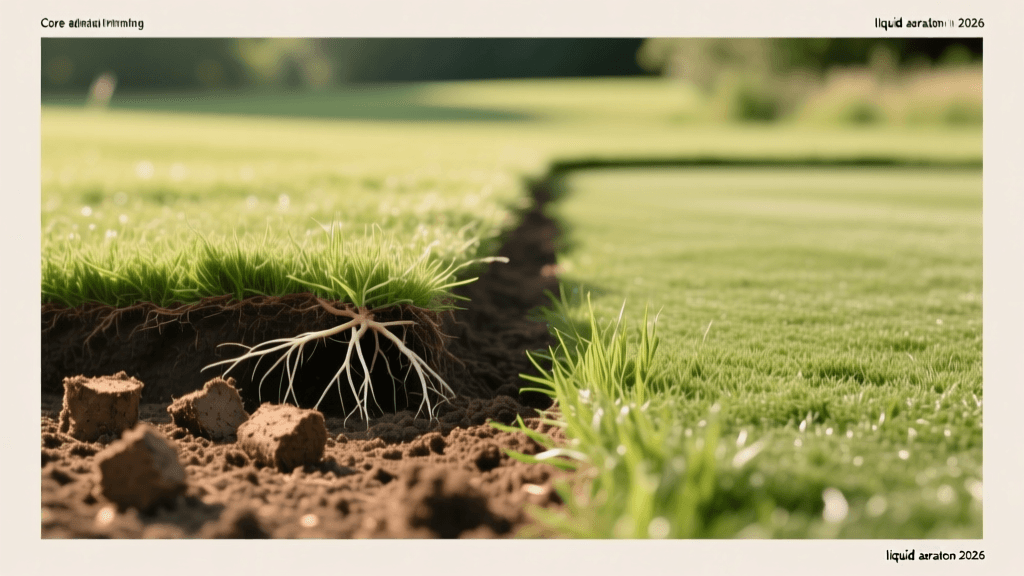
Core vs Liquid Aeration: A 2026 Photo Documentation Guide
Introduction: The Intersection of Turf Science and Garden Photography
In the realm of modern turf management, the debate between mechanical core aeration and chemical liquid aeration continues to evolve. As we navigate the 2026 lawn care season, homeowners and professionals alike are seeking definitive proof of which method yields the best results for their specific soil types. However, the true value of these aeration methods is often hidden beneath the surface or revealed only through subtle changes in turf vigor over time. This is where the art and science of garden photography and documentation come into play. By treating your lawn as a living laboratory and using your camera as a scientific instrument, you can visually track, compare, and analyze the effectiveness of core versus liquid aeration. Whether you are building a portfolio for a landscaping business or simply maintaining a meticulous garden journal, mastering the visual documentation of soil health is an essential skill for the modern turf enthusiast.
Establishing the Visual Baseline: Photographing Compacted Soil
Before you can document the results of any aeration treatment, you must establish a rigorous visual baseline. Compacted soil presents specific visual cues that a trained photographer can capture. Look for areas where water pools after a light rain, where the turf appears thin and stressed, or where the soil surface has developed a hard, cracked crust. To document this, use a macro lens to capture the intricate details of the soil surface. Place a standardized scale reference, such as a color checker passport or a simple ruler, in the frame to provide context for the size of soil cracks and the density of the turf canopy. According to the University of Minnesota Extension, identifying the exact areas of compaction is the critical first step before any aeration method can be successfully applied. Photograph these problem areas from a top-down perspective (nadir view) as well as at ground level to capture the lack of thatch decomposition and the shallow angle of stressed grass blades.
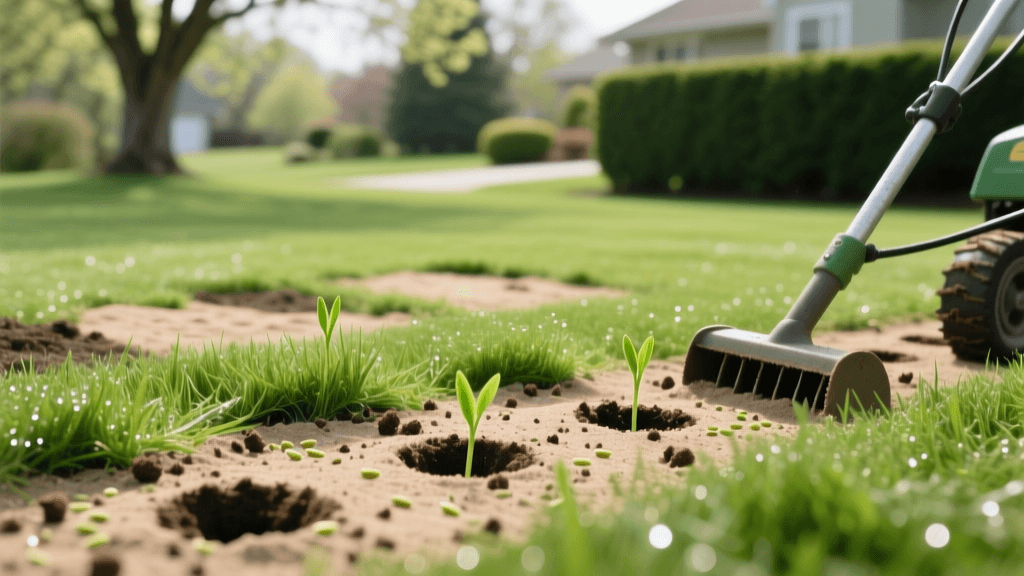
Documenting Core Aeration: Capturing the Tangible Evidence
Core aeration is a highly visual process. The mechanical extraction of soil plugs leaves immediate, tangible evidence on the surface of the lawn. From a documentation standpoint, this provides an abundance of photographic opportunities. Begin by photographing the aeration process itself, capturing the machine in action and the immediate aftermath of the extracted cores resting on the turf. Use a polarizing filter on your lens to cut through the glare of the morning dew or irrigation water, ensuring the rich, dark colors of the extracted soil plugs stand out against the green grass.
Macro Analysis of the Soil Cores
The true value of core aeration documentation lies in the macro photography of the extracted plugs. Using a 100mm macro lens and a ring flash to eliminate harsh shadows, photograph the cross-section of the soil cores. Look for and document the presence of white, healthy roots, the depth of the thatch layer, and the transition from topsoil to compacted clay. Over the next two to three weeks, set up a time-lapse camera rig to document the natural decomposition of these plugs back into the lawn canopy. This visual timeline is incredibly compelling for demonstrating how core aeration naturally top-dresses the lawn and introduces beneficial microorganisms back into the thatch layer.
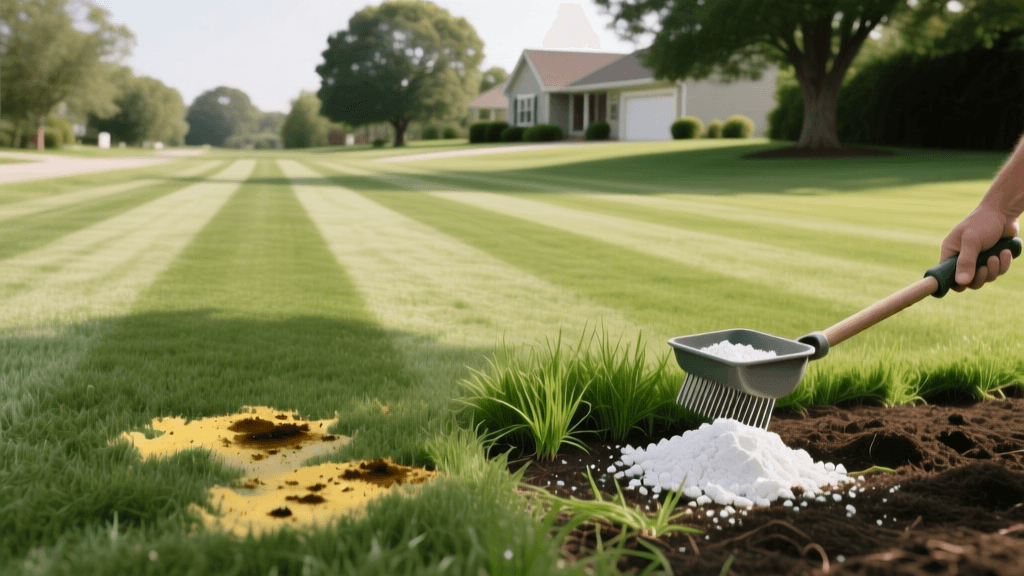
Capturing Liquid Aeration: The Invisible Transformation
Liquid aeration presents a unique challenge for the garden photographer. Unlike core aeration, liquid aeration—which in 2026 relies on advanced enzymatic blends, humic acids, and specialized soil surfactants—leaves no physical holes or plugs on the surface. The chemical and biological relief of soil compaction happens entirely out of sight. Therefore, your photographic strategy must shift from documenting the process to documenting the effects. Research highlighted by Penn State Extension indicates that managing soil compaction and improving water infiltration are paramount for long-term turf health, even when using non-mechanical soil conditioners.
Photographing Water Infiltration Rates
The most effective way to visually document liquid aeration is through controlled water infiltration tests. Set up a simple double-ring infiltrometer or use a standardized PVC pipe driven into the soil. Pour a measured amount of water into the tube and use a high-frame-rate camera or a time-lapse setup to record the water level dropping over time. Compare these photographs and videos against your baseline footage taken before the liquid aeration application. The visual difference in how quickly the soil absorbs water—rather than letting it pool or run off—is a powerful piece of documentary evidence.
Soil Profile Trench Photography
To capture the subterranean benefits of liquid aeration, you must dig a small, shallow soil profile trench (about 12 inches deep and 12 inches long) in an inconspicuous area of the lawn. Smooth the face of the soil profile with a trowel and mist it lightly with water to enhance color contrast. Photograph the soil profile to document the depth of the root zone, the moisture gradient, and the presence of earthworms or beneficial fungal hyphae. Liquid aeration excels at breaking up hardpan layers deep in the soil, and a well-lit soil profile photograph will clearly show roots penetrating deeper into the subsoil compared to untreated areas.
Core vs. Liquid Aeration: 2026 Visual Comparison Matrix
When organizing your garden photography portfolio or client presentations, having a structured comparison matrix is invaluable. The table below outlines the specific visual indicators you should be capturing for each aeration method in 2026.
| Documentation Metric | Core Aeration Visual Indicators | Liquid Aeration Visual Indicators |
|---|---|---|
| Immediate Surface Evidence | Abundant soil plugs (cores) resting on the turf canopy; visible holes in the soil. | No surface disruption; turf remains entirely intact immediately after application. |
| Water Infiltration | Water visibly pools in aeration holes before slowly draining into the subsoil. | Uniform, rapid absorption across the entire soil surface without localized pooling. |
| Root Depth (Soil Profile) | Roots concentrated in the top 2-3 inches, following the path of physical cores. | Deeper, more uniform root penetration breaking through historical hardpan layers. |
| Canopy Recovery (30 Days) | Visible greening around plug holes; thatch layer visibly thinning as plugs break down. | Overall uniform darkening of turf color; increased turf density and drought resilience. |
| Best Photographic Tool | Macro lens for plug analysis; top-down drone mapping for hole distribution. | Time-lapse for infiltration tests; soil profile trench photography for root depth. |
Recommended 2026 Photography Gear for Turf Documentation
To elevate your lawn care documentation from simple snapshots to professional-grade scientific records, investing in the right gear is essential. In 2026, the market offers incredible tools for macro and aerial turf analysis.
- Macro Lenses and Ring Flashes: A dedicated 90mm or 100mm macro lens is non-negotiable for capturing soil structure, root hairs, and the microbial life present in decomposing core plugs. Pair this with an LED macro ring light to provide even, shadow-free illumination in the micro-environment of the turf canopy.
- Circular Polarizing Filters (CPL): When photographing liquid aeration results, especially the sheen of healthy, well-hydrated grass blades or the glare of water during infiltration tests, a CPL is vital. It allows you to strip away surface reflections and reveal the true, saturated colors of the turf.
- Multispectral Drones: For large properties, visual documentation goes beyond the visible light spectrum. Multispectral drones, such as the latest DJI Mavic 3 Multispectral series, capture near-infrared (NIR) data. This allows you to generate NDVI (Normalized Difference Vegetation Index) maps, providing undeniable, color-coded photographic proof of the cellular health and vigor differences between core-aerated and liquid-aerated zones.
- Intervalometers and Weatherproof Housings: To capture the multi-week breakdown of core aeration plugs or the gradual greening effect of liquid surfactants, you need a reliable intervalometer. Mount your camera on a heavy-duty ground stake to ensure the framing remains identical over a 30-day period, regardless of wind or weather.
Creating a Time-Lapse Recovery Journal
The ultimate goal of garden photography in this context is to tell a story over time. A time-lapse recovery journal is a highly effective way to document the comparative effectiveness of core versus liquid aeration. Select two identical, equally compacted test plots in your lawn. Apply core aeration to Plot A and liquid aeration to Plot B. Set up two identical cameras on fixed tripods, ensuring the lighting angle and focal length are perfectly matched. Program the cameras to take a photograph at the exact same time every day at solar noon to maintain consistent shadow lengths. After 60 days, stitch the images together into a side-by-side video. This visual journal will clearly illustrate the speed of canopy recovery, the rate of plug decomposition, and the uniformity of the green-up, providing you with an irrefutable visual record of how each method performs in your specific microclimate.
Conclusion: The Lens as a Lawn Care Tool
As lawn care practices become more data-driven and scientifically grounded, the role of the garden photographer expands beyond mere aesthetics. By meticulously documenting the physical extraction of core aeration and the subterranean, chemical relief provided by liquid aeration, you transform your camera into a vital diagnostic tool. Whether you are analyzing soil profile trenches, mapping canopy health with multispectral drones, or simply tracking water infiltration rates with a macro lens, the visual evidence you gather in 2026 will inform better turf management decisions for years to come. Remember, the health of your lawn is not just felt underfoot; when documented correctly, it is vividly seen through the lens.