
Designing a Water-Smart Potager Garden: Layout & Smart Irrigation
The Evolution of the Potager: Beauty Meets Water Conservation
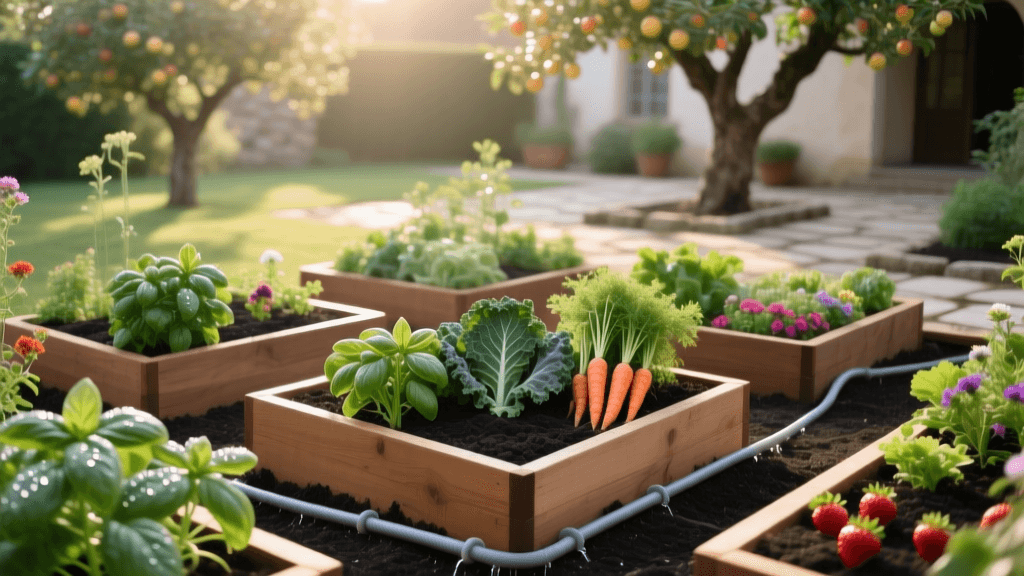
The traditional French potager is a masterpiece of edible landscaping, seamlessly blending the utility of a kitchen garden with the aesthetic rigor of formal design. Historically, these gardens relied on abundant water and intensive labor. Today, the modern home gardener faces different challenges: stricter municipal water restrictions, erratic climate patterns, and a desire for low-maintenance outdoor living spaces. Designing a water-smart potager requires a paradigm shift. By integrating intelligent spatial planning, moisture-retentive soil architecture, and smart home irrigation technology, you can cultivate a stunning, high-yield garden-to-table space that conserves resources without sacrificing visual appeal.
This guide will walk you through the essential design and planning phases of creating a sustainable, tech-enabled potager garden, complete with specific dimensions, material costs, and smart home integrations.
Step 1: Spatial Planning and Bed Dimensions
The foundation of any successful potager is its geometry. Unlike traditional row cropping, a potager utilizes intensive planting in defined beds, separated by accessible pathways. When planning your layout, sun exposure and ergonomics must dictate your dimensions.
- Orientation: Align your raised beds on a North-South axis. This ensures that the sun sweeps evenly across the beds from east to west, preventing taller crops like trellised tomatoes or indeterminate peppers from casting long, yield-reducing shadows over shorter, sun-loving herbs.
- Bed Width: Limit bed widths to a maximum of 4 feet. The average adult reach is roughly 2 to 2.5 feet; a 4-foot width ensures you can access the center of the bed from either side without ever stepping on and compacting the carefully engineered soil.
- Bed Length: Standard 8-foot lengths are ideal for minimizing material waste when purchasing lumber or composite decking boards.
- Pathway Width: Plan for pathways that are at least 36 inches wide. This accommodates a standard garden wheelbarrow and allows for comfortable kneeling and harvesting.
Step 2: Hardscaping Materials and Budgeting
The hardscape defines the bones of your potager. Choosing the right materials impacts both the longevity of your garden and its thermal properties.
Raised Bed Materials: Untreated cedar and redwood are classic choices, offering natural rot resistance and a beautiful silver patina over time. Expect to spend between $150 and $250 per 4x8 cedar bed kit. For a more modern, industrial aesthetic that retains heat (beneficial for extending the growing season in cooler zones), consider corrugated galvanized steel beds with cedar top rails, which cost roughly $120 to $180 per 4x8 unit.
Pathway Surfacing: Avoid impermeable surfaces like concrete, which increase runoff and heat island effects. Instead, use Decomposed Granite (DG) or crushed oyster shells. DG compacts into a firm, permeable surface that allows rainwater to percolate into the water table. A 3-inch layer of DG over landscape fabric will cost approximately $1.50 to $2.50 per square foot.
Step 3: Soil Architecture for Moisture Retention
Water efficiency begins beneath the surface. Native ground soil is often too dense or sandy for intensive potager gardening. Instead, build a custom soil matrix designed to hold moisture while providing adequate drainage.
A highly effective, water-retentive soil recipe for raised beds includes:
- 40% High-Quality Topsoil: Provides the mineral base and structural integrity.
- 30% Organic Compost: Fuels microbial life and provides slow-release nutrients.
- 20% Coco Coir: A sustainable alternative to peat moss, coco coir can hold up to 10 times its weight in water, drastically reducing irrigation frequency.
- 10% Coarse Perlite or Pumice: Ensures oxygen reaches the root zone and prevents waterlogging.
Cost Estimate: Filling a standard 4x8 bed that is 12 inches deep requires 32 cubic feet of soil. Buying in bulk from a local landscape supply yard will cost roughly $120 to $150 per bed, significantly cheaper than purchasing bagged soils.
Step 4: Smart Irrigation and Hydrozoning
The most critical intervention for a water-smart potager is upgrading from manual watering or overhead sprinklers to a smart, automated drip irrigation system. Overhead watering wastes up to 50% of water to evaporation and wind drift, while also promoting fungal diseases on edible foliage.
By integrating a smart Wi-Fi irrigation controller, such as the Rachio 3 or Orbit B-hyve, your garden will automatically adjust watering schedules based on real-time local weather data, soil type, and evapotranspiration (ET) rates. These controllers feature automatic rain delays and freeze protection, ensuring you never water during or immediately after a rainstorm.
Drip Irrigation Component Comparison
Selecting the right drip emitters is vital for targeted hydration. Below is a comparison of common drip components used in potager planning:
| Emitter Type | Flow Rate | Best Application | Estimated Cost |
|---|---|---|---|
| Inline Drip Tubing (1/4 inch) | 0.9 GPH per emitter | Row crops, leafy greens, root vegetables | $0.35 per foot |
| Adjustable Drip Emitters | 0 to 15 GPH | Large shrubs, dwarf fruit trees, berry bushes | $0.85 each |
| Micro-Sprayers (180-degree) | 10 to 15 GPH | Dense herb patches, seed germination beds | $1.25 each |
| Drip Tape (Flat) | 0.4 GPH per emitter | Temporary seasonal rows, budget-conscious builds | $0.15 per foot |
Step 5: The Science of Hydrozoning
Hydrozoning is the practice of clustering plants with similar water requirements together. In a potager, this prevents the common mistake of overwatering drought-tolerant herbs just to keep a neighboring bed of thirsty cucumbers hydrated.
According to the University of California Division of Agriculture and Natural Resources (UC ANR), proper hydrozoning paired with drip irrigation can reduce landscape water use by up to 50% while maintaining plant health. The UC Master Gardener Program recommends dividing your garden into distinct hydrozones:
- Zone 1 (High Water): Celery, cucumbers, melons, and squash. These require consistent, deep moisture and should be placed closest to the water source or on the most robust irrigation valves.
- Zone 2 (Moderate Water): Tomatoes, peppers, eggplants, and brassicas. These benefit from deep, infrequent watering to encourage deep root growth and prevent blossom end rot.
- Zone 3 (Low Water): Mediterranean herbs like rosemary, thyme, oregano, and lavender. These thrive on neglect and should be placed on a separate smart controller zone that waters only when soil moisture sensors indicate severe dryness.
'Grouping plants by their water needs ensures that every drop is used efficiently. A smart controller combined with hydrozoning transforms a garden from a water liability into a sustainable ecosystem.' — UC ANR Water Conservation Guidelines.
Step 6: Integrating Smart Lighting and Decor
A true outdoor living space bridges the gap between day and night. To extend the usability of your potager for evening harvesting and al fresco dining, integrate energy-efficient, smart outdoor lighting.
Consider installing solar-powered LED path lights, such as the Ring Solar Pathlight, along your 36-inch decomposed granite walkways. These lights charge via integrated photovoltaic cells during the day and connect to your smart home hub, allowing you to adjust brightness and color temperature via your smartphone. For the dining area adjacent to the garden, hang weatherproof, warm-white (2700K) LED string lights overhead to create an inviting ambiance that mimics firelight, enhancing the garden-to-table dining experience without adding to your electrical bill.
Conclusion: Planning for the Future
Designing a water-smart potager garden is an investment in both your culinary lifestyle and your local environment. By adhering to strict spatial dimensions, engineering soil for maximum moisture retention, and leveraging smart home irrigation technology, you create a resilient landscape. The upfront planning and initial costs of smart controllers and drip infrastructure are quickly offset by reduced water bills, higher crop yields, and the unparalleled joy of stepping into a beautifully structured, thriving garden to harvest tonight's dinner.

