
How to Build a Budget DIY Rain Barrel Irrigation System
The Financial and Environmental Case for Rainwater Harvesting
As homeowners look for ways to bridge the gap between sustainable landscaping, garden-to-table living, and household budgeting, rainwater harvesting has emerged as a premier DIY solution. Building your own rain barrel irrigation system is not only an excellent weekend project, but it also provides a free, chemical-free water source for your outdoor plants, vegetable gardens, and lawn. When growing a garden-to-table vegetable patch, the quality of your water matters. Municipal water often contains chlorine and chloramines, whereas rainwater is naturally soft and free of these treatment chemicals, making it ideal for edible gardens.
According to the Environmental Protection Agency (EPA), the average American family uses 320 gallons of water per day, with nearly 30% dedicated to outdoor uses like lawn and garden irrigation. By capturing just a fraction of the rainfall that hits your roof, you can drastically reduce your summer water bills while conserving a vital municipal resource. Furthermore, capturing rainwater reduces stormwater runoff, which helps prevent soil erosion and keeps local waterways free of urban pollutants.
Materials and Tools: The Under-$60 Shopping List
Store-bought decorative rain barrels can easily cost between $150 and $250. By sourcing materials yourself and embracing a budget-friendly DIY aesthetic, you can build a highly functional, 55-gallon system for a fraction of the price. Here is what you will need:
- 55-Gallon Food-Grade HDPE Drum: ($20 - $30) Look for used barrels that previously held food products like syrup or vinegar. Avoid barrels that held industrial chemicals. Local breweries, soda bottling plants, or online marketplaces are great sources.
- 3/4-Inch Brass or PVC Spigot: ($8) A standard garden hose spigot.
- 3/4-Inch Bulkhead Fitting: ($5) This creates a watertight seal through the plastic wall of the barrel.
- Aluminum Window Screen Mesh: ($2) To cover the top inlet and prevent mosquitoes from breeding.
- 4 Concrete Cinder Blocks: ($12) For elevating the barrel to create gravity-fed water pressure.
- Hardware & Sealants: ($5) 100% silicone waterproof sealant, Teflon (plumber's) tape, and a large rubber washer.
Tools Required: Power drill, 1-inch hole saw bit, adjustable wrench, utility knife, measuring tape, and a marker.
Step-by-Step Assembly Guide
Step 1: Prep and Clean the Barrel
Thoroughly rinse the inside of your 55-gallon drum with a mild bleach solution (1 tablespoon of bleach per gallon of water) to sanitize it, especially if it will be used to irrigate edible garden-to-table crops. Rinse it out completely with clean water afterward. Ensure the top lid is removable; if it is sealed, you will need to carefully cut an access hole in the top using a jigsaw or reciprocating saw.
Step 2: Drill and Install the Spigot
Measure exactly 3 inches up from the bottom of the barrel and mark a spot. This gap allows sediment, debris, and heavy minerals to settle at the bottom without clogging your spigot. Using your drill and the 1-inch hole saw bit, carefully bore a hole through the plastic. Insert the bulkhead fitting through the hole from the outside, ensuring the rubber O-ring sits flush against the barrel's exterior. From the inside, thread the locknut onto the bulkhead fitting and tighten it with an adjustable wrench. Wrap the threads of your spigot in Teflon tape and screw it into the exterior side of the bulkhead fitting. Apply a bead of silicone sealant around the exterior edge for extra leak protection.
Step 3: Create the Inlet and Overflow Valves
Cut a 4-inch hole in the top lid of the barrel to serve as the water inlet from your gutter downspout. Stretch the aluminum window screen mesh over this hole and secure it with a bungee cord or waterproof adhesive. This screen is critical; it filters out roof debris and prevents mosquitoes from laying eggs in your standing water. Next, drill a 1-inch hole near the very top rim of the barrel and insert a secondary bulkhead fitting to act as an overflow valve. Attach a short piece of hose to this overflow fitting and direct it away from your home's foundation to prevent water damage during heavy storms.
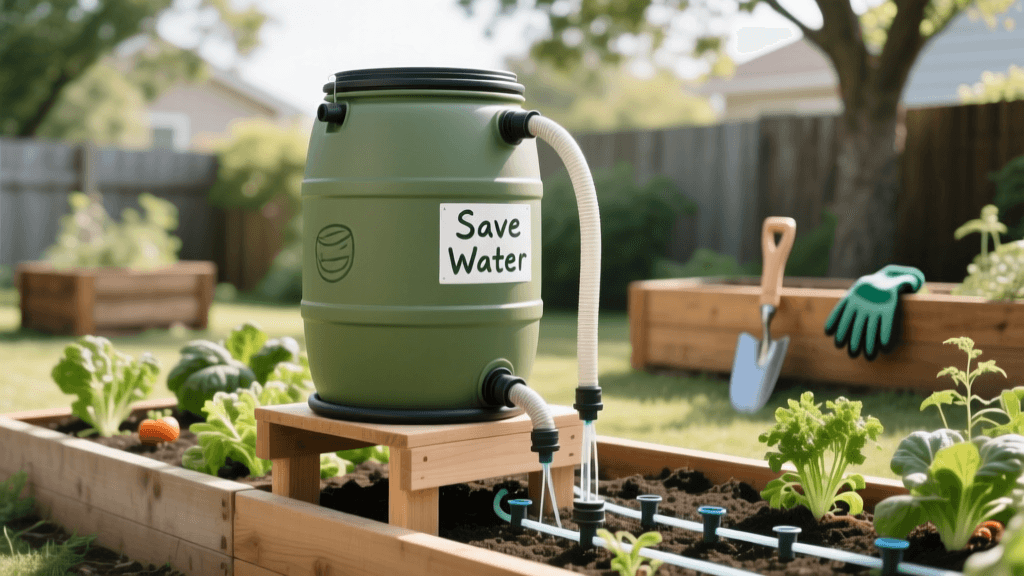
Step 4: Elevate for Gravity-Fed Pressure
Water pressure in a rain barrel is dictated entirely by gravity. You generate approximately 0.433 PSI (pounds per square inch) for every foot of elevation. To achieve enough pressure to run a soaker hose or a simple drip irrigation line, elevate the barrel at least 2 feet off the ground. Stack your four cinder blocks on a level, compacted surface (like a bed of crushed gravel) and place the barrel securely on top. This 2-foot elevation yields roughly 0.86 PSI, which is perfect for gravity-fed drip emitters.
Cost Comparison: DIY vs. Retail Rain Barrels
To illustrate the true value of this budget-friendly DIY solution, consider the cost breakdown below compared to purchasing a pre-assembled unit from a big-box home improvement store.
| Component | Budget DIY Cost | Retail Equivalent Cost |
|---|---|---|
| 55-Gallon Barrel | $25 (Used Food-Grade) | $90 (New Decorative) |
| Spigot and Fittings | $13 | $35 (Pre-installed) |
| Elevation Base | $12 (Cinder Blocks) | $65 (Decorative Stand) |
| Screen & Sealants | $7 | Included |
| Total Estimated Cost | $57 | $190+ |
By investing a few hours of weekend labor, you save upwards of $130, which can be reallocated toward buying high-quality heirloom seeds, soil amendments, or smart-home irrigation upgrades for your garden.
Seasonal Maintenance and Winterization
A well-maintained rain barrel will last for decades. However, seasonal shifts require specific attention. As noted by the University of Minnesota Extension, freezing temperatures can easily crack plastic barrels if water is left inside to expand. Before the first hard freeze of autumn, completely drain the barrel, leave the spigot in the open position, and disconnect the downspout diverter. Store the barrel upside down in a garage or shed, or secure it with a heavy lid and straps to prevent winter winds from blowing it over.
During the active spring and summer months, check the inlet screen monthly for leaf litter and debris. If you notice an algae bloom inside the barrel (which can happen if the barrel is exposed to direct sunlight), add a few drops of unscented household bleach or a specialized rain barrel algae treatment tablet, and scrub the interior walls. Algae can clog delicate drip irrigation emitters and introduce unwanted organic acids to your garden soil.
Budget Smart-Home Integration
One of the most exciting trends in modern landscaping is the integration of smart home technology with outdoor water features. While in-ground smart sprinkler systems can cost thousands of dollars, you can automate your DIY rain barrel on a strict budget. Purchase a battery-operated, Wi-Fi-enabled smart faucet timer (such as the Orbit B-hyve or similar models, typically costing around $40) and attach it directly to your barrel's spigot.
Because your gravity-fed system operates at a low PSI, you must pair this smart timer with a pressure-compensating drip irrigation line. Standard spray sprinklers require 30+ PSI and will fail to operate on a gravity-fed barrel. A pressure-compensating drip line ensures that every tomato plant and pepper vine in your garden-to-table setup receives the exact same amount of water, regardless of how full the rain barrel is. Using the smart timer's companion app, you can schedule your drip irrigation to run at dawn, minimizing evaporation and ensuring your edible garden is perfectly hydrated using 100% free, harvested rainwater.
Harvesting rainwater not only reduces your utility bills but also decreases stormwater runoff, which can carry pollutants into local waterways. It is one of the simplest, most impactful changes a homeowner can make for their local ecosystem.
Water Use It Wisely Campaign
Final Thoughts
Building a budget-friendly DIY rain barrel irrigation system is a highly rewarding project that bridges the gap between eco-conscious landscaping and practical home maintenance. For under $60 and an afternoon of work, you can secure a sustainable, chemical-free water source that will nurture your lawn, protect your foundation, and help your garden-to-table vegetables thrive for years to come.

