
Gardening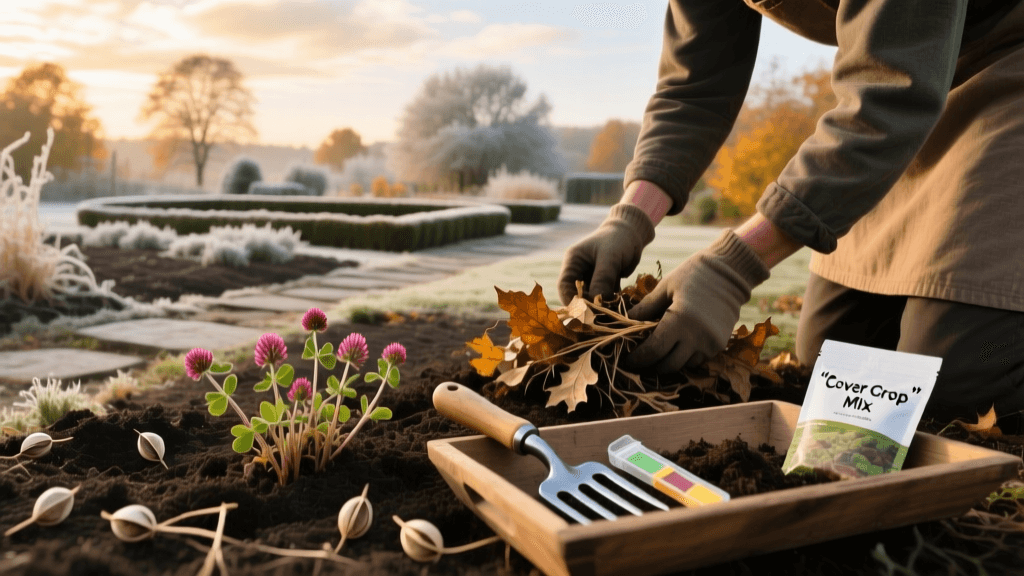
Fall Garden Cleanup and Winter Soil Preparation Guide
The Critical Role of Fall Garden Maintenance
As the vibrant growing season winds down and the first crisp autumn breezes arrive, many gardeners are tempted to simply walk away from their beds until spring. However, from a seasonal maintenance and soil health perspective, fall is arguably the most important time of the year. The actions you take between late September and early November dictate the vitality of your soil microbiome, the severity of pest pressures next year, and the overall vigor of your spring planting. Proper fall garden cleanup and winter soil preparation transform a dormant garden into a biological powerhouse, actively rebuilding nutrients and structure while you rest.
Step 1: Strategic Debris Removal and Pest Management
The first step in seasonal maintenance is managing the above-ground biomass left behind by your summer crops. How you handle this debris directly impacts the health of your garden ecosystem. Leaving diseased plant material in the garden guarantees that fungal spores and bacterial pathogens will overwinter in the soil, leading to early blight, powdery mildew, and wilt diseases the following year.
What to Compost vs. What to Trash
Not all garden debris is created equal. You must be highly selective about what goes into your compost bin and what gets removed from the property entirely.
- Compost: Healthy spent bean stalks, marigold roots, pumpkin vines (if disease-free), and fallen autumn leaves. These provide excellent carbon-to-nitrogen ratios for your winter compost pile.
- Trash or Burn: Tomato plants with signs of early or late blight, squash vines infested with squash vine borer larvae, and any brassicas suffering from clubroot. Home compost piles rarely reach the sustained 140°F to 160°F required to kill these resilient pathogens and pest eggs.
- Leave in Place: Sturdy perennial stems like coneflowers and sunflowers can be left standing until early spring to provide crucial overwintering habitat for native solitary bees and a food source for birds.
By removing pest-infested debris, you disrupt the life cycle of common garden predators. For example, the Colorado potato beetle overwinters in the soil and debris near host plants. Clearing this debris and lightly tilling the top two inches of soil exposes the beetles to freezing temperatures and foraging birds.
Step 2: Soil Testing and Targeted Amendments
Before the ground freezes, you must understand what your soil actually needs. Guesswork leads to nutrient lockout and environmental runoff. According to the Cornell University Cooperative Extension, fall is the optimal time to apply slow-acting soil amendments like lime or sulfur, as they require several months and the freeze-thaw cycle to fully integrate into the soil profile and alter the pH.
How to Take a Proper Soil Sample
- Use a clean stainless steel trowel to dig 6 to 8 inches deep in 10 to 15 different spots across your garden bed.
- Mix these cores together in a clean plastic bucket (avoid galvanized metal, which can skew zinc readings).
- Remove any rocks, roots, or earthworms, and let the soil air-dry on a newspaper for 24 hours.
- Place about two cups of the dried soil into the testing kit provided by your local university extension office or a private lab like Logan Labs.
A comprehensive university lab test typically costs between $15 and $30. This small investment will tell you exactly how much phosphorus, potassium, calcium, and magnesium your soil lacks.
Actionable Fall Amendments
If your soil test indicates a low pH (below 6.2 for most vegetables), apply Espoma Organic Garden Lime at a rate of 2 to 3 pounds per 100 square feet. If your soil is too alkaline, apply elemental sulfur. For general organic matter depletion, top-dress the beds with a 1-inch layer of premium compost, such as Dr. Earth Premium Gold All Purpose Compost, which costs roughly $8 per 1.5 cubic foot bag. Do not till this compost in; let the winter worms and frost heave incorporate it naturally, preserving the delicate soil structure and mycorrhizal fungal networks.
Step 3: Selecting and Planting Winter Cover Crops
Cover crops, often referred to as 'green manure,' are the cornerstone of advanced seasonal soil health maintenance. They prevent winter erosion, suppress cool-season weeds, and scavenge leftover nitrogen before it leaches into the groundwater. The USDA Natural Resources Conservation Service (NRCS) strongly advocates for keeping living roots in the soil for as much of the year as possible to feed the soil food web.
Below is a comparison chart of the most effective winter cover crops for home gardeners, including specific planting windows and termination methods.
| Cover Crop | Planting Window | Nitrogen Impact | Termination Method | Avg. Seed Cost |
|---|---|---|---|---|
| Crimson Clover | Aug - Mid Sept | Fixes 70-150 lbs/acre | Mow before bloom in spring | $4.50 / lb |
| Winter Rye | Sept - Late Oct | Scavenges excess N | Crimp or cut at 3 feet tall | $2.50 / lb |
| Hairy Vetch | Aug - Sept | Fixes 90-200 lbs/acre | Mow at flowering stage | $6.00 / lb |
| Daikon Radish | Aug - Sept | Scavenges, breaks clay | Winter-kills (hard freeze) | $3.50 / lb |
Planting and Managing Cover Crops
For a balanced approach, plant a mix of Winter Rye and Hairy Vetch. The rye provides a robust carbon-rich root system that breaks up compaction, while the vetch climbs the rye and fixes atmospheric nitrogen into the soil. Broadcast the seed at a rate of 2 pounds per 1,000 square feet, rake it lightly into the top quarter-inch of soil, and water thoroughly. You must terminate (kill) these crops 3 to 4 weeks before your spring planting date to allow the biomass to decompose and prevent the cover crop from competing with your vegetables for moisture.
'Maintaining a living root in the soil through cover crops feeds soil biology year-round. The exudates released by these roots are the primary food source for the bacteria and fungi that cycle nutrients into plant-available forms.' — USDA NRCS Soil Health Division
Step 4: Mulching and Protecting Perennial Beds
While vegetable beds benefit from cover crops, perennial flower beds, berry patches, and overwintering alliums like garlic require a different approach: heavy mulching. However, timing is everything. Applying mulch too early in the fall can trap heat in the soil, delaying plant dormancy and encouraging rodent nesting.
Wait until after the first hard killing frost (when temperatures drop below 28°F for several hours) before applying your winter blanket. Use 3 to 4 inches of loose, seed-free straw or shredded autumn leaves. Avoid using whole, unshredded leaves, as they mat together and create an impermeable barrier that blocks water and oxygen from reaching the soil. Shredding leaves with a lawnmower before applying them accelerates their decomposition and adds valuable humus to the soil by spring. For garlic beds planted in October, a thick layer of straw prevents the cloves from heaving out of the ground during the erratic freeze-thaw cycles of late winter.
Step 5: Winterizing Garden Tools and Equipment
Seasonal maintenance extends beyond the soil to the equipment you rely on. Winterizing your tools saves you hundreds of dollars in replacement costs and prevents the spread of soil-borne diseases.
- Cleaning: Scrub shovels, hoes, and trowels with a stiff wire brush and a solution of 10% bleach to water to kill lingering fungal spores.
- Protecting Metal: Wipe all metal surfaces with a rag soaked in boiled linseed oil or Camellia oil to prevent rust. Do not use petroleum-based motor oil, as it can leach into your soil next spring.
- Preserving Wood: Sand down any rough spots on wooden handles and apply a generous coat of raw linseed oil. Let it soak in overnight, then wipe off the excess. This prevents the wood from drying out and splintering.
- Pruning Saws and Shears: Disassemble bypass pruners if possible. Clean the sap off the blades with rubbing alcohol, sharpen the beveled edge with a diamond file, and lubricate the pivot point with a drop of 3-in-One oil.
Conclusion
Embracing fall garden cleanup and winter soil preparation shifts your perspective from reactive gardening to proactive ecosystem management. By removing diseased debris, testing and amending your soil, sowing strategic cover crops, and properly winterizing your tools, you are investing in the long-term health of your garden. When the soil finally thaws and spring arrives, your beds will be biologically active, structurally sound, and primed for your most productive harvest yet.

