
Gardening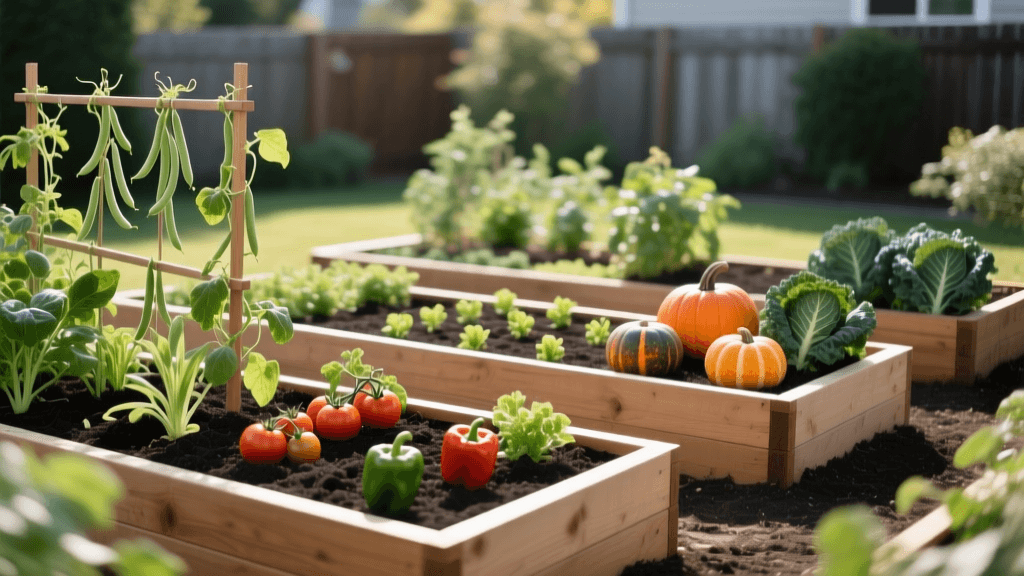
Designing a Four-Season Raised Bed Vegetable Garden Layout
Why Plan a Four-Season Raised Bed Garden?
Designing a vegetable garden that produces fresh food year-round requires more than just buying seeds and hoping for the best. A well-planned, four-season raised bed garden maximizes your yield, minimizes weed pressure, and extends your harvest well beyond the traditional summer months. By combining the spatial efficiency of square foot gardening with strategic succession planting and season extension infrastructure, you can transform a simple backyard plot into a highly productive, year-round food source. This comprehensive design and planning guide will walk you through site selection, material costs, soil formulation, and seasonal layout strategies to ensure your garden thrives in every climate zone.
Step 1: Site Selection and Bed Dimensions
Before purchasing materials, you must identify the optimal microclimate in your yard. Vegetables require full sun, which translates to a minimum of six to eight hours of direct, unfiltered sunlight daily. Orient your raised beds along a North-South axis. This specific orientation ensures that the sun sweeps evenly across the bed from east to west, preventing taller crops from casting permanent shadows on shorter, sun-loving plants.
Optimal Dimensions and Accessibility
The golden rule of raised bed design is accessibility. You should never have to step into the bed to reach the center, as this compacts the soil and destroys the porous structure you are trying to cultivate. Therefore, the maximum width of any raised bed should be four feet. If the bed is placed against a fence or wall, reduce the width to two feet. Length can vary, but eight feet is the standard lumber length, minimizing cuts and waste. For depth, aim for 18 to 24 inches. This depth accommodates deep-rooting crops like tomatoes, carrots, and parsnips while providing excellent drainage.
Material Cost and Longevity Comparison
Choosing the right material impacts both your upfront budget and the lifespan of your garden. Below is a comparison of the most popular raised bed materials based on current market averages for a standard 4x8 foot bed.
| Material | Estimated Cost (4x8 Bed) | Expected Lifespan | Pros & Cons |
|---|---|---|---|
| Untreated Pine | $60 - $90 | 3 - 5 Years | Cheap and accessible, but rots quickly and requires replacement. |
| Western Red Cedar | $250 - $350 | 10 - 15 Years | Naturally rot-resistant and beautiful, but higher upfront cost. |
| Aluzinc Galvanized Steel | $120 - $180 | 20+ Years | Extremely durable, pest-proof, and modular. Can heat soil in extreme summer. |
| Composite Timber | $300 - $450 | 25+ Years | Zero maintenance and won't rot, but expensive and can bow if not braced. |
Step 2: The Ultimate Soil Recipe for Raised Beds
Filling a raised bed with native topsoil is a common beginner mistake. Topsoil compacts heavily in a confined space, leading to poor drainage and stunted root growth. Instead, you need a lightweight, nutrient-dense, and moisture-retentive mix. According to research published by the Utah State University Extension, a modified soilless mix provides the best aeration and water-holding capacity for raised bed environments.
The Modified Thirds Recipe
For a 4x8 foot bed that is 18 inches deep, you will need approximately 48 cubic feet of soil. To achieve this, blend the following components:
- 16 Cubic Feet of Coarse Vermiculite: Provides aeration and retains moisture. (Cost: ~$60)
- 16 Cubic Feet of Peat Moss or Coconut Coir: Acts as a sponge for water retention. Coir is recommended as a more sustainable, renewable alternative to peat. (Cost: ~$45)
- 16 Cubic Feet of Blended Compost: The nutrient engine of your garden. Do not rely on a single source; blend mushroom compost, worm castings, and composted cow manure to ensure a broad spectrum of micronutrients. (Cost: ~$80)
Mix these components thoroughly on a tarp or in a wheelbarrow before adding them to the bed. Water the mix deeply as you fill the bed to settle the ingredients and eliminate large air pockets.
Step 3: Spatial Design and Vertical Zoning
Once your bed is built and filled, it is time to design the layout. The Square Foot Gardening method, developed by Mel Bartholomew, divides the 4x8 bed into 32 individual one-foot squares. This grid system eliminates traditional row planting, drastically reducing wasted space and weed growth.
Vertical Zoning and Trellising
To maximize sunlight exposure, design your bed with a vertical zone on the North side. Install a heavy-duty cattle panel or a nylon trellis netting (such as the Haxnicks Easy Netting) along the entire 8-foot northern edge. This structure will support indeterminate tomatoes, pole beans, cucumbers, and climbing peas. By keeping vining crops vertical and on the north side, you prevent them from shading out the smaller crops planted in the southern squares.
Companion Planting Grid Strategy
When planning your 32 squares, integrate companion planting to deter pests naturally. For example, plant a square of bush beans adjacent to a square of sweet corn to fix nitrogen in the soil. Interplant fast-growing radishes (16 per square) among slow-growing brassicas like broccoli (1 per square) to act as a trap crop for flea beetles and to mark rows while the main crop establishes.
Step 4: Succession Planting Schedule
A four-season garden relies on succession planting—the practice of sowing new crops immediately after harvesting the previous ones. Below is a strategic planting schedule designed for a temperate climate (USDA Zones 6-7), which can be adjusted based on your local frost dates.
| Season | Primary Crops | Square Foot Spacing | Timing & Action |
|---|---|---|---|
| Early Spring | Peas, Spinach, Radishes | 8/sq ft, 9/sq ft, 16/sq ft | Sow directly outdoors 4-6 weeks before the last frost. |
| Summer | Tomatoes, Peppers, Bush Beans | 1/sq ft, 1/sq ft, 9/sq ft | Transplant warm-season crops 1-2 weeks after the last frost. |
| Fall | Kale, Carrots, Swiss Chard | 1/sq ft, 16/sq ft, 4/sq ft | Sow seeds 8-10 weeks before the first expected fall frost. |
| Winter | Mache, Overwintering Garlic, Scallions | 4/sq ft, 4/sq ft, 9/sq ft | Plant garlic in late fall; protect greens with cold frames. |
Step 5: Integrating Season Extension Infrastructure
To truly achieve a four-season harvest, your garden design must include passive heating and frost protection structures. The Cornell University Cooperative Extension highly recommends the use of low tunnels and cold frames to extend the growing season by up to two months on either end of the year.
Low Tunnels and Row Covers
For your raised beds, invest in a set of wire hoops and a spunbond polypropylene row cover, such as the Agribon AG-19. This fabric allows 85% of sunlight to penetrate while trapping ground heat and protecting plants from light frosts down to 28°F (-2°C). In the spring, use low tunnels to warm the soil and harden off transplants. In the fall, drape the Agribon over your hoops to protect late-season greens from early snowfalls.
Hard-Framed Cold Frames
For deep winter harvesting, design a cold frame that sits directly on top of your 4x8 raised bed. A cold frame is essentially a bottomless box with a transparent, angled lid (often made from twin-wall polycarbonate or repurposed storm windows). The lid should slope downward from north to south to capture maximum solar radiation. By growing cold-hardy crops like mache, claytonia, and winter spinach inside a cold frame, you can harvest fresh salads even when snow is on the ground.
Conclusion
Designing a four-season raised bed vegetable garden is an investment of time, planning, and upfront capital that pays dividends in the form of year-round, organic produce. By carefully selecting durable materials, formulating a highly aerated soil mix, utilizing vertical space, and employing strategic succession planting, you will create a resilient and highly productive garden ecosystem. Grab your graph paper, map out your 32 squares, and prepare to harvest in every season.

