Pest Control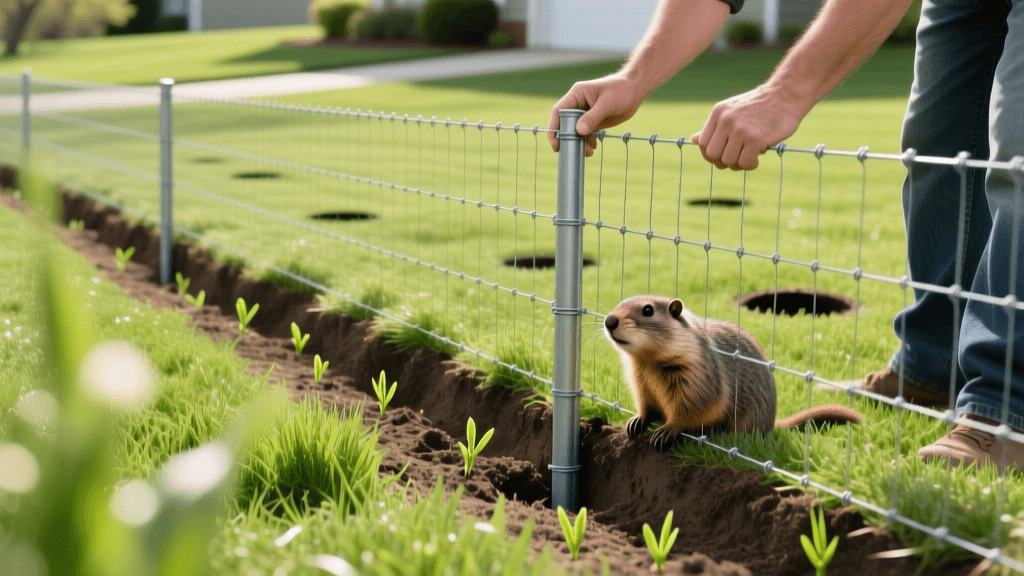
Groundhog L-Footer Fence Guide: Protect 2026 Seeded Lawns
The Hidden Threat to Your 2026 Aeration and Seeding Efforts
Investing in core aeration and premium turfgrass seeding is one of the most effective ways to achieve a thick, resilient lawn in 2026. Aeration alleviates soil compaction, allowing oxygen, water, and vital nutrients to reach the root zone, while seeding introduces robust, drought-tolerant grass varieties like advanced Tall Fescue blends. However, this vital lawn care process inadvertently creates the perfect storm for a specific and highly destructive pest: the groundhog (Marmota monax), also known as the woodchuck.
When you core aerate your lawn, you soften the topsoil and remove thousands of small soil plugs. While this is ideal for seed-to-soil contact, it also makes the ground significantly easier for burrowing mammals to excavate. According to the Penn State Extension, groundhogs are prolific diggers that can move massive amounts of soil when constructing their extensive burrow systems. If a groundhog takes up residence in your freshly aerated yard, your newly spread grass seed will be buried under heavy mounds of subsoil, and the delicate new root systems will be severed by their tunneling. To protect your landscaping investment, installing a specialized L-footer wire fence buried barrier is the ultimate exclusion strategy.
What is an L-Footer Wire Fence Buried Barrier?
An L-footer is a specific fencing configuration designed to outsmart digging mammals. Standard fences fail against groundhogs because these rodents simply dig underneath the barrier. The L-footer solves this by extending the fencing material below ground and bending it outward, away from the protected area, in the shape of the letter 'L'.
When a groundhog encounters the fence, its natural instinct is to dig at the base. Because of the outward-facing underground apron, the groundhog digs into the wire mesh rather than tunneling past it. This method is entirely non-lethal, highly effective, and ensures that your newly seeded lawn remains undisturbed during the critical 21-to-28-day germination window required by modern 2026 turfgrass cultivars.
Step-by-Step Installation Guide for Seeded Lawns
Installing an L-footer requires precision, especially when working around a lawn that has just been aerated and seeded. You must minimize foot traffic and heavy equipment use to avoid compacting the freshly aerated soil or disturbing the seedbed.
Materials Required
- 19-gauge galvanized hex netting (1-inch mesh, 36 to 48 inches wide)
- Steel T-posts or heavy-duty wooden stakes (6-foot length)
- UV-resistant zip ties or galvanized fence staples
- A narrow trenching shovel or manual edger
- Landscape staples (U-pins) for securing the underground apron
Step 1: Perimeter Measurement and Trenching
Measure the perimeter of the garden or lawn section you wish to protect. Using a narrow trenching shovel, dig a shallow trench exactly 12 inches deep and 2 inches wide, positioned about 2 inches outside the fence line. Because your lawn was recently aerated, the soil will be loose; use a slicing motion rather than prying to avoid tearing up the surrounding seedbed.
Step 2: Attaching the Netting to Posts
Drive your T-posts into the ground at 8-foot intervals. Unroll the 19-gauge hex netting and attach it to the posts, ensuring the bottom of the wire extends down into your 12-inch trench and continues outward along the ground surface. Leave at least 30 inches of netting above ground to deter climbing, as groundhogs are surprisingly adept at scaling standard chicken wire.
Step 3: Creating the L-Footer Bend
The bottom 12 inches of the netting should be bent outward at a 90-degree angle, extending away from the protected lawn. This outward apron is the core of the L-footer design. Secure this apron to the soil surface using landscape staples every 2 feet. If you are installing this over an existing seeded area, gently press the staples into the topsoil without dragging the wire, which could uproot germinating grass seedlings.
Step 4: Backfilling and Turf Protection
Backfill the trench over the outward-facing apron with the excavated soil. If you have leftover topsoil or compost from your aeration and topdressing process, use it to cover the wire apron. This not only hides the barrier but also provides a secondary layer of protection for the wire against lawnmower blades. Over time, the grass seed will germinate right through the 1-inch hex mesh, effectively camouflaging the underground barrier.
Timing Exclusion with Your 2026 Seeding Schedule
Timing is everything when coordinating pest exclusion with lawn aeration and seeding. Turfgrass experts recommend aligning your L-footer installation with your primary seeding window to prevent soil disruption during the vulnerable germination phase. Below is a strategic timeline for homeowners managing both turf establishment and pest control.
| Season | Aeration & Seeding Action | Groundhog Exclusion Strategy | Risk Level |
|---|---|---|---|
| Early Spring (March-April) | Overseeding bare spots; light aeration. | Inspect existing L-footers for winter frost-heave damage. Repair gaps before groundhogs emerge from hibernation. | High |
| Late Summer (August) | Pre-fall core aeration prep. | Install new L-footer barriers before fall seeding begins. Soil is dry and easier to trench. | Medium |
| Early Fall (September) | Full lawn core aeration and heavy seeding. | Ensure all trenching is complete. Do not allow groundhogs access to soft, freshly aerated soil. | Critical |
| Late Fall (November) | Dormant seeding; winterizing lawn. | Clear fallen leaves from the fence line to prevent groundhogs from using debris as a ramp over the fence. | Low |
Repairing Aeration and Seeding Damage Post-Exclusion
If a groundhog has already damaged your lawn before you installed the L-footer, you must remediate the site to restore your turf. Groundhog burrows feature multiple entrances and extensive underground chambers, which can lead to severe soil subsidence and uneven lawn surfaces that disrupt mowing and water distribution.
Collapsing the Burrow System
Once the groundhog is safely excluded (ensure no animals are trapped inside by monitoring the exits for 48 hours), you must collapse the tunnels. Use a garden hose to flood the burrow entrances, which helps wash soil into the voids and accelerates natural settling. Alternatively, use a long steel soil probe or rebar to pierce the ground above the tunnel lines, breaking the roof of the burrow so the soft, aerated soil collapses inward.
Overseeding and Topdressing Mounds
Groundhogs push subsoil to the surface, creating mounds that smother existing grass and introduce weed seeds. Rake the mounds flat, dispersing the soil evenly. If the subsoil is heavy clay, mix it with the compost you used during your initial aeration topdressing. Broadcast a fast-germinating perennial ryegrass or your primary Tall Fescue blend over the disturbed areas. Keep the area consistently moist for 14 days to ensure the repair seed integrates seamlessly with the rest of your lawn.
Material Comparison and 2026 Cost Breakdown
Choosing the right fencing material is critical. While standard chicken wire is cheap, it degrades quickly in the soil and can be chewed through by determined rodents. Hardware cloth is incredibly strong but expensive and difficult to bend into an L-shape. 19-gauge galvanized hex netting offers the best balance of cost, durability, and ease of installation for 2026 landscaping projects.
| Material Type | Avg. Cost per 50ft Roll (2026) | Soil Durability | Chew Resistance | Ease of L-Bending |
|---|---|---|---|---|
| Standard Chicken Wire (20ga) | $45.00 | Poor (Rusts in 2-3 years) | Low | Very Easy |
| Galvanized Hex Netting (19ga) | $85.00 | Excellent (10+ years) | High | Easy |
| PVC-Coated Hex Netting | $110.00 | Superior (15+ years) | High | Moderate |
| Hardware Cloth (19ga) | $160.00 | Excellent | Very High | Difficult (Requires tools) |
Expert Insights and Long-Term Lawn Health
The Internet Center for Wildlife Damage Management emphasizes that physical exclusion is the only permanent, long-term solution for groundhog conflicts. Lethal methods, trapping, or chemical repellents are temporary at best and will not protect your multi-year aeration and seeding investments. Furthermore, relying on repellents near freshly seeded lawns can introduce unwanted chemicals into the soil microbiome, potentially inhibiting the mycorrhizal fungi that modern turfgrass seeds rely on for nutrient uptake.
By installing an L-footer wire fence buried barrier, you create a physical boundary that respects the local ecosystem while fiercely protecting your property. The upfront cost and labor of trenching and bending the wire are quickly offset by the elimination of annual turf repair, repeated aeration sessions, and the frustration of watching your hard work disappear into a burrow. As you plan your 2026 lawn care calendar, make groundhog exclusion a foundational step that runs parallel to your aeration and seeding efforts, ensuring your lawn remains thick, green, and undisturbed.