
How to Grow Cherry Tomatoes in Containers: Beginner Guide
Why Cherry Tomatoes Are the Perfect Beginner Crop
If you are looking to bridge the gap between your outdoor patio and your indoor kitchen, few projects are as rewarding as growing cherry tomatoes. For beginners, cherry tomatoes are the ultimate gateway crop. They are remarkably resilient, highly productive, and require significantly less space than their larger beefsteak cousins. A single healthy plant can yield hundreds of bite-sized fruits from mid-summer all the way to the first autumn frost. Whether you are tossing them into fresh summer salads, roasting them for a savory tart, or snacking on them straight off the vine, cherry tomatoes bring the garden-to-table experience right to your back door. This comprehensive guide will walk you through everything you need to know to successfully grow cherry tomatoes in containers, from selecting the right smart irrigation tools to harvesting your first crop.
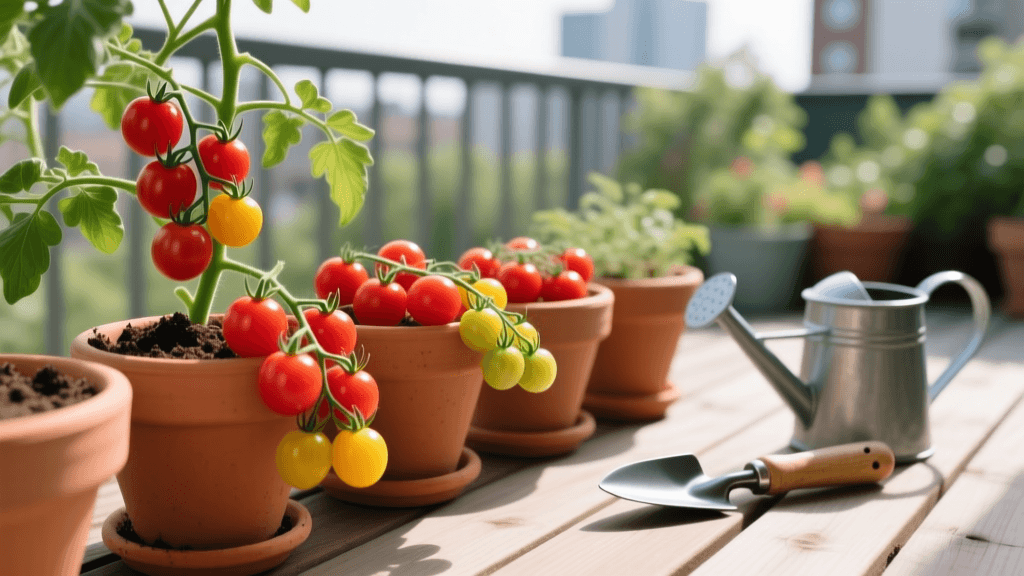
Choosing the Right Container for Your Patio
The foundation of any successful container garden is the pot itself. Tomatoes have deep, extensive root systems that require ample space to access water and nutrients. While it might be tempting to use a small decorative planter, cherry tomatoes will quickly become root-bound and stressed in anything less than a 5-gallon container.
For optimal results, we recommend using a 7-gallon to 10-gallon fabric grow bag (such as the GeoPot or Smart Pot brands, which typically cost between $10 and $20). Fabric pots offer a distinct advantage over traditional plastic or terracotta: they promote 'air pruning.' When the roots reach the edge of the fabric, they are exposed to air, which stops them from circling and encourages the growth of a dense, fibrous, and highly efficient root network. Ensure that whatever container you choose has excellent drainage. If you are using a solid plastic or resin deck box, drill at least six to eight half-inch drainage holes in the bottom to prevent waterlogging and root rot.
Top Cherry Tomato Varieties for Containers
Not all tomatoes are created equal when it comes to container gardening. Tomatoes generally fall into two categories: determinate (bush types that grow to a fixed size and fruit all at once) and indeterminate (vining types that grow continuously and require heavy staking). For beginners with limited patio space, determinate or dwarf varieties are often the easiest to manage, though compact indeterminate varieties can also thrive with proper support.
| Variety | Growth Habit | Days to Harvest | Best Feature for Beginners |
|---|---|---|---|
| Tiny Tim | Determinate (Dwarf) | 50-60 Days | Stays under 18 inches tall; no staking required. |
| Patio Princess | Determinate | 60-70 Days | Bred specifically for pots; highly disease resistant. |
| Sweet 100 | Indeterminate | 65-75 Days | Massive yields; requires a tall cage but worth the effort. |
| Tumbler | Determinate | 55-65 Days | Ideal for hanging baskets and railing planters. |
The Ultimate Container Soil Mix
Never use topsoil or garden soil from your yard in a container. It is too dense, will compact over time, and can introduce soil-borne diseases and weed seeds. Instead, you need a light, fluffy, and nutrient-rich potting mix that retains moisture while draining excess water. You can buy a premium organic potting mix like FoxFarm Ocean Forest, or you can mix your own for about $15 per batch. Here is a foolproof, beginner-friendly soil recipe:
- 1 Part High-Quality Peat Moss or Coco Coir: Provides the base structure and retains moisture. Coco coir is a more sustainable, eco-friendly alternative to peat.
- 1 Part Organic Compost: Introduces beneficial microbes and a slow release of essential macro and micronutrients.
- 1 Part Perlite or Pumice: Ensures proper aeration and drainage, preventing the soil from becoming a soggy brick.
- 1/4 Cup Granular Tomato Fertilizer: Mix in a slow-release organic fertilizer like Espoma Tomato-tone (4-7-10) directly into the soil before planting to give your roots an immediate food source.
Smart Irrigation and Watering Schedules
Container tomatoes dry out much faster than in-ground plants, especially during the peak heat of July and August. Inconsistent watering is the number one cause of tomato stress, leading to cracked skins and blossom end rot. To take the guesswork out of hydration, consider integrating a smart home watering system into your outdoor setup.
Invest in a smart hose timer, such as the Rachio Smart Hose Timer or the Orbit B-hyve (ranging from $50 to $100). By attaching a simple drip irrigation line or a soaker hose to your container, you can schedule precise watering sessions via your smartphone. Set your smart timer to water early in the morning (around 5:00 AM). This allows the water to soak deeply into the root zone before the midday sun evaporates it, and it keeps the foliage dry, which drastically reduces the risk of fungal diseases like early blight. Aim to provide about 1 to 1.5 inches of water per week, increasing to daily short bursts during extreme heatwaves.
Step-by-Step Planting and Support
When you are ready to plant your nursery-bought transplant or hardened-off seedling, follow these steps for maximum vigor:
- Fill the Pot: Fill your container with your prepared soil mix, leaving about 3 inches of space from the rim.
- Bury the Stem: Tomatoes have the unique ability to grow adventitious roots from their stems. Pinch off the bottom two sets of leaves and bury the plant deeply, covering the bare stem with soil. This creates a massive root system that will anchor the plant and absorb more nutrients.
- Install Support Early: Do not wait until the plant is large to add a cage or stake, as you risk damaging the roots later. Insert a sturdy 4-foot steel tomato cage or a heavy-duty wooden stake at the time of planting.
- Mulch the Top: Add a 1-inch layer of organic mulch, such as straw or untreated grass clippings, to the top of the soil. This locks in moisture and prevents soil-borne fungal spores from splashing onto the lower leaves during heavy rains.
Pruning and Ongoing Maintenance
For determinate (bush) varieties, pruning is generally unnecessary and can actually reduce your yield. However, if you are growing an indeterminate variety like the Sweet 100, you will need to manage 'suckers.' Suckers are the small shoots that grow in the 'V' joint between the main stem and the leaf branches. Pinch these off with your fingers when they are small to direct the plant's energy into fruit production rather than excessive foliage.
Additionally, practice proactive maintenance by removing any yellowing or spotted leaves at the base of the plant. This improves airflow and removes potential habitats for pests like aphids and spider mites. Every three weeks, supplement your soil with a liquid kelp or fish emulsion fertilizer to provide a quick boost of trace minerals during the heavy fruiting stage.
Troubleshooting Common Container Tomato Issues
Even with the best care, beginners may encounter a few common hurdles. The most notorious is Blossom End Rot, which presents as a dark, sunken, leathery black spot on the bottom of the tomato. This is not a disease, but a calcium deficiency in the developing fruit, almost always caused by uneven watering. When the soil dries out completely and is then flooded, the plant cannot transport calcium to the fruit.
According to the Cornell University College of Agriculture and Life Sciences, 'Consistent moisture is key to preventing blossom end rot in container tomatoes. Because containers have limited soil volume, they are highly susceptible to rapid drying. Mulching and utilizing drip irrigation are highly recommended to maintain uniform soil moisture levels and ensure steady calcium uptake by the roots.'
If you notice your tomatoes splitting or cracking on the vine, this is also a symptom of erratic watering—a heavy rainstorm or a sudden deep watering after a dry spell causes the inside of the fruit to expand faster than the skin can stretch. Harvest any split tomatoes immediately to prevent them from rotting or attracting pests.
Garden-to-Table: Harvesting and Enjoying Your Crop
Cherry tomatoes are ready to harvest when they have reached their full, deep color (red, orange, or yellow, depending on the variety) and give slightly to a gentle squeeze. The best time of day to harvest is in the early evening when the plant's sugar levels are at their peak. Simply snap them off at the small joint (the abscission zone) just above the fruit, or use a pair of clean pruning snips to avoid damaging the delicate vine.
To celebrate your first harvest, try this simple, no-cook garden-to-table recipe: Patio Bruschetta. Halve two cups of your freshly picked cherry tomatoes and toss them in a bowl with one tablespoon of extra virgin olive oil, one minced garlic clove, a splash of balsamic vinegar, and a handful of fresh basil leaves snipped directly from your herb garden. Let the mixture sit at room temperature for 20 minutes to allow the flavors to meld, then serve it over toasted sourdough bread rubbed with a little fresh garlic. It is the perfect, tangible reward for your beginner gardening efforts, proving that the journey from a simple patio container to your dining table is one of the most satisfying experiences in home and garden living.

