
How to Grow Patio Tomatoes in Containers: Beginner Guide
Why Choose Patio Tomatoes for Container Gardening?
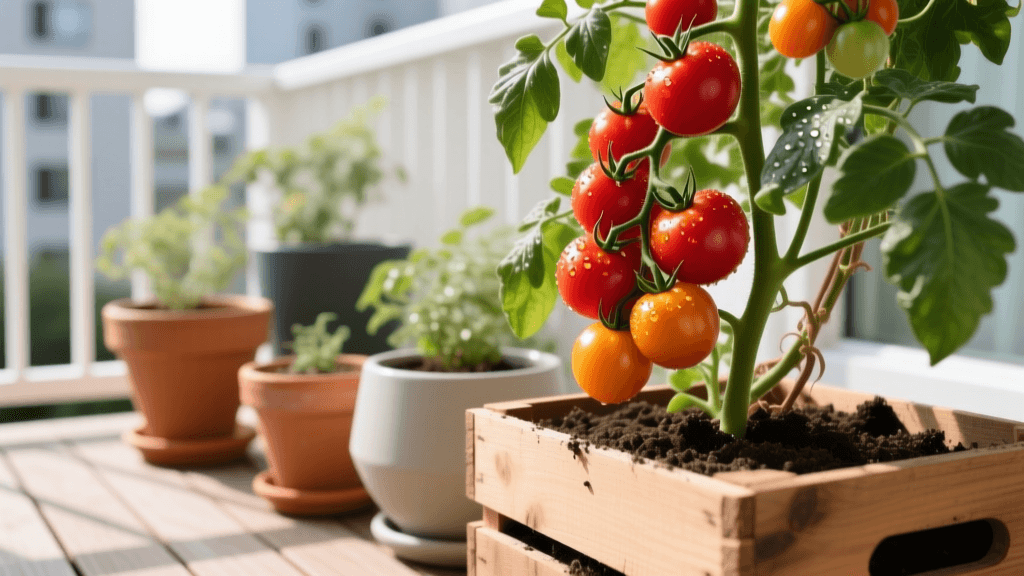
For beginners looking to bridge the gap between outdoor living and garden-to-table cooking, few crops are as rewarding as the patio tomato. Unlike their sprawling indeterminate cousins that require massive raised beds and complex trellising, patio tomatoes are typically determinate or dwarf varieties. They are genetically predisposed to grow in compact, bushy forms, making them the undisputed champions of balcony, deck, and patio gardening.
According to the University of Minnesota Extension, container gardening is one of the most effective ways for urban and suburban homeowners to grow fresh produce, provided that proper soil and watering protocols are followed. Containers offer superior drainage, allow you to control soil quality completely, and can be moved to chase the sun or shelter from harsh storms.
Essential Supplies and Estimated Costs
Before you head to the garden center, it is crucial to gather the right materials. Using the wrong soil or undersized pots is the number one reason beginners fail at container gardening. Here is your shopping list for a single patio tomato plant:
- Container (15 to 20 Gallons): While you can use plastic or terracotta, 15-gallon fabric grow bags (costing around $15 to $20) are highly recommended. They promote air-pruning of the roots, preventing the plant from becoming root-bound and improving overall drainage.
- Premium Potting Mix (1.5 to 2 Cubic Feet): Never use garden soil or topsoil in containers; it compacts and suffocates roots. Opt for a high-quality, well-draining potting mix like FoxFarm Ocean Forest or Miracle-Gro Performance Organics ($20 to $30 per bag).
- Slow-Release Fertilizer: A balanced granular fertilizer like Osmocote Tomato, Vegetable & Herb ($10) provides a steady nutrient baseline.
- Water-Soluble Fertilizer: For mid-season boosts, use a liquid fish emulsion or kelp fertilizer ($12).
- Support Structure: A sturdy 3-foot tomato cage or heavy-duty bamboo stake ($8 to $15).
Total Estimated Startup Cost: $65 to $87 per plant setup.
Step-by-Step Planting Guide
1. Timing is Everything
Tomatoes are warm-season crops that despise cold soil. Wait to plant until at least two weeks after your region's last expected spring frost date. The nighttime air temperatures should consistently stay above 50°F (10°C), and the soil temperature in your container should ideally be around 65°F to 70°F.
2. The Deep Planting Technique
Tomatoes have a unique superpower: they can grow adventitious roots along their buried stems. When transplanting your nursery seedling, pinch off the bottom two sets of leaves. Dig a hole deep enough so that only the top cluster of leaves is exposed above the soil line. This deep planting creates a massive, robust root system that will support heavy fruit production and improve drought tolerance.
3. Install Supports Immediately
Do not wait until the plant is large to install your tomato cage. Pushing a cage into the soil later will damage the delicate, expanding root network. Place the cage over the newly planted seedling and press it firmly into the potting mix.
Container Tomato Care: Watering, Feeding, and Pruning
Mastering the Watering Schedule
Containers dry out significantly faster than in-ground gardens. During the peak of summer, a mature patio tomato in a fabric grow bag may require watering once or even twice a day. The golden rule is to water deeply until moisture runs out of the bottom drainage holes, then wait until the top two inches of soil feel dry to the touch before watering again. Inconsistent watering leads to blossom end rot and fruit splitting.
Pro Tip: Apply a 2-inch layer of organic mulch, such as straw or shredded cedar bark, to the top of your container. This reduces surface evaporation by up to 30% and keeps root temperatures stable during heatwaves.
Fertilizing for Maximum Yield
Potting mixes deplete their nutrients quickly due to frequent watering. While your slow-release granular fertilizer handles the baseline, you should supplement with a liquid water-soluble fertilizer every 14 days once the first yellow flowers appear. Use a fertilizer with a higher phosphorus and potassium ratio (like a 5-10-10 NPK) to encourage fruit set rather than excessive leafy growth.
To Prune or Not to Prune?
Most true "patio" or dwarf tomato varieties are determinate, meaning they grow to a fixed genetic height, produce their fruit all at once, and stop. Do not heavily prune determinate tomatoes. Removing their leaves reduces their photosynthetic capacity and exposes the developing fruit to sunscald. Simply remove the lower leaves that touch the soil to prevent soil-borne fungal diseases from splashing up during watering.
Comparison Chart: Top Patio Tomato Varieties for Beginners
| Variety Name | Growth Habit | Days to Maturity | Fruit Size & Flavor Profile |
|---|---|---|---|
| Patio Princess | Determinate (Bush) | 60-70 Days | Medium (3-4 oz), classic sweet-acid balance |
| Tiny Tim | Dwarf | 45-55 Days | Cherry (1 inch), highly prolific, great for snacking |
| Tumbling Tom | Trailing / Cascade | 70-80 Days | Cherry (1-2 oz), perfect for hanging baskets |
| Bush Early Girl | Determinate | 55-65 Days | Large (6-8 oz), meaty, excellent for slicing |
Troubleshooting Common Beginner Problems
- Blossom End Rot: Characterized by a black, sunken leathery spot on the bottom of the fruit. This is not a disease, but a calcium deficiency usually triggered by uneven watering. Maintain a strict watering schedule and ensure your potting mix has adequate drainage.
- Aphids and Whiteflies: These sap-sucking insects love tender new growth. Treat infestations early by spraying the foliage (especially the undersides of leaves) with insecticidal soap or neem oil in the early evening to avoid harming beneficial pollinators.
- Yellowing Lower Leaves: If the bottom leaves turn yellow and drop, your plant is likely nitrogen-deficient or you are overwatering. Check the soil moisture and apply a liquid nitrogen boost if the soil is appropriately dry.
Harvesting and Garden-to-Table Enjoyment
The ultimate reward of your labor is the harvest. Pick your patio tomatoes when they are fully colored but still have a slight give when gently squeezed. For the best garden-to-table flavor, never store your homegrown tomatoes in the refrigerator. Cold temperatures break down the volatile organic compounds responsible for their complex flavor profiles. Instead, keep them on your kitchen counter at room temperature, out of direct sunlight, and consume them within a few days.
By following this beginner-friendly guide, you will transform your patio into a productive, edible landscape. Whether you are tossing tiny cherry tomatoes into a summer salad or slicing a Bush Early Girl for a classic caprese, the taste of a sun-warmed, homegrown tomato is an experience that will keep you coming back to container gardening year after year.

